

Since NFC is one of new feature on nRF52, some customers often ask how to verify NFC tag they are implementing. The purpose of this blog is to provide how to setup and how the implementation based on SDK is shown on the reader. This is somewhat simple, but it will be very clear for the customers to start from scratch.
- Environment
-. A laptop or desktop PC running Windows with some available USB ports.
-. nRF5 SDK 11.0.
-. nRF52 DK(PCA10040) 2 pcs with NFC antenna, or one nRF51 DK(reader side) and a nRF52DK(tag side) with NFC antenna
-. A micro-USB cable
-. Adafruit Tag Reader introduced in NFC examples, which will be used to read and parse the content of an NFC type 2 tag(nRF52).
-. A sample tag card(option).
I purchased the reader on internet and the sample tag card is included as below.. \o/
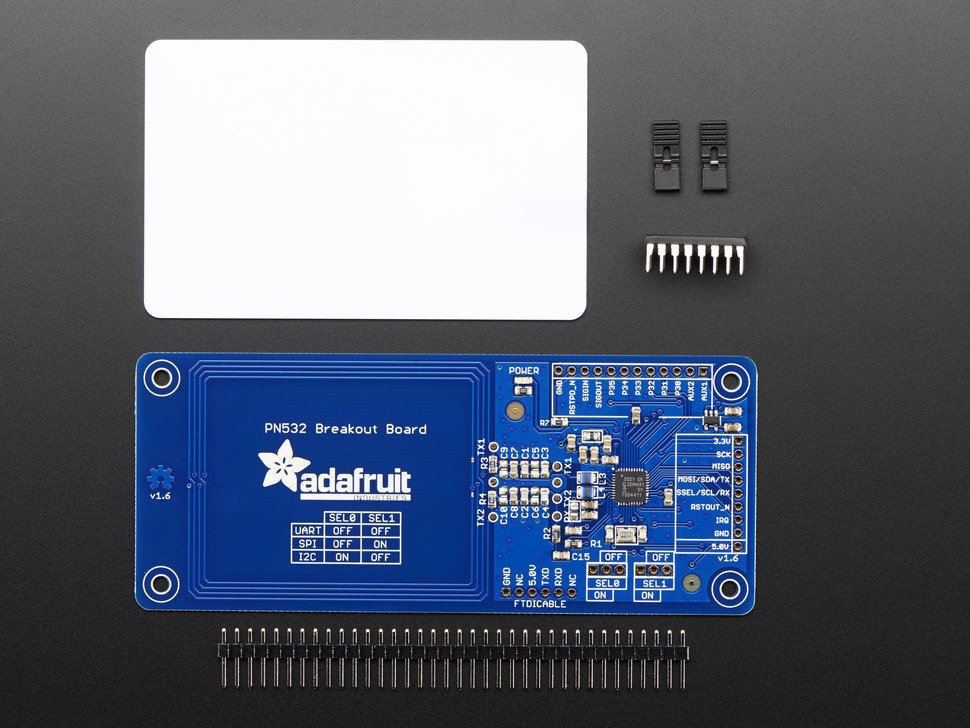
PN532 NFC/RFID CONTROLLER BREAKOUT BOARD with a tag
- Setup
-. Program the binary built with the project adafruit_tag_reader.
( nRF5_SDK_11.0.0_89a8197\examples\nfc\adafruit_tag_reader)
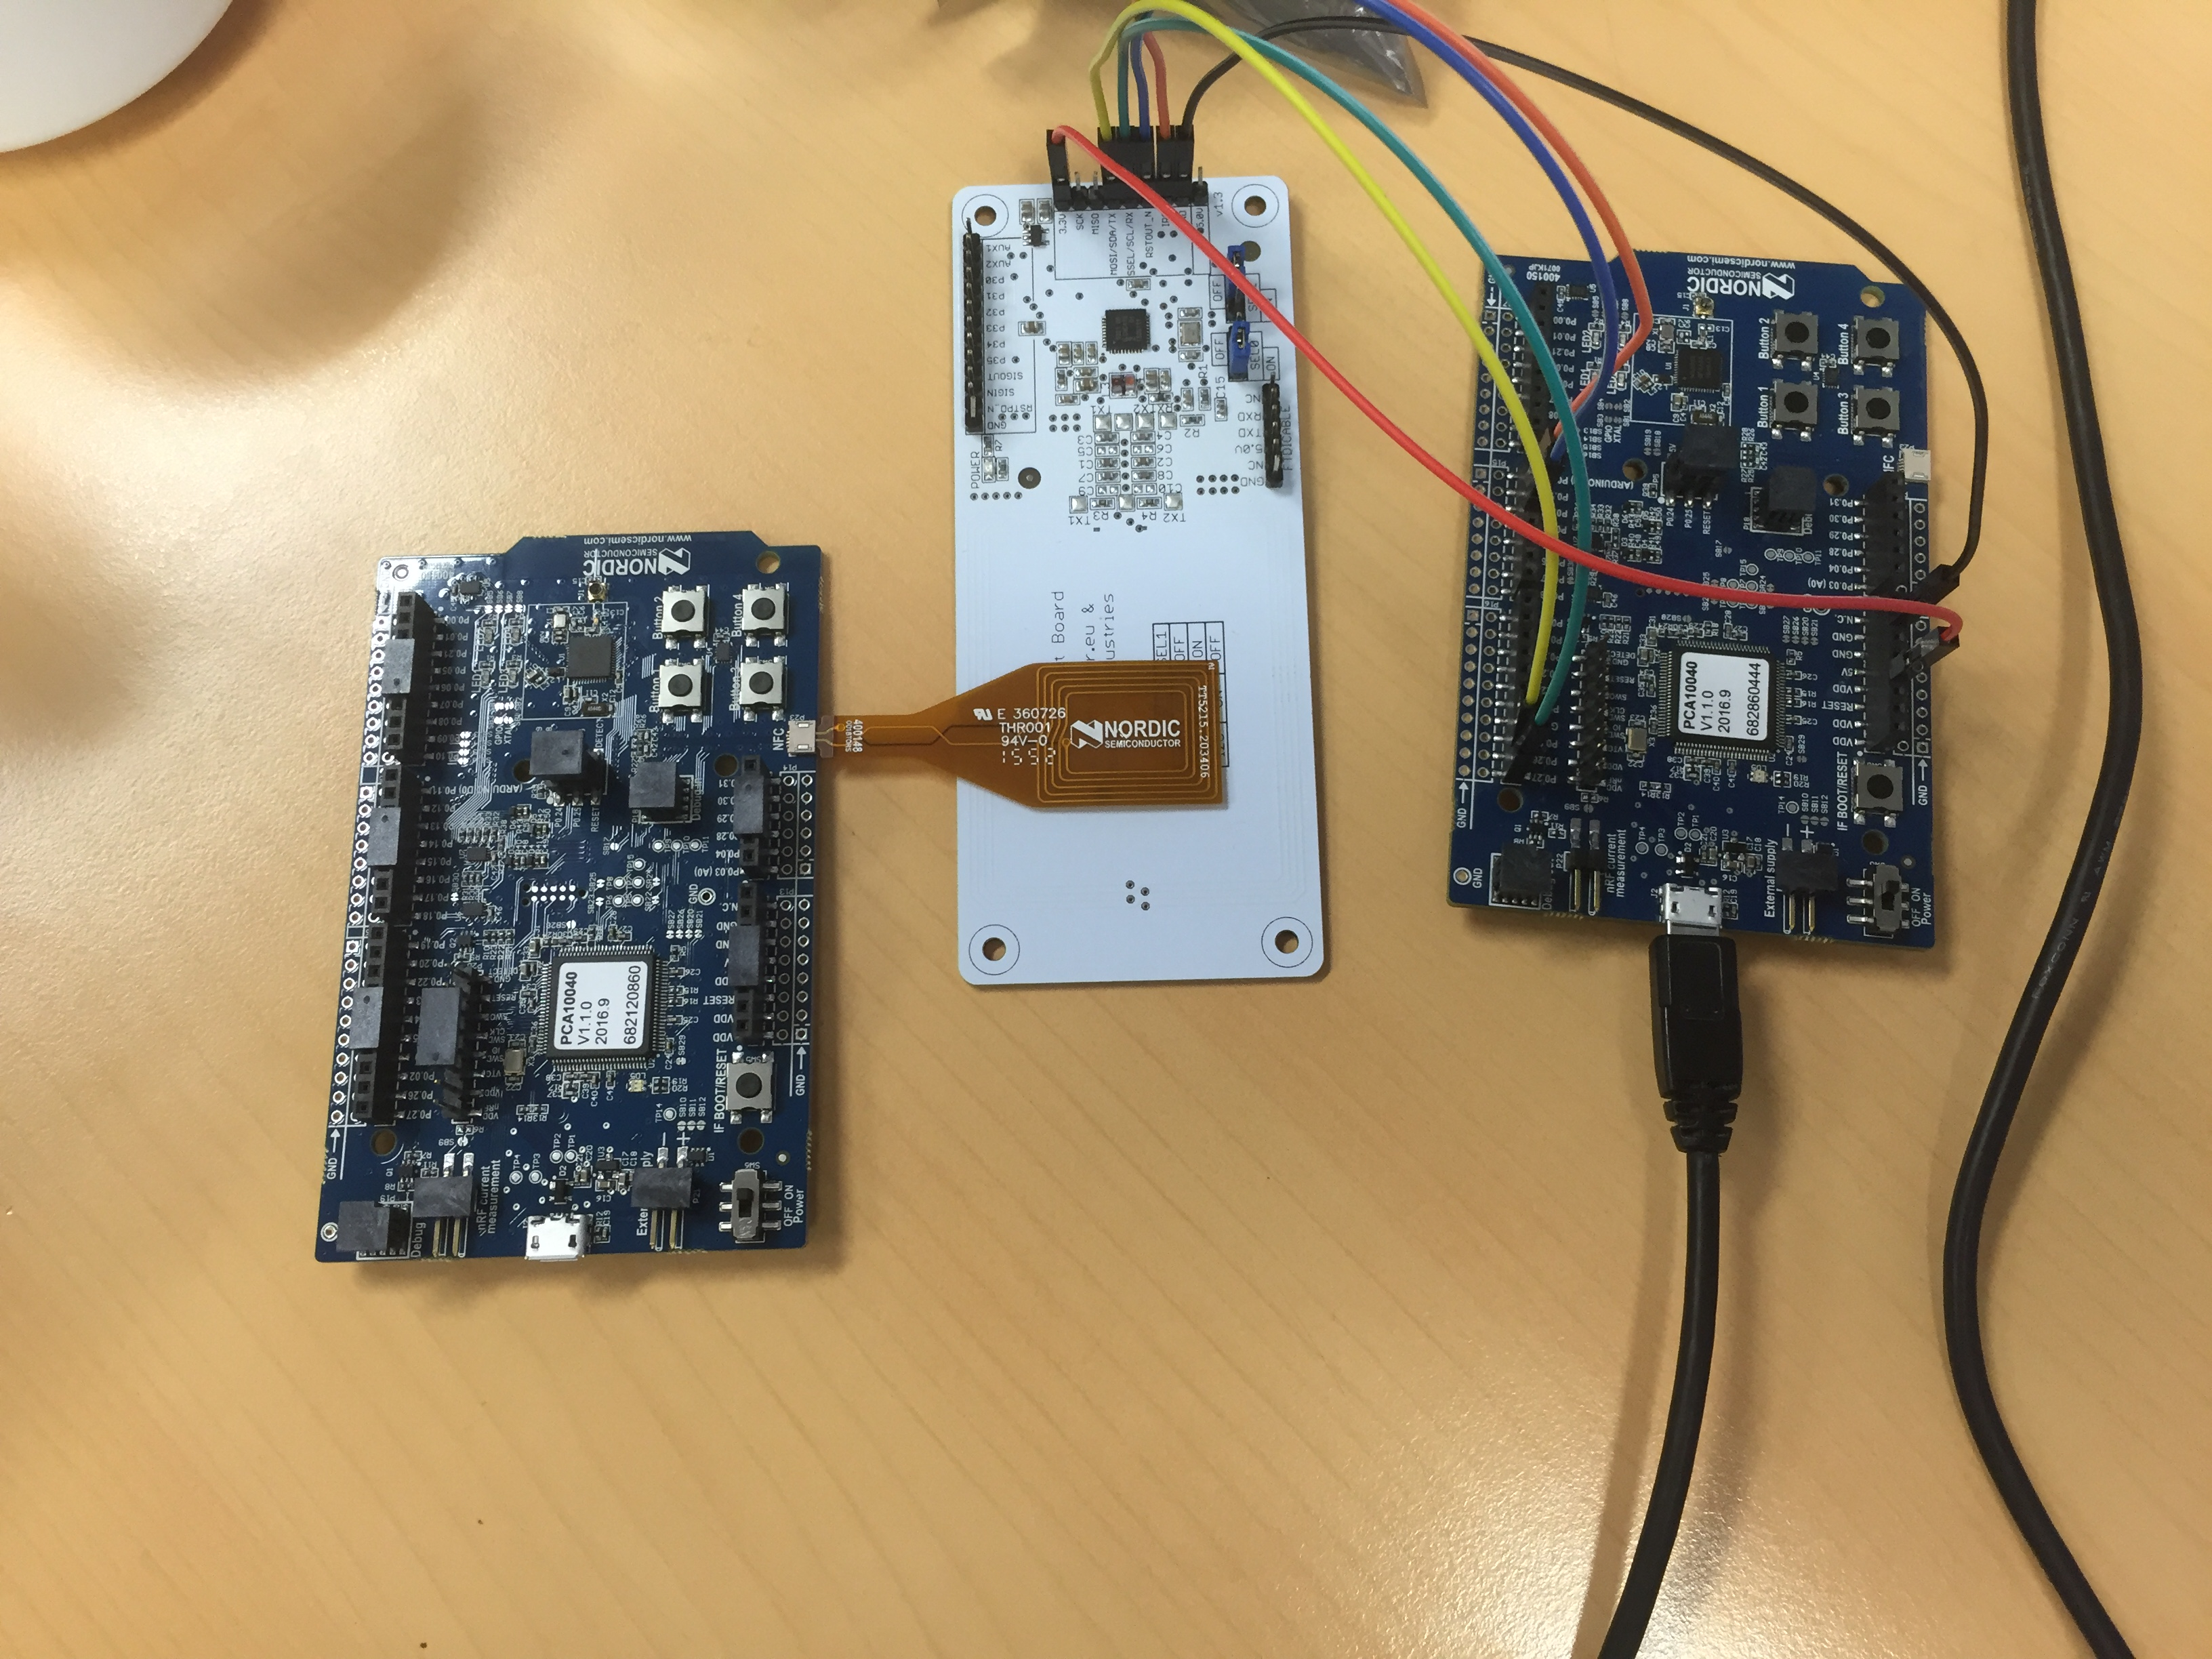
-. Connect Adafruit reader(hereafter PN532) to nRF52DK(nRF51 DK also fine).
Pin map is describes on the surface of PN532, so the connection will be like below:
[PN532] ------------------------------------ [nRF52DK]
5V	  ---------------------------------------------- x
GND ---------------------------------------------- GND
IRQ ---------------------------------------------- P0.13
RSTOUT_N -------------------------------------- P0.14
SSEL/SCL/RX ----------------------------------- P0.27
MOSI/SDA/TX----------------------------------- P0.26
MISO  ----------------------------------------------- x
SCK    ----------------------------------------------- x
3.3V   --------------------------------------------- VDD
Since the I2C will be used, the SEL 0 should be ON, SEL 1 OFF.
I made another board with Arduino shield, but just connecting with cable will be much easier.
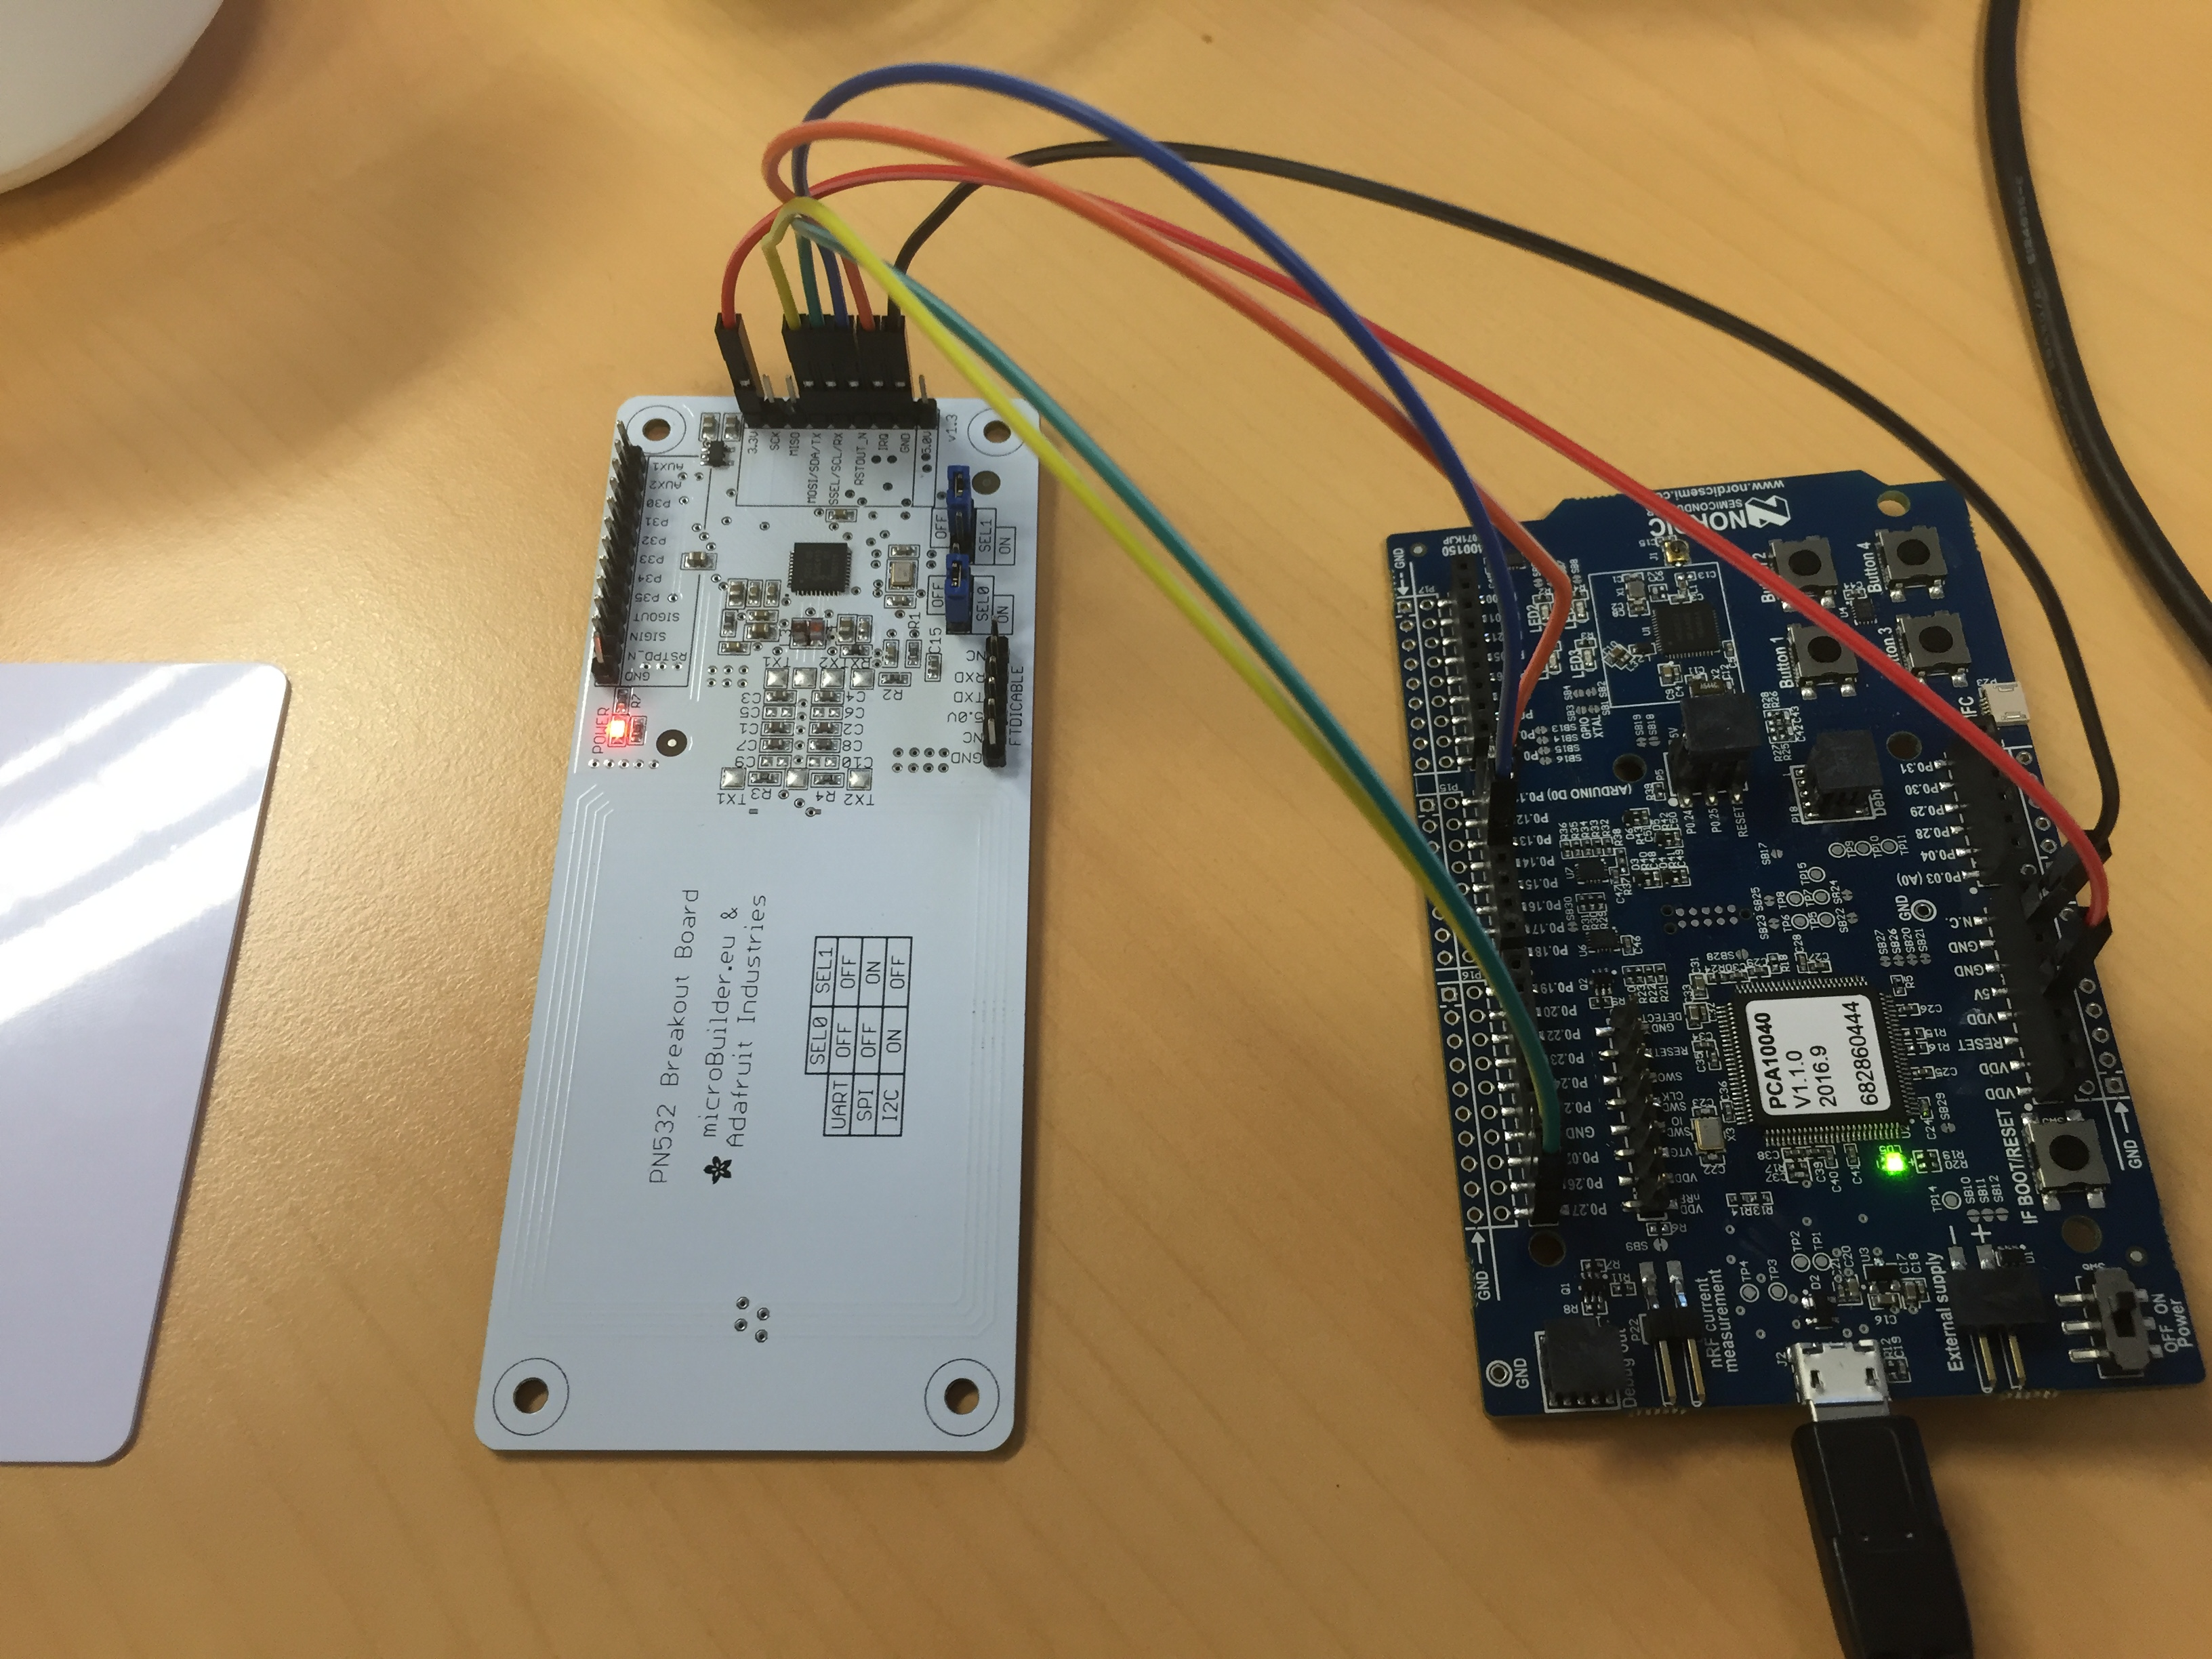
connecting PN532 to nRF52(or nRF51) DK with cable
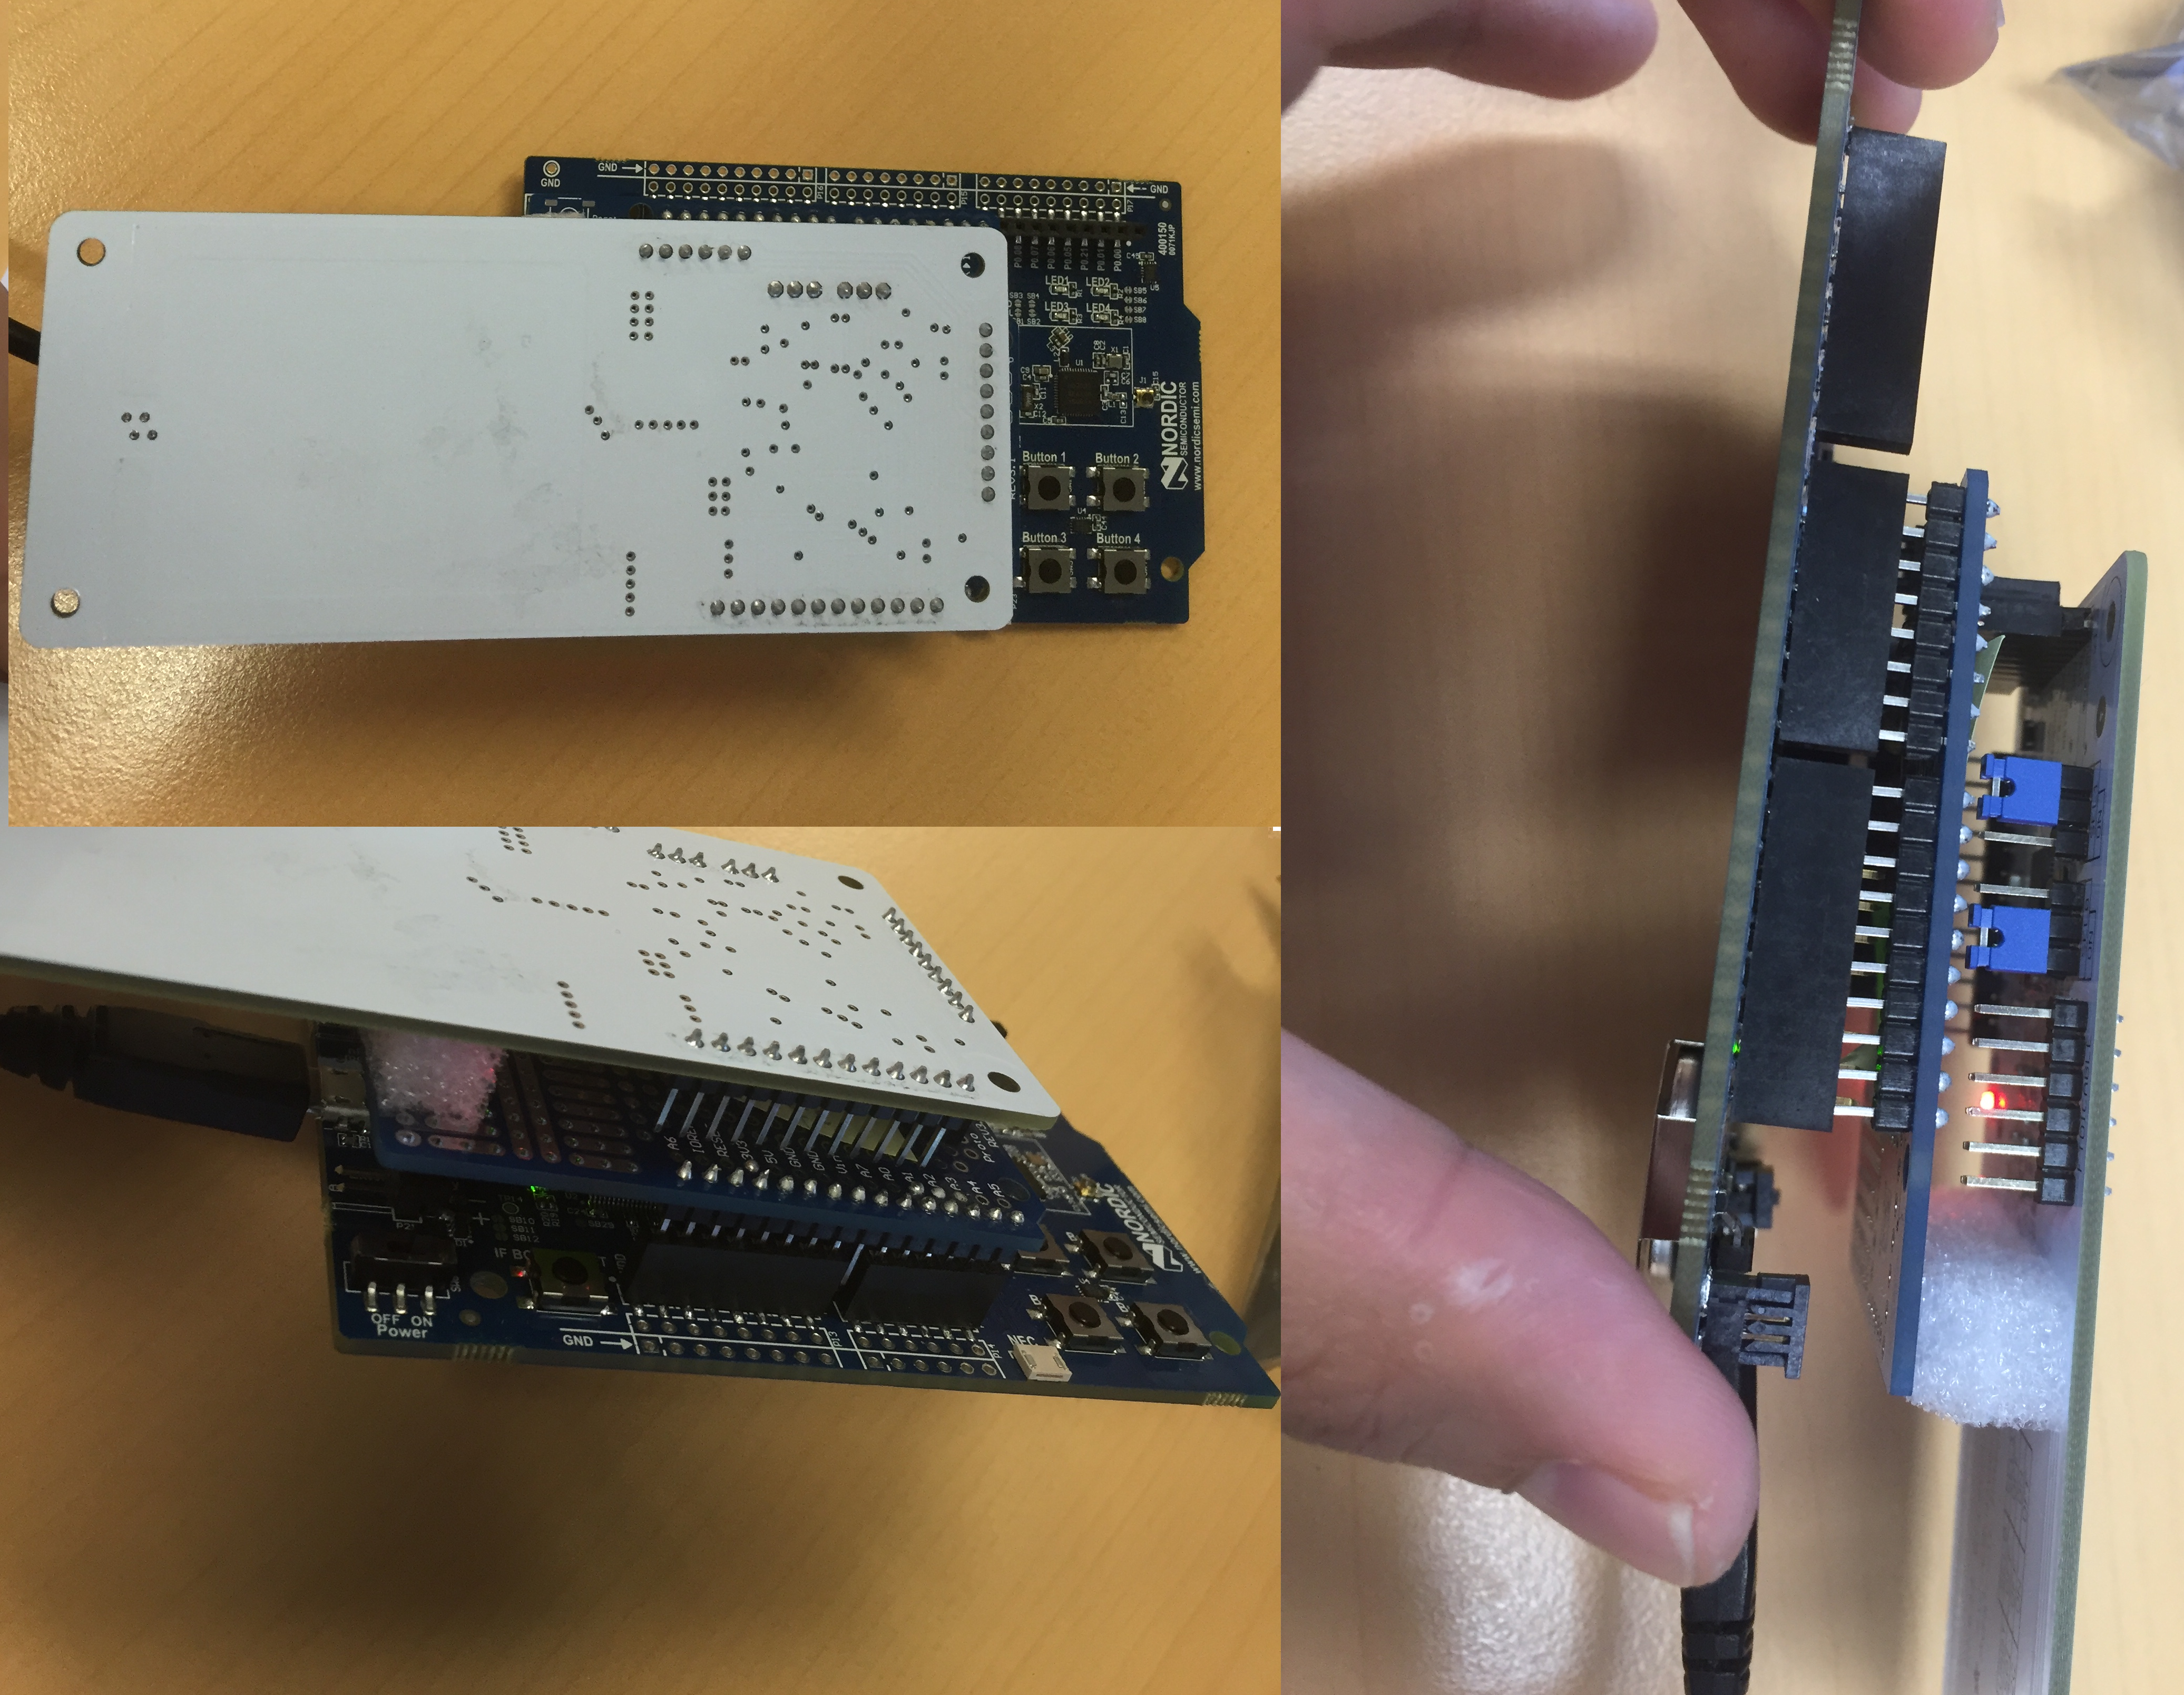
connecting PN532 to DK using Arduino shield
- How to verify basic operation between the reader and a tag
3.1. Verification between the reader and the bundle tag(white card)
Everything is ready now. Touch the white bundle card close to the reader and you will see the detail information over UART as following:
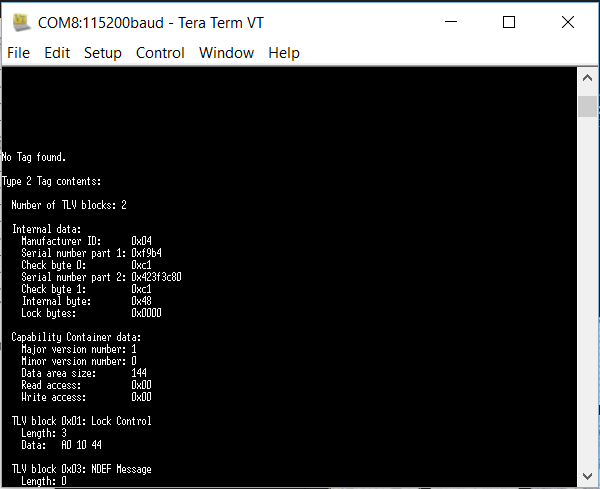
read data from white bundle tag
3.2. Verification between the reader and nRF52.
Example 1] Since we confirmed the reader works correct, let’s try to use nRF52 with text.
Please use the application placed in nRF5_SDK_11.0.0_89a8197\examples\nfc\record_text and build & program to another nRF52DK. On the final procedure, touch the tag onto the reader and you will see the three recorded text each language(English, Norwegian and Polish) as intended in the application over UART on your PC.
touching tag to the reader
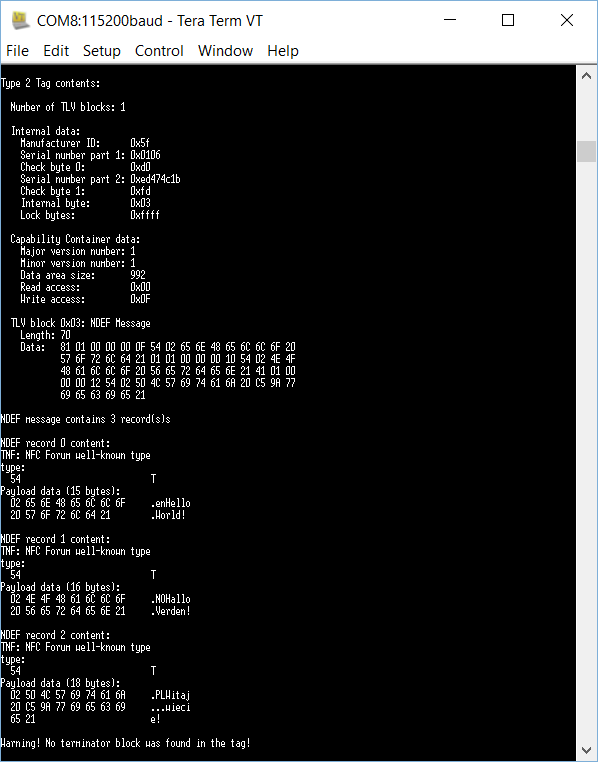
read data from nRF52 using record text example
Example 2] URL application. Same sequence with Example 1, but please use the relevant example (nRF5_SDK_11.0.0_89a8197\examples\nfc\record_url ) and the URL will be shown as below.
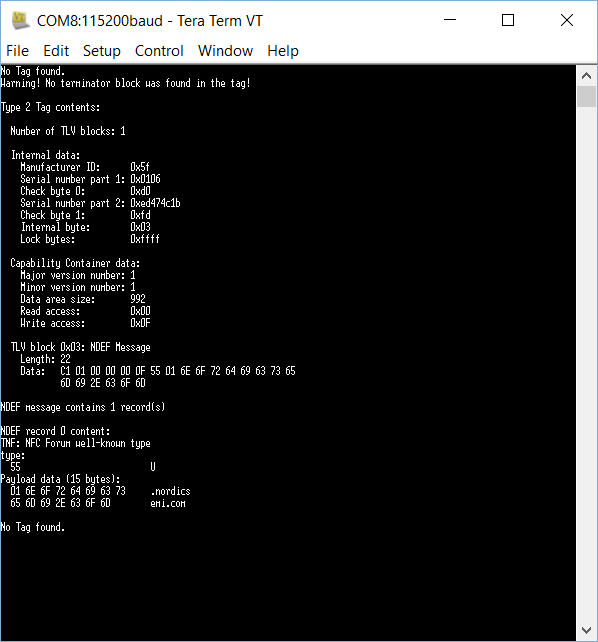 read data from nRF52 using record URL example
In summary, nothing is modified on the source code level and the only thing described is just to set up HW(PN532) and the connection. It's extremely simple, so NFC beginners can find how it works and validate if data is transmit correctly before testing with more complicated one such as mobile phone or pad, etc.


