

The first version of Nordic IoT SDK has been released over 6 months. Till now, there have been no well-known router solutions supporting Bluetooth Low Energy over IPv6. This made us the BLE application developers holding back from considering IPv6 in our solutions.
In fact, BLE 6LoWPAN router solution is not really a big deal. Nowadays, off-the-shelf routers in the market are already equipped with a powerful micro-computer system and, most importantly, Linux, which allows for customizations. Example of such solution is OpenWRT (http://openwrt.org/). The latest release, Chaos Calmer 15.05-rc1, makes use of Kernel 3.18.11, which supports Bluetooth Low Energy 6LoWPAN.
This means that, if you plugged in a Bluetooth 4.0 dongle and installed related Kernel modules, you can have BLE over IPv6.
Therefore, I looked into the table of supported hardware in the OpenWRT website (http://wiki.openwrt.org/toh/start), and found the TP-Link N750 router (i.e. WDR4300), which I can buy in the computer store downstairs at a relatively low price (HK$4xx). The processor inside is a 560 MHz Atheros AR9344. 128MB RAM inside. However, 8MHz flash only…..what a pity.
Then, I read through the OpenWRT official page on WDR4300 (http://wiki.openwrt.org/toh/tp-link/tl-wdr4300) and started my journey on customization. Since I have not noticed that the router could be bricked, and thanks to Murphy’s law, my WDR4300 really bricked…… Fortunately, there were numerous videos on Youtube demonstrating how to de-brick it. Thanks God / Buddha!!! and why haven’t I noticed them before?...
After further struggling through the instructions and blogs, I have come up with the following brief procedures which anyone can make a BLE router on WDR4300 in a morning without using COM terminals. The procedures include:
1.	Preparing the Linux system
2.	Setting up Bluetooth
3.	Network interface settings
4.	Firewall settings
Section 1 is device depenedant, whereas the other three should be generic.
[1]. Preparing the Linux System
These procedures differ from router to router, but should be more or less the same. They involve downloading the OpenWRT image, putting router in fail-safe mode, and flashing the image. In some router models, the on-board flash size is very limited (e.g. the WDR4300 has only 8MB…). In such case, you need to extend the root file system (rootfs).
1.1. Download image from OpenWRT
The images of Chaos Calmer 15.05 rc-1 is available for download at https://downloads.openwrt.org/chaos_calmer/15.05-rc1/. Since the processor on the WDR4300 is Atheros AR71xx series, I went into /ar71xx/generic folder. I found 4 files related to WDR4300.

Two of them are with name -il-, which means they are for Israel. Since I'm from Asia, I would not use them. There are two left behind: factory and sysupgrade. They differ by the FFs in configuration region. This means that by using the factory image your configurations are gone. I chose the factory one because I wanted to start everything from scratch.
1.2. Putting router in failsafe mode
The WDR4300, when in failsafe mode, configures itself with IPv4 address 192.168.0.86, and then asks for a file named wdr4300v1_tp_recovery.bin from tftp server on 192.168.0.66.
Therefore, to let it find the file on your PC, you need to:
(i) Connect your PC to the one of the LAN ports on the router.
(ii) Force your PC’s IP address to 192.168.0.66/24.
(iii) Rename the factory image to wdr4300v1_tp_recovery.bin.
(iv) Start a tftp server on your PC, with wdr4300v1_tp_recovery.bin in the root folder.
(v) Unblock incoming traffic in the firewall settings on your PC.
Then, you can put the router in failsafe mode:
(vi) Press the reset button, and power on the router. Then, the rightmost LED will turn on, like this:

When flashing is done, the 2nd LED will turn ON.

1.3. Try the first telnet.
The default router address is 192.168.1.1. You should log in and change the password.
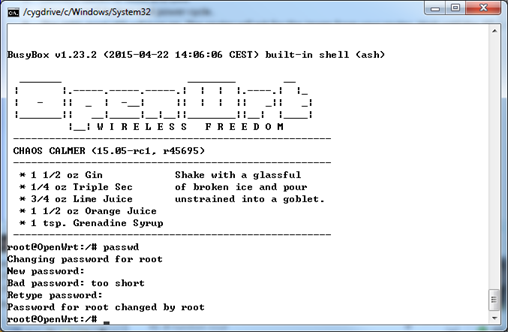
At this moment, the Linux system is up. Thereafter, you can log in using SSH.
1.4. Extend rootfs
Since the WDR4300 has only 8MB of on-board flash, and by installing packages I faced out-of-space errors, therefore I decided to extend the rootfs by mounting it on USB drive. If your device has 32MB of space or above, you can skip this.
Since packages need to be installed for mounting USB drive, internet access through the WAN is required.
(i) Connect to WAN port. The 2nd right-most LED lights up.

(ii) Install packages for mounting USB drive.
opkg update
opkg install kmod-usb-storage block-mount kmod-fs-ext4
(iii) Format a USB drive to EXT4 file system using some Linux (e.g. Ubuntu).
(iv) Plug the formatted USB drive to the router.
(v) Reboot the router.
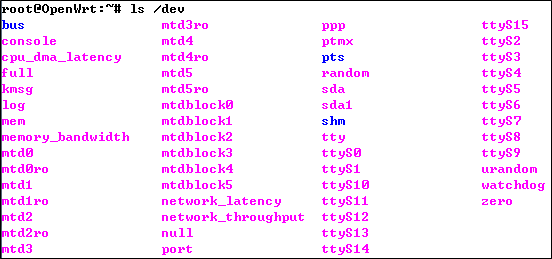
(vi) SSH to the router and then the USB drive becomes /dev/sda1.
(vii) Create a mount point for the USB drive.
mkdir -p /mnt/usb
(viii) Mount the USB drive.
mount /dev/sda1 /mnt/usb
(ix) Copy necessary files to flash to the new root partition.
mkdir -p /tmp/cproot
mount --bind / /tmp/cproot
tar -C /tmp/cproot -cvf - . | tar -C /mnt/usb -xf -
umount /tmp/cproot
(x) Update /etc/config/fstab to mount the USB device as the rootfs, and then reboot.
config mount
    option  target      /
    option  device      /dev/sda1
    option  fstype      ext4
    option  options     rw,sync
    option  enabled     1
    option  enabled_fsck    0
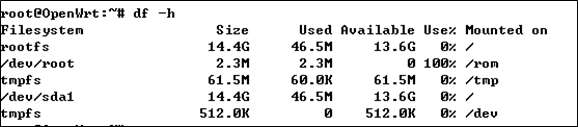
The rootfs is now several GBs in size, and the router becomes a normal Linux machine which you can install anything you want.
[2]. Setting up Bluetooth
This part is very similar to the Nordic IoT SDK document. You have to install Bluetooth packages, configure 6LoWPAN, perform BLE scan and then connect to the device.
(i) First of all, plug in Bluetooth 4.0 dongle, because the WDR4300 has no such thing. (I believe all routers nowadays have no such thing, either.).
(ii) Install essential packages.
opkg update
opkg install kmod-bluetooth kmod-bluetooth_6lowpan bluez-utils bluez-libs ip
(iii) Reboot.
(iv) After reboot, make sure that the bluetooth_6lowpan module was installed.
(v) Write 35 to PSM.
echo 35 > /sys/kernel/debug/bluetooth/6lowpan_psm
(vi) Reset HCI0.
hciconfig hci0 reset
(vii) Scan for devices.
hcitool lescan
(viii) Connect to device
echo "connect 00:11:22:33:44:55 1"> /sys/kernel/debug/bluetooth/6lowpan_control
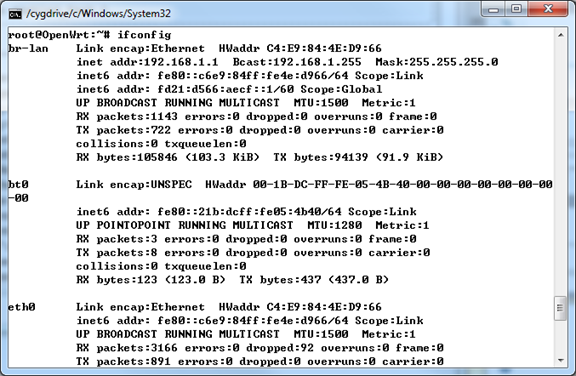
After the device is connected, the bt0 interface is then brought up:
[3]. Network interface settings
Up till now you should have a Bluetooth Low Energy device connected with bt0 interface brought up. In the IoT SDK document and also this devzone, the demos stop at pinging from the link-local interface FE80::xxxx/64, which is highly limited in real applications. I went one step further, pinging the BLE device from LAN. The following are the steps:
(i) From some web-browser (I used Chrome, and I love Chrome so much that you would never understand), log in the web site 192.168.1.1.
(ii) Open Network==>Interfaces click the “Add new interface…” button. Let’s call this virtual interface.
(iii) Simply call the new interface “6lowpan”, and cover the real interface “bt0”.
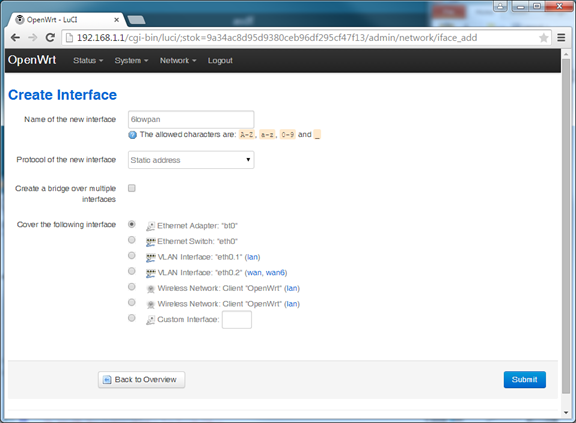
(iv) In interface overview (i.e. Network==>Interface), edit “6lowpan”.
(v) Set IPv6 assignment length to 64, and disable DHCP for this interface.
(vi) In “IPv6 Settings” tab, set “Router Advertisement-Service” to “server mode”.
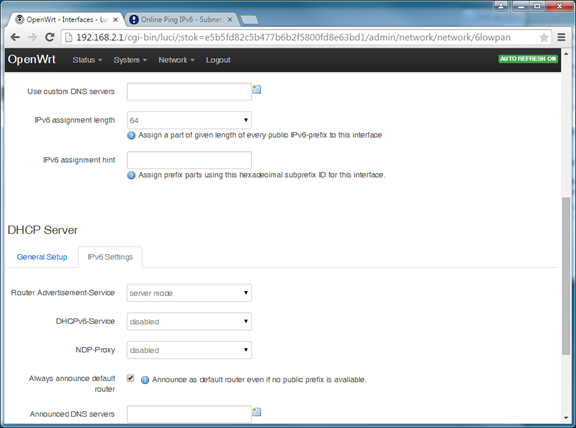
(vii) Save and apply.
(viii) Edit /etc/config/dhcp and add the following lines to ‘6lowpan’ section.
option ra_default '1'
option ra_management '1'
option ra_offlink '1'
The device should have obtained a global address. However, you can still only ping from inside the router only. This is because the firewall blocked you from sending messages to bt0 from other interfaces.
[4]. Firewall Settings
By default, all the interfaces are connected together inside OpenWRT. However, you are blocked by the firewall, therefore you cannot ping the BLE device from other interfaces. Therefore, you need to configure the firewall so that you can ping from your PC on the LAN.
(i) Open Network==>Firewall, add a new zone named “bt_ipv6”, covering virtual interface “6lowpan”.
(ii) In the general settings, set Forward to "accept".
(iii) In the inter-zone forwarding settings of “bt_ipv6”, allow forward to destination zones: LAN and WAN.
(iv) AND, allow forward from source zones: LAN. (WAN is excluded because I don’t want outsiders from accessing my intranet.)
(v) Save and apply.
The resulting zone overview is as below:
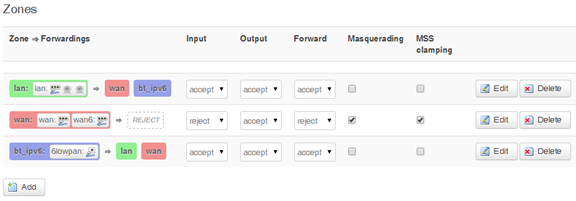
Now, LAN can send freely to WAN and bt_ipv6, and bt_ipv6 can send freely to LAN and WAN.
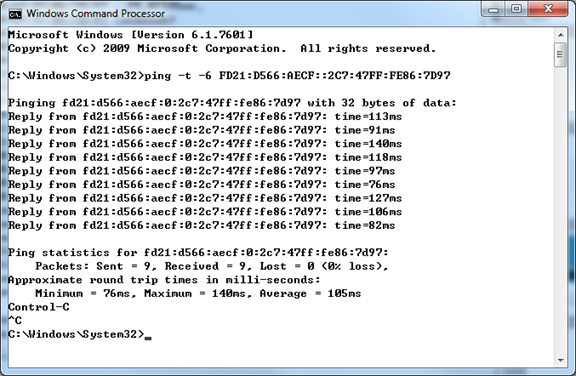
You can then ping the BLE device freely from your PC!
And the Interface Overview should look like this:
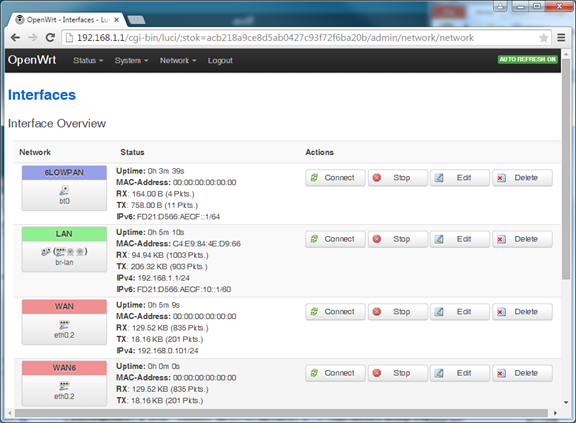
The WAN configuration should be more or less similar. Then, you can access the BLE device from the web, and you can implement any web-thing on the BLE device.
Good luck :).


