

##Measuring humidity using TWI on nrf52##
In this post I will explain how the nRF5x chip can be used to communicate with a sensor over TWI (I2C). To run this example extract the files to examples -> peripheral in the SDK for nrf52 and open the project file under pca10036 -> arm5_no_packs. It does not need a softdevice.
The sensor implemented is HTU21D, which is a humidity sensor from Measurement Specalities and the code is written for nRF52 and tested on the nRF52 development kit.
To run this example you need
-
Real time terminal (RTT) as explaplained in this tutorial
Introduction
I2C is a serial protocol for two-wire interface (TWI), designed to connect low-speed devices. One major advantage is that multiple devices can be connected on only two lines, SDA (data) and SCL (clock).
Some basic information on how twi can be implemented will be presented here. It is based on the information that can be found on the infocenter of Nordic semiconductor.
The TWI driver include a hardware access layer (HAL) and the driver layer (DRV). Detailed information can be found in the links provided, but key features which will be discussed in this post include:
- Repeated start
- No multi-master
- 7-bit addressing
- Supports clock stretching
- Blocking and non-blocking mode
###Initialization### Before the driver can be used it need to be initialized. In the example code initialization of the driver is done by the function twi_master_init:
static ret_code_t twi_master_init(void)
{
    ret_code_t ret_code;
    //Setup SDA and SCL pin, twi frequency and interrupt priority
    const nrf_drv_twi_config_t config =
    {
       .scl                = 3,
       .sda                = 4,
       .frequency          = NRF_TWI_FREQ_400K,
       .interrupt_priority = APP_IRQ_PRIORITY_HIGH
    };

    do
    {
        // Setup TWI without an event handler
        // ret_code = nrf_drv_twi_init(&m_twi_master, &config, NULL);
        // Setup TWI with an event handler
        ret_code = nrf_drv_twi_init(&m_twi_master, &config, twi_event_handler);
        if(ret_code!= NRF_SUCCESS)
        {
            break;
        }
        nrf_drv_twi_enable(&m_twi_master);
    }while(0);
    return ret_code;
}
First a TWI instance configuration struct (nrf_drv_twi_config_t) called config is set up. A pointer to this struct is passed to nrf_drv_twi_init when the twi driver is initialized. Here pin 3 (P0.03) and pin 4 (P0.04) is used for scl and sda respectively, but they can be configured to other pins. The frequency is set to be 400kbps, the different possibilities are:
NRF_TWI_FREQ_100K //100kbps
NRF_TWI_FREQ_250K //250kbps
NRF_TWI_FREQ_400K //400kpbs
Lastly the interrupt priority is set high.
To initialize the driver the function nrf_drv_twi_init is used. It takes three arguments (two optional). The first argument is a pointer to a TWI driver instance struct that need to be defined in the source code
static const nrf_drv_twi_t m_twi_master = NRF_DRV_TWI_INSTANCE(MASTER_TWI_INST);
This is mandatory and need to be defined.
The second argument is a pointer to the twi instance configuration previously defined. This is an optional argument, if a NULL argument is provided it will use the default configuration.
The last argument is an optional event handler which decide if the driver is working in blocking mode or non-blocking mode. Blocking mode:
ret_code = nrf_drv_twi_init(&m_twi_master, &config, NULL);
Since no eventhandler is provided is will run in blocking mode. The functions nrf_drv_twi_tx and nrf_drv_tvi_rx (discussed later) will return when the requested transfer is completed, or in an error was reported by the peripheral. It will halt the execution until the task is finished.
Non-blocking mode
ret_code = nrf_drv_twi_init(&m_twi_master, &config, twi_event_handler);
Here the twi event handler is provided and the twi driver run in non-blocking mode. All calls to nrf_drv_twi_tx and nrf_drv_twi_rx return with NRF_SUCCESS imidiatly after the transfer is set up or with NRF_ERROR_BUSY if the driver is busy. The event handler is called when the transfer is complete or an error occurs.
If the driver is initialized correctly the function nrf_drv_twi_enable is called to enable the driver.
###Communication### Now we get to the fun part, which is getting humidity readings from the sensor. To communicate with the sensor the two functions nrf_drv_twi_tx and nrf_drv_twi_rx are used. These functions only take the 7 bit address of the slave device, the read/write bit is appended by the functions. Use slave_address >> 1 if the address provided is 8 bit.
ret_code_t nrf_drv_twi_tx(nrf_drv_twi_t const * p_instance, uint8_t address, uint8_t const * p_data, uint8_t length, bool no_stop )
The function that transfer the data take five arguments:
-
p_instance: pointer to the twi master instance previously defined to be m_twi_master
-
address: 7 bit address of slave device (LSB)
-
p_data: Pointer to a transmit buffer. In our case the command to start humidity readings is stored in this buffer (0xF5)
-
length: Number of bytes to send (1 in our case)
-
no_stop: If set true, the stop condition is not generated on the bus after the transfer has completed (allowing for repeated start, not used here)
The values returned are
-
NRF_SUCCESS: If the procedure was successful
-
NRF_ERROR_BUSY: If the driver is not ready for a new transfer
-
NRF_ERROR_INTERNAL: If an error was detected by the hardware
ret_code_t nrf_drv_twi_rx(nrf_drv_twi_t const * p_instance, uint8_t address, uint8_t const * p_data, uint8_t length)
The rx (return function) take four arguments
-
p_instance: pointer to the twi master instance previously defined to be m_twi_master
-
address: 7 bit address of slave device (LSB)
-
p_data: Pointer to a receive buffer, where the data received is stored
-
length: Number of bytes to be received
The return values are the same as with the transmitter function.
Now it time to look into the datasheet. The sensor can work in two different modes, hold master and no hold master mode. This example use the no hold master mode, because then the microcontroller can perform other tasks when the sensor is measuring the humidity. On page 12 the no hold master communication sequence is stated

0x40 is the 7 bit I2C address of the humidity sensor and 0xF5 is the command to start humidity reading with no hold master mode. The wait statement is a delay the sensor need to complete the humidity reading and is stated at measurement time in the datasheet. In this example it is set to 50 ms (this is actually the maximum time a temperature measurement take).
In the example this sequence is divided into two functions, start_humidity_no_hold_master and fetch_humidity_no_hold_master. This could have been combined into onr function but are split up to free the cpu when the sensor is measuring and also to show how the event handler can be used.
ret_code_t start_humidity_no_hold_master() {
    ret_code_t ret_code;
    uint8_t command_address = HUMIDITY_NO_HOLD_MASTER_ADDRESS; //Address to humidity reading with no hold of twi lines
    ret_code = nrf_drv_twi_tx(&m_twi_master, HTU21D_ADDRESS, &command_address, 1, false);
    return ret_code;
}
To initialize a humidity reading the command 0xF5 need to be sent to the slave. This is done with the function nrf_drv_twi_tx. The 7 bit address of the slave device is defined as HTU21D_ADDRESS (0x40) at the top of the example. The command_address (0xF5) hold the register address that need to be sent to start the measurement. The number of bytes to send is 1 and the no_stop bool is set to false. This will terminate the twi transfer when the command is sent to the slave device. Note that there is no need to add a write bit when using nrf_drv_twi_tx, the function do this automatically. After this command the sensor need time to perform the measurement before the humidity can be read.
The humidity is retrieved by the following function.
ret_code_t fetch_humidity_no_hold_master(int *humidity){
    ret_code_t ret_code;
    uint8_t returned_over_I2C[3]; //Array to hold returned data
    ret_code = nrf_drv_twi_rx(&m_twi_master, HTU21D_ADDRESS, returned_over_I2C, 3, false); //Get raw humidity data
    nrf_delay_ms(1);

        //Calculate humidity: from page 15 in datasheet
        uint16_t rawHumidity = ((unsigned int) returned_over_I2C[0] << 8) | (unsigned int) returned_over_I2C[1];
        float tempRH = rawHumidity / (float)65536; //2^16 = 65536
        float rh = -6 + (125 * tempRH); //From page 14 in datasheet
        *humidity = (int)(rh*10); // this could be change to (int)(rh*10), then one decimal of the humidity data will be kept ( 34.5  = 345 )
        return ret_code;
}
Here nrf_drv_twi_tx start a read condition from the slave. This is done by writing the slave address HTU21D_ADDRESS on the SDA line. If the sensor is ready it will return three bytes, the first two hold information on which humidity is measured, the third is a CRC checksum which can be used as error detection in the transfer. This is not implemented in this example. After the humidity information is received the true humidity is calculated according to the formula on page 15 in the datasheet. The humidity is stored in the location provided by the pointer humidity.
###TWI event handler ### The twi driver can function in blocking mode or non-blocking mode depending on if it is provided an event handler. An example of how an event handler can be used is provided in the example. If this is to be used it need to be passed into the initialization function in twi_master_init as previously discussed. This event handler is simple but it shows how it can be implemented
void twi_event_handler(nrf_drv_twi_evt_t * p_event)
{
    switch (p_event->type)
    {
        case NRF_DRV_TWI_TX_DONE:
            twi_flag = HTU21D_MEASUREMENT_SENT;
            break;
        case NRF_DRV_TWI_RX_DONE:
            twi_flag = HTU21D_MEASUREMENT_RECEIVED;
            break;
        case NRF_DRV_TWI_ERROR:
            twi_flag = TWI_ERROR;
            break;
        default:
            twi_flag = TWI_ERROR;
            break;
    }
}
There are three different event types that can occur; NRF_DRV_TWI_TX_DONE, NRF_DRV_TWI_RX_DONE and NRF_DRV_TWI_ERROR. Based on the type of error the event handler set the twi_flag which are checked in the main function. When nrf_drv_twi_tx is successful the event type is NRF_DRV_TWI_TX_DONE. We then know that the sensor is starting humidity readings so the flag is set to HTU21D_MEASUREMENT_SENT. When nrf_drv_twi_rx is done the event type is NRF_DRV_TWI_RX_DONE and the flag is set to HTU21D_MEASUREMENT_RECEIVED. If an error occur the flag is set to TWI_ERROR.
###Catching the event flag###
twi_flag_temp = twi_flag; //Use a temporary flag. Then the flag cannot be changed during a cycle in main.
switch (twi_flag_temp)
{
    case HTU21D_START_MEASUREMENT: //When
        nrf_gpio_pin_toggle(LED_1); //Toggle one led to indicate a new measurement is starting
        err_code =  start_humidity_no_hold_master(); //Start humidity reading
        APP_ERROR_CHECK(err_code);
        break;
    case HTU21D_MEASUREMENT_SENT:
        nrf_delay_ms(50); //Delay so the humidity readings can be done
        err_code = fetch_humidity_no_hold_master(&humidity);
        APP_ERROR_CHECK(err_code);
        break;
    case HTU21D_MEASUREMENT_RECEIVED:
        SEGGER_RTT_printf(0, "Humidity: ");
        print_as_float(humidity,1);
        break;
    default:
        break;
}
The event flag is cached in the main function. This example use a timer to generate an event once every two seconds. Whenever there is an interrupt it check the twi flag and act according to it. The flow chart below describe how this is done.

###Twi without event handler### Twi can also be implemented without an event handler. This is done by providing NULL instead of an eventhandler when initializing the twi driver. In the example this can be used by uncommenting the initialization in twi_master_init (remember to comment out the initialization with event handler). Also uncomment the main loop. It should not look like this
while (true)
{
        start_humidity_no_hold_master(); //Start humidity reading
        nrf_delay_ms(50);
        fetch_humidity_no_hold_master(&humidity);
        SEGGER_RTT_printf(0, "Humidity: ");
        print_as_float(humidity,1);
power_manage();
}
Now the cpu will wake up once every two seconds (due to the timer), start a humidity reading, delay 50ms, read and print the humidity before it goes to sleep.
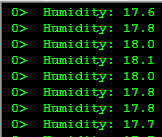
That is is. If you compile and upload the code to the development kit, hook up the humidity sensor to the SDA and SCL lines and open an Real time terminal you have a humidity sensor that prints the humidity every two seconds!
On a last note: I also included functions to read the temperature from the sensor just in case anyone is interested.

