This discussion has been locked.
You can no longer post new replies to this discussion. If you have a question you can start a new discussion

How to write the bootloader back to nRF52840 Dongle ?

hi,

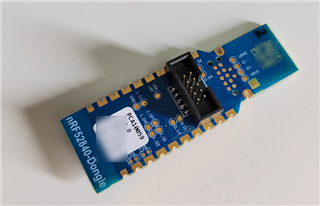
I have accidentally selected "Erase All" under the Segger Embedded Studio, now my nRF52840 Dongle unable to show its USB port under Windows 10 Device Manager anymore.

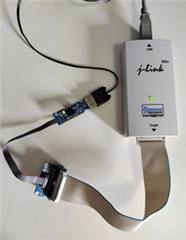
How to resolve this issues and where to get the right bootloader image for nRF52840, as the nRF52840 Dongle unable to report its serial port, Segger J-Link was unable to connect.

Please advise.

  • Hi Ricky

    Is any further follow up necessary on this case? If so, please provide some details as to how you connect the J-Link to your Dongle, have you added a 10-pin header to the P1 on the back of the Dongle? The J-Link EDU should be able to interface with devices operating all the way down to 1.2V, but it does use a 20-pin JTAG target interface, so it depends on how you have made that communicate with the nRF52840 Dongle.

    Also have you checked out the Dongle Programming tutorial available here

    Best regards,

    Simon

  • hi Simon,

    I did not use J-Link EDU after I successfully written the bootloader using J-Link clone. Much time had spent to get into the success stage, I did not border to know further.

    Honestly, I damaged the P1 during improper soldering, I don't have free time to test further although I have few nRF52840 dongles to play with, but at least I know this dongle has few ways to connect to J-Link.

    I will test again using 10-pin connection to P1 1.27mm header via J-Link EDU when there is free time.

    I do hope that Nordic has tutorial videos on using the dongle in Arduino framework, PlatformIO, and how to configure I2C for nRF52840 dongle because it is easier for high level software programmer to learn.

    Please advise.

  • Hi

    Okay, then it sounds like the damaged P1 might be the root cause of your programming issues with the Dongle. Glad you got it working one way or the other though! I'm afraid we don't have specific videos on using the Dongle in Arduino or PlatformIO, but this might exist out there from other sources. I assume you mean how to configure I2C in software, right? This is similar to how it's done for any of the DKs as well. Check out our TWI sensor example project for instance, which demonstrates how to use the I2C interface. by communicating with a thermometer.

    Best regards,

    Simon

  • Dear friends,

    This time, I soldered a 1.27mm IDC Male Socket to the back of nRF52840 Dongle very carefully, I wish it has a rectangle box marked on that area to position the SWD interface while soldering :o)


    I am using Segger J-LINK EDU to burn bootloader to this dongle, you have to connect the USB power supply as well otherwise you will be seeing error messages below:

    ERROR: Low voltage detected at the target. Please make sure the device is
    ERROR: properly supplied.
    Error while burning bootloader.

    This time the J-LINK clone won't work on such configuration, and it caused DLL error under Arduino IDE 1.8.16 as shown below:

    Error while burning bootloader.
    ERROR: JLinkARM DLL reported an error. Try again. If error condition
    ERROR: persists, run the same command again with argument --log, contact Nordic
    ERROR: Semiconductor and provide the generated log.log file to them.

    Well, I won't bother that much to investigate further, just use the genuine Segger J-LINK EDU for my works to be safe.

    You have to be careful in using clone J-LINK because its VTref or pin 1 of the JTAG interface is 3.3V OUTPUT.

    The VTref of Segger J-LINK EDU is INPUT VOLTAGE reference based on the datasheet.

    After the bootloader is written, you may disconnect the J-LINK device, connect the dongle with USB, now the new bootloader will establish a serial COM port under Windows, use that serial port to upload sketch easily under Arduino IDE or PlatformIO IDE.

    The successfully sketch uploaded messages are like below:

    Sketch uses 40004 bytes (4%) of program storage space. Maximum is 815104 bytes.
    Global variables use 6876 bytes (2%) of dynamic memory, leaving 230692 bytes for local variables. Maximum is 237568 bytes.
    Upgrading target on COM16 with DFU package C:\Users\RICKYG~1\AppData\Local\Temp\arduino_build_772033\test.ino.zip. Flow control is disabled, Single bank, Touch disabled
    ########################################
    #######################################
    Activating new firmware
    Device programmed.

    Depends on which nRF52840 .HEX bootloader file you use, I am using feather_nrf52840_express_bootloader-0.6.2_s140_6.1.1.hex on Nordic nRF52840 Dongle just to test it under Arduino platform.


    Hopes, this help.


Related