
Using the nRF Connect SDK / West to Program the Radio_Test example into the nRF5340 DK
Background:
There is a need to be able to put a Nordic Semiconductors System-on-Chip / transceiver into modes where the physical layer and RF characteristics may be ascertained. The radio test example is used to put the nRF5340 into various modes in order to exercise the device for FCC, ETSI, and other regulatory agencies. This may also be utilized to bring up prototypes to ensure they are operational. The purpose of this document is to show how this valuable utility maybe built and programmed into the nRF5340 DK (development kit). An example of how one can observe the utility operation is also provided. The procedures shown in this short document are also applicable to any of the other nRF52 Series devices that are supported in the application.
Hardware used:
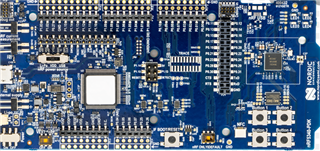
nRF5340 DK
USB to micro USB cable
Windows PC
Optional: nRF52 DK or nRF52840 Dongle.
Software / Utilities:
nRF Connect for Desktop
https://www.nordicsemi.com/Software-and-tools/Development-Tools/nRF-Connect-for-desktop
Most current nRF Connect SDK revision installed by the Toolchain Manager. Note that if a different version is used then work must be done in the subsequent subdirectories.
nRF Command Line tools:
https://www.nordicsemi.com/Software-and-tools/Development-Tools/nRF-Command-Line-Tools
Segger Embedded Studio – Free Nordic Edition -for nRF Cnnect SDK:
https://developer.nordicsemi.com/nRF_Connect_SDK/doc/latest/nrf/gs_installing.html#install-the-ses-nordic-edition.
Preparation procedure:
Using the USB to micro USB cable, connect nRF5340 DK to an available USB port on the PC.
Download and install the nRF Connect for Desktop utility program from the Nordic semiconductor website.
Start nRF Connect for Desktop
Check for any and all updates. Install as needed
Start nRF Connect for Desktop and move to Toolchain Manager
Open Toolchain Manager

Find v1.6.1 and click on install the IDE in the directory of your choice. It is suggested that it be installed into an nRF Connect SDK subdirectory off the root directory.
For this procedure it is assumed that the Drive is C: and the directory is nsc.. ( c:\nsc\ )
Programming the development board:
Use the nRF Connect for Desktop to move to a “sand box” first. This is where you will be for the recovery and the programming of the two CPU cores.
(Note that running just a command prompt from the start menu will not work)
Click on open in the Toolchain manager

Click on the down arrow to the right of Open IDE and then Open Command prompt.

Programming the application processor with the empty application:
This is needed in order to access the GPIOs and other items the application processor controls and the Radio_Test firmware needs.
Navigate to the c:\ncs\v1.6.1\nrf\samples\nrf5340\empty_app_core subdirectory
Type “west build -b nrf5340dk_nrf5340_cpuapp -p”
Takes a minute or so to compile
Type “west flash”
If you have more then one board running it will give you a list of Segger serial numbers. They are located on the large square white label on the Dev Kit. Chose the one you wish to program.
Programming the Radio_Test example into the network core:
Go to \nrf\samples\peripheral\radio_test
Type “west build -b nrf5340dk_nrf5340_cpunet -p”
Type “west flash”
The application and network processors are now programmed.
*Note to reprogram or program additional boards the only action needed is to go to the proper subdirectory for the Application or Network processor and then type “west flash”.
Recovery option:
If for some reason, there is any difficulty with programming. The device can be “recovered”
Navigate to the \nrf\samples\nrf5340\empty_app_core subdirectory
Type “west flash –recover”
Go back to the earlier steps and re-flash the application core and network core as described above.
The instructions for running the Radio_Test example may be found here:
You may also find information on this in the readme.rst file in the radio_test Subdirectory.
\nrf\samples\peripheral\radio_test.
A terminal emulation program like Terra Term, Putty, Real Term, etc. is needed to run the Radio_Test.
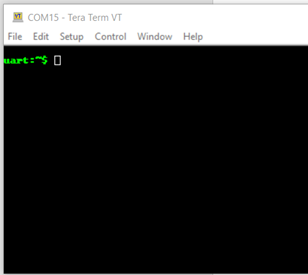
Configure the Com port. There will be three com ports listed. Pick the bottom (highest numbered. Note that your com port may be different then shown.
The serial speed for this project is 115200

Once the terminal program is configured and the Enter key is pushed this should be seen:
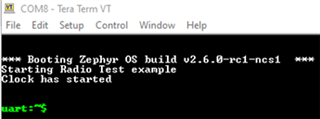
Pushing the reset button gives this screen:
If at any time help is required, a help menu is available.
Type help as shown below. For more information please see the radio_test documentation:
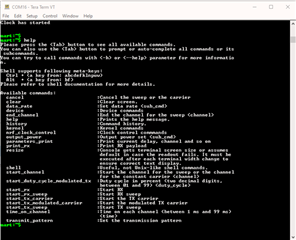
Typing just the command without an argument will show the options for that command. For example:
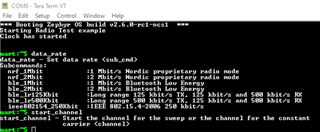
These commands and arguments are case sensitive!
For more info on the command and argument lists visit this link:
https://developer.nordicsemi.com/nRF_Connect_SDK/doc/1.6.1/nrf/samples/peripheral/radio_test/README.html.
Running a quick test of the system:
At the command prompt type in the following. Reminder that these commands and arguments are case sensitive.
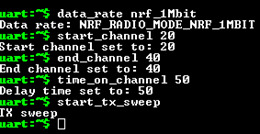
This will start the radio at the standard 1Mbit per second on air data rate, with a dwell time of 50ms, transmitting from 2420Mhz to 2440Mhz.
If a signal analyzer is not available, then a nRF52 based development kit or a nRF52840 based development dongle can be used along with the RSSI utility found in the nRF Connect for Desktop. This will show the activity of the RF signals being run on the DUT. This will also show other Bluetooth LE devices nearby. As far as real agency testing is concerned, a real signal analyzer will be needed.
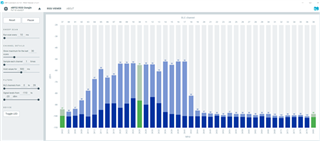
Figure showing the radio configured to sweep between 2420MHz and 2440MHz.
Note that the device is configured to transmit a modulated carrier that is “like” a Bluetooth LE packet but is not sending out an advertising packet so in this case a central cannot connect to this device.
Conclusion:
The author hopes that this brief paper can help the Engineers move smoothly thru the Test and evaluation process of the Nordic Semiconductor's suite of ultra Low power SoC offerings.