
Requirements
This document uses:
- Segger Embedded Studio (SES)
- nRF5 SDK v17.1.0
- an nRF52 DK to emulate the nRF52810
- a BLE-enabled mobile device
You may want to review the blog here for a more comprehensive overview of the DFU process. Performing a DFU on the nRF52805, nRF52810 or nRF52811 is somewhat simpler as it is only possible to DFU the application, due to the limited flash memory.
Setup
- Download and install nRF Connect for Desktop to your PC. Open the tool and install the Programmer application.
- Download and install nRF Connect for Mobile to your mobile device.
- Download and install nRF Toolbox on your mobile device. nRF Toolbox is a collection of mobile applications. Source code can be found on GitHub.
- Install nrfutil. The nRF Util application is a Python package and command-line utility that supports Device Firmware Update (DFU) and cryptographic functionality.
- Install micro-ecc. Micro-ecc is a small ECDH and ECDSA security implementation for 32-bit microcontrollers. Step 1 on the linked page says to install 4.9-2015-q3-update of the GCC compiler toolchain for ARM. You should instead install the 9-2020-q2-update. Step 5 is redundant.
- Connect the nRF52 DK to your PC’s USB port with a data capable micro-USB cable. Make sure to use the micro-USB port nearest the power switch. Move the DK’s power switch to the ON position. If the LED nearest to the white decal blinks continuously, the USB data lines are not connected. Try another cable or USB port.
Generate the Keys
- Create a folder called keys on your PC and open a command window in that folder. Referencing these steps, run the commands below to generate your private and public keys. It is crucial to protect your private key to keep your design secure. Nordic has no “back door” to retrieve your keys or break the security if you lose them.
nrfutil keys generate priv.pem
nrfutil keys display --key sk --format hex priv.pem
nrfutil keys display --key pk --format hex priv.pem
nrfutil keys display --key pk --format code priv.pem
nrfutil keys display --key pk --format code priv.pem --out_file dfu_public_key.c
- Do a DIR to verify that new c and priv.pem files have been created
Bootloader
- Browse to:
…\nRF5_SDK_17.1.0_ddde560\examples\dfu\secure_bootloader\pca10040e_s112_ble\ses
and double-click on the Segger Embedded Studio (SES) project there to open it. - In the Project Items pane on the left, right-click on dfu_public_key.c and remove it from the project.
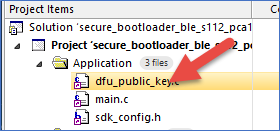
- Right-click on the Application folder in the Project Items pane and select Add Existing File..
-
Browse to the keys folder from step 1, select the dfu_public_key.c file and click Open. On the SES menu bar click Build → Build and Run and close SES when the process completes.
LEDs 1 and 2 on the DK will light. Use nRF Connect on your mobile device to see the DK is advertising as DfuTarg.
Application
- Browse to:
…\nRF5_SDK_17.1.0_ddde560\examples\ble_peripheral\ble_app_beacon\pca10040e\s112\ses
and double-click on the SES project there to open it.
On the SES menu bar click Build → Build Solution and close SES when the process completes. - Browse to:
…\nRF5_SDK_17.1.0_ddde560\examples\ble_peripheral\ble_app_beacon\pca10040e\s112\ses\Output\Release\Exe
Copy ble_app_beacon_pca10040e_s112.hex, Create a folder called C:NordicWork on your PC and paste the hex file there. Rename that file to APP.hex for simplicity.
Creating a DFU Zip Package
- Copy the pem file your keys folder into C:\NordicWork.
- Run the following in a command window in your C:\NordicWork folder to create a DFU package using your private key. Explanations of the parameters can be found on the InfoCenter The FWID can be found in the release notes for the SoftDevice being used.
nrfutil pkg generate --hw-version 52 --sd-req 0x0103 --application-version 0xff --application APP.hex --key-file priv.pem APP.zip - Do a DIR *.zip to confirm that a new zip has been created. Copy this file to your mobile device. This is the file that you would distribute for performing a DFU in the field.
Performing the DFU
- Open nRF Toolbox on your mobile device and tap the DFU Perform the additional installation if required

- Tap the Start button (if present) and then tap the Select button for the zip file to DFU
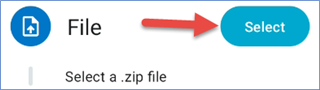
- Browse to the folder where you copied the zip file. Tap APP.zip to select it. Then tap Done at the bottom.

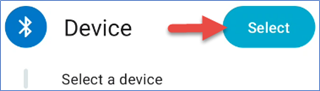
- Tap the Select button for the Device to use. Tap the Grant permission button if needed.
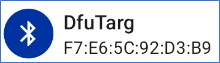
- Find DfuTarg in the scanner window and tap it
- Tap the Start button and watch the status and progress
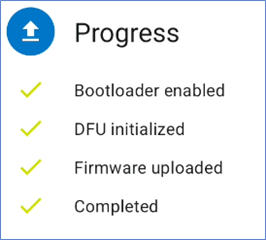
The progress screen will appear. When the DFU is complete, DfuTarg will disconnect, the nRF52 will reboot and the beacon application will run.
Note that LED1 on the DK is blinking, indicating that advertising is occurring (if the LED stops blinking, press the reset button to reset the timeout).
Use nRF Connect on your mobile device to scan and find the beacon advertising.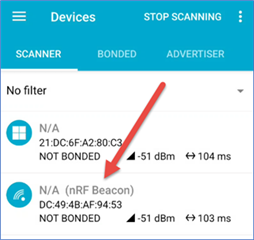
-
$core_v2_ui.GetResizedImageHtml($comment.User.AvatarUrl, 44, 44, "%{border='0px', alt=$comment.User.DisplayName, ResizeMethod='ZoomAndCrop'}")
$core_v2_ui.UserPresence($comment.User.Id)
$comment.User.DisplayName
-
Cancel
-
Vote Up
$currentVotes.ToString("+0;-0;0")
Vote Down
-
$core_v2_ui.Like($comment.CommentId, $comment.CommentContentTypeId, "%{ Format = $likeFormat, IncludeTip = 'true' }")
-
More
-
Cancel
Children