Depreceted
see new blog post for new version of embedded studio here:
https://devzone.nordicsemi.com/blogs/1032/segger-embedded-studio-a-cross-platform-ide-w-no-c/
#Introduction This post is an introductory tutorial to SEGGER Embedded Studio. If you haven't already please skim through this post https://devzone.nordicsemi.com/blogs/825/segger-embedded-studio-cross-platform-ide-w-no-cod/ but don't follow along with it. This is the new and improved tutorial using the nRF device pack and assumes no prior knowledge on Embedded Studio.
After following this tutorial you will be able to build, debug and run a BLE project on nRF5x devices! You will also be able to load a softdevice (and any other file of your choice, i.e. a bootloader) to your board upon loading your application.
#Edit - New Release! We just released V2.16 of Embedded Studio, which includes some improvements based on your / blog readers' feedback:
- Target -> Erase All enabled
- Properties -> Debugger -> J-Link Options -> Erase All added to erase the chip prior to download
- Properties -> Debugger -> Debugger Options -> Start From Entry Point Symbol added to disable setting the PC after reset
- Fixed project property dialog forgetting previously modified properties on cancel.
- Imported projects from uvproj(x) files now use the TargetName.
- Fixed reading of XML files with a UTF-8 byte order mark.
#Required Software To follow along with this post download and install each of the following:
- Nordic SDK (zip version): http://developer.nordicsemi.com/nRF5_SDK/nRF5_SDK_v11.x.x/ Note: I strongly recommend following this tutorial with a completely unmodified version of the SDK!
- Most recent SEGGER J-Link software pack: https://www.segger.com/jlink-software.html
- Most recent version of SES: https://www.segger.com/ses-download.html
- nRF SEGGER Embedded Studio Device Pack: nRF.emPackage. (This file should just be saved for now. We will install it in Embedded Studio in the "Setting up Embedded Studio" section of this tutorial).
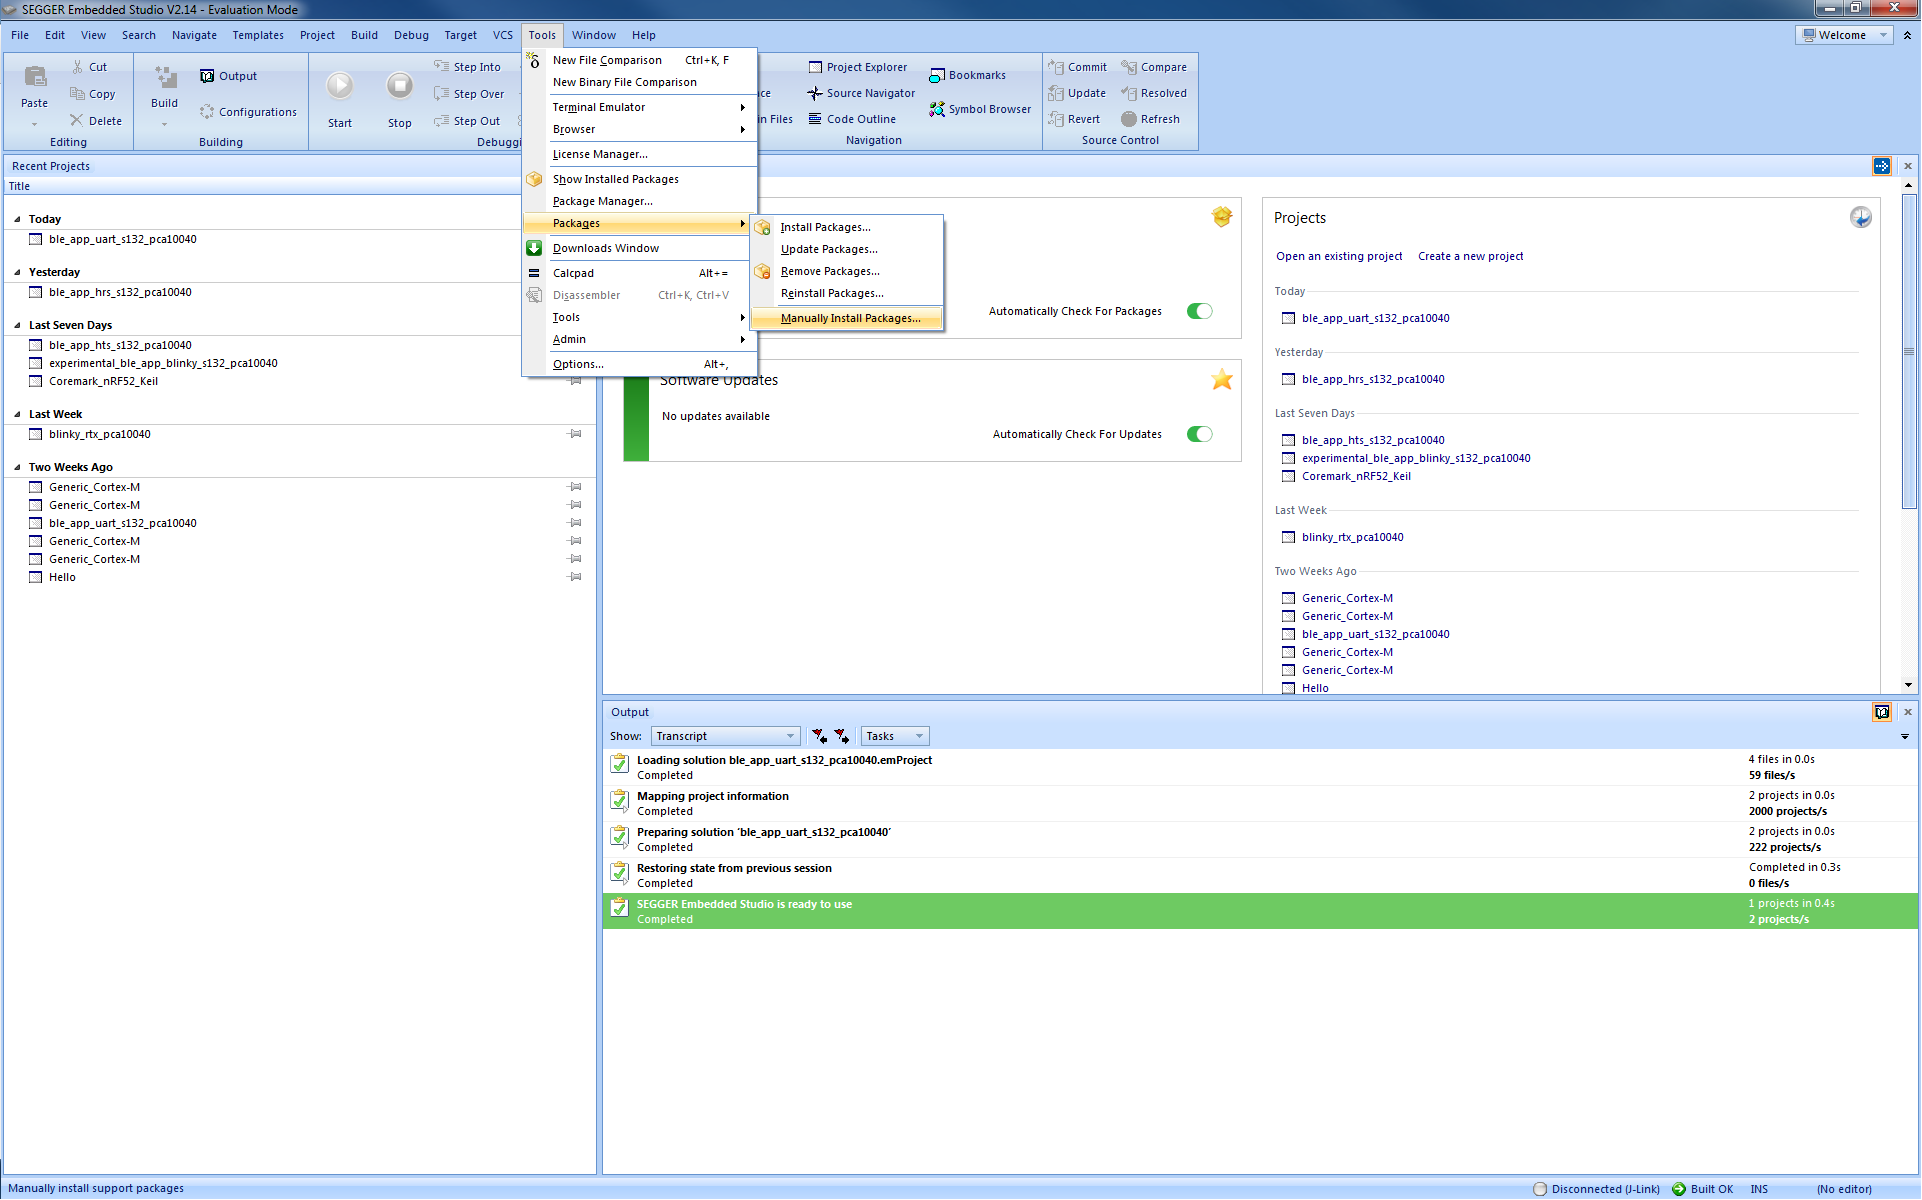
#Setting up Embedded Studio Open SEGGER Embedded Studio V2.14. If this is the first time you will see the Dashboard Welcome Screen. If you've already been using Embedded Studio make sure you close all open solutions. The first thing we need to do is install the CMSIS and nRF Device packages. Go to "Tools -> Packages -> Manually Install Packages" and select nRF.emPackage.
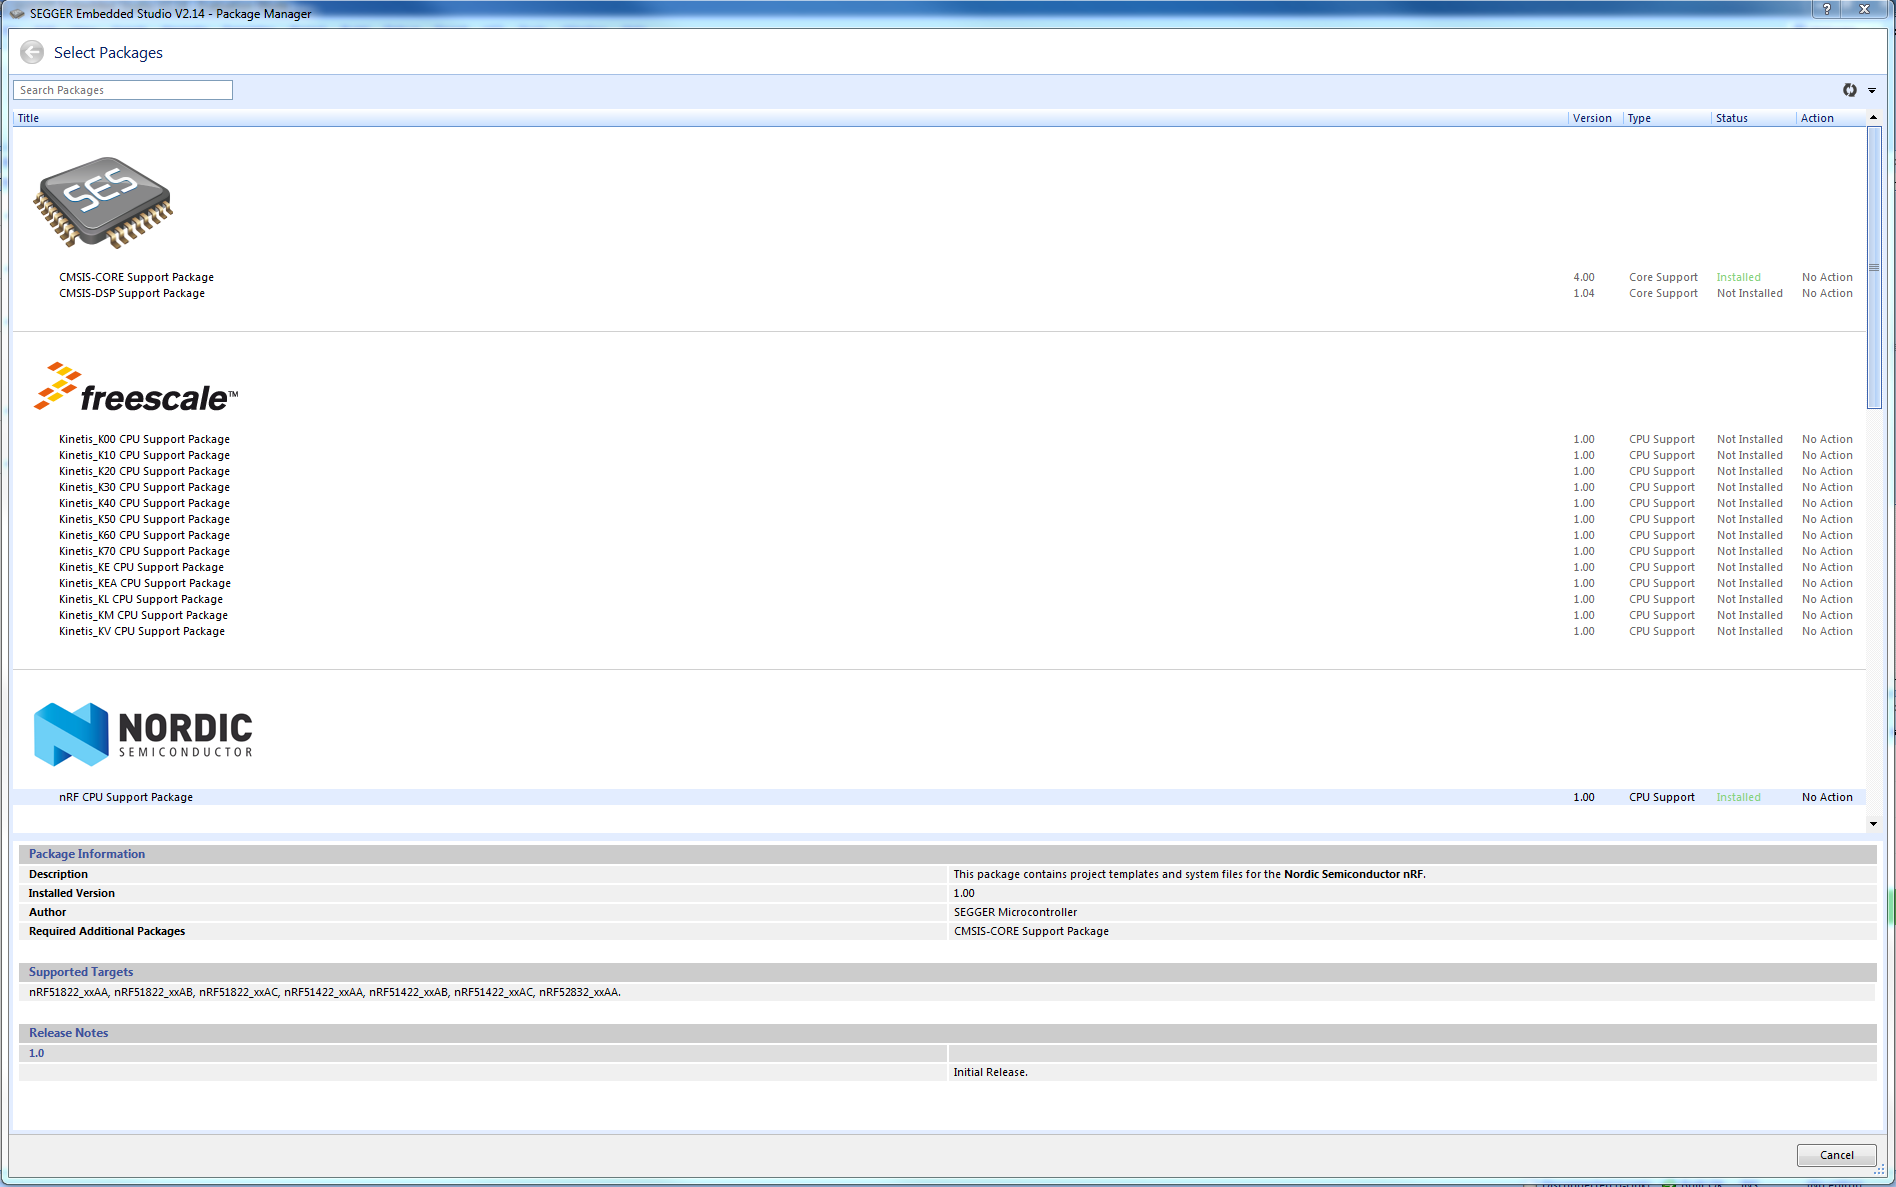
Now in "Tools -> Package Manager..." update the packages by clicking the "Refresh package list" button in the upper right hand corner. Select the "CMSIS-Core Support Package" by clicking it and then click "next" (right lower corner) and follow the instructions to download and install this package. Now make sure the CMSIS-Core Support Package and the Nordic Semiconductor nRF CPU Support Package are both installed.
#Importing a Keil uVision Project
Embedded Studio allows you to import Keil and IAR projects. In this tutorial we will import the ble_app_hrs_s132_pca10040 example (if you are using an nRF51 Series device or the nRF52 Preview DK import the corresponding uVision project file and follow along - minor differences will be highlighted along the way). This feature makes Embedded Studio plug & play with our SDK. Go to "File -> Open IAR EWARM / Keil MDK Project" and select
'\nRF5_SDK_...\examples\ble_peripheral\ble_app_hrs\pca10040\s132\arm5_no_packs
ble_app_hrs_s132_pca10040.uvprojx.' Make sure you select nRF_EXE as the template for this project.
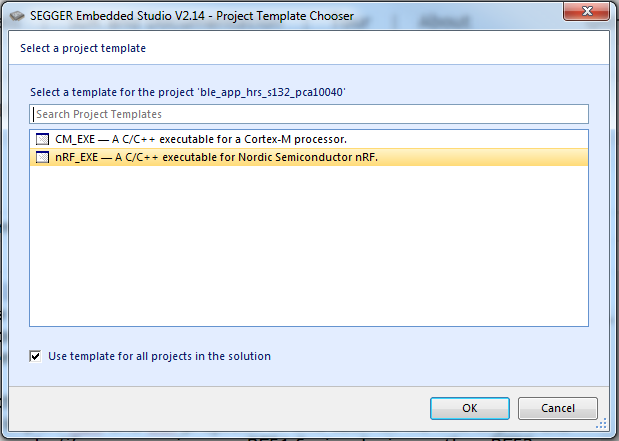
Our project will get its structure from the Keil uVision project we imported. All the source files, preprocessor definitions, user include directories and many project settings will be carried over from Keil. The nRF_EXE template (from our nRF device package) configures the rest of our project settings (memory map, flash section placement, etc...) and adds the system/startup files to our project.
#Adjustments At this point we are almost done! But we need to make some minor adjustments to compile our project.
- In the "Project Explorer" notice that two Projects have been imported. This is because in Keil, Nordic SDK examples that use the SoftDevice include a dummy project specifically for flashing the SoftDevice directly from Keil. Since we can automatically flash the SoftDevice with our application in Embedded Studio we can delete this project. Remove the project 'flash_s130_nrf51_2.0.0-7.alpha_softdevice' or similar from Embedded Studio so you are left with only the real project. WARNING: it looks like Embedded Studio imports this dummy SoftDevice flash project as the default project. After importing a project from Keil it is likely this is the active (bolded) project.
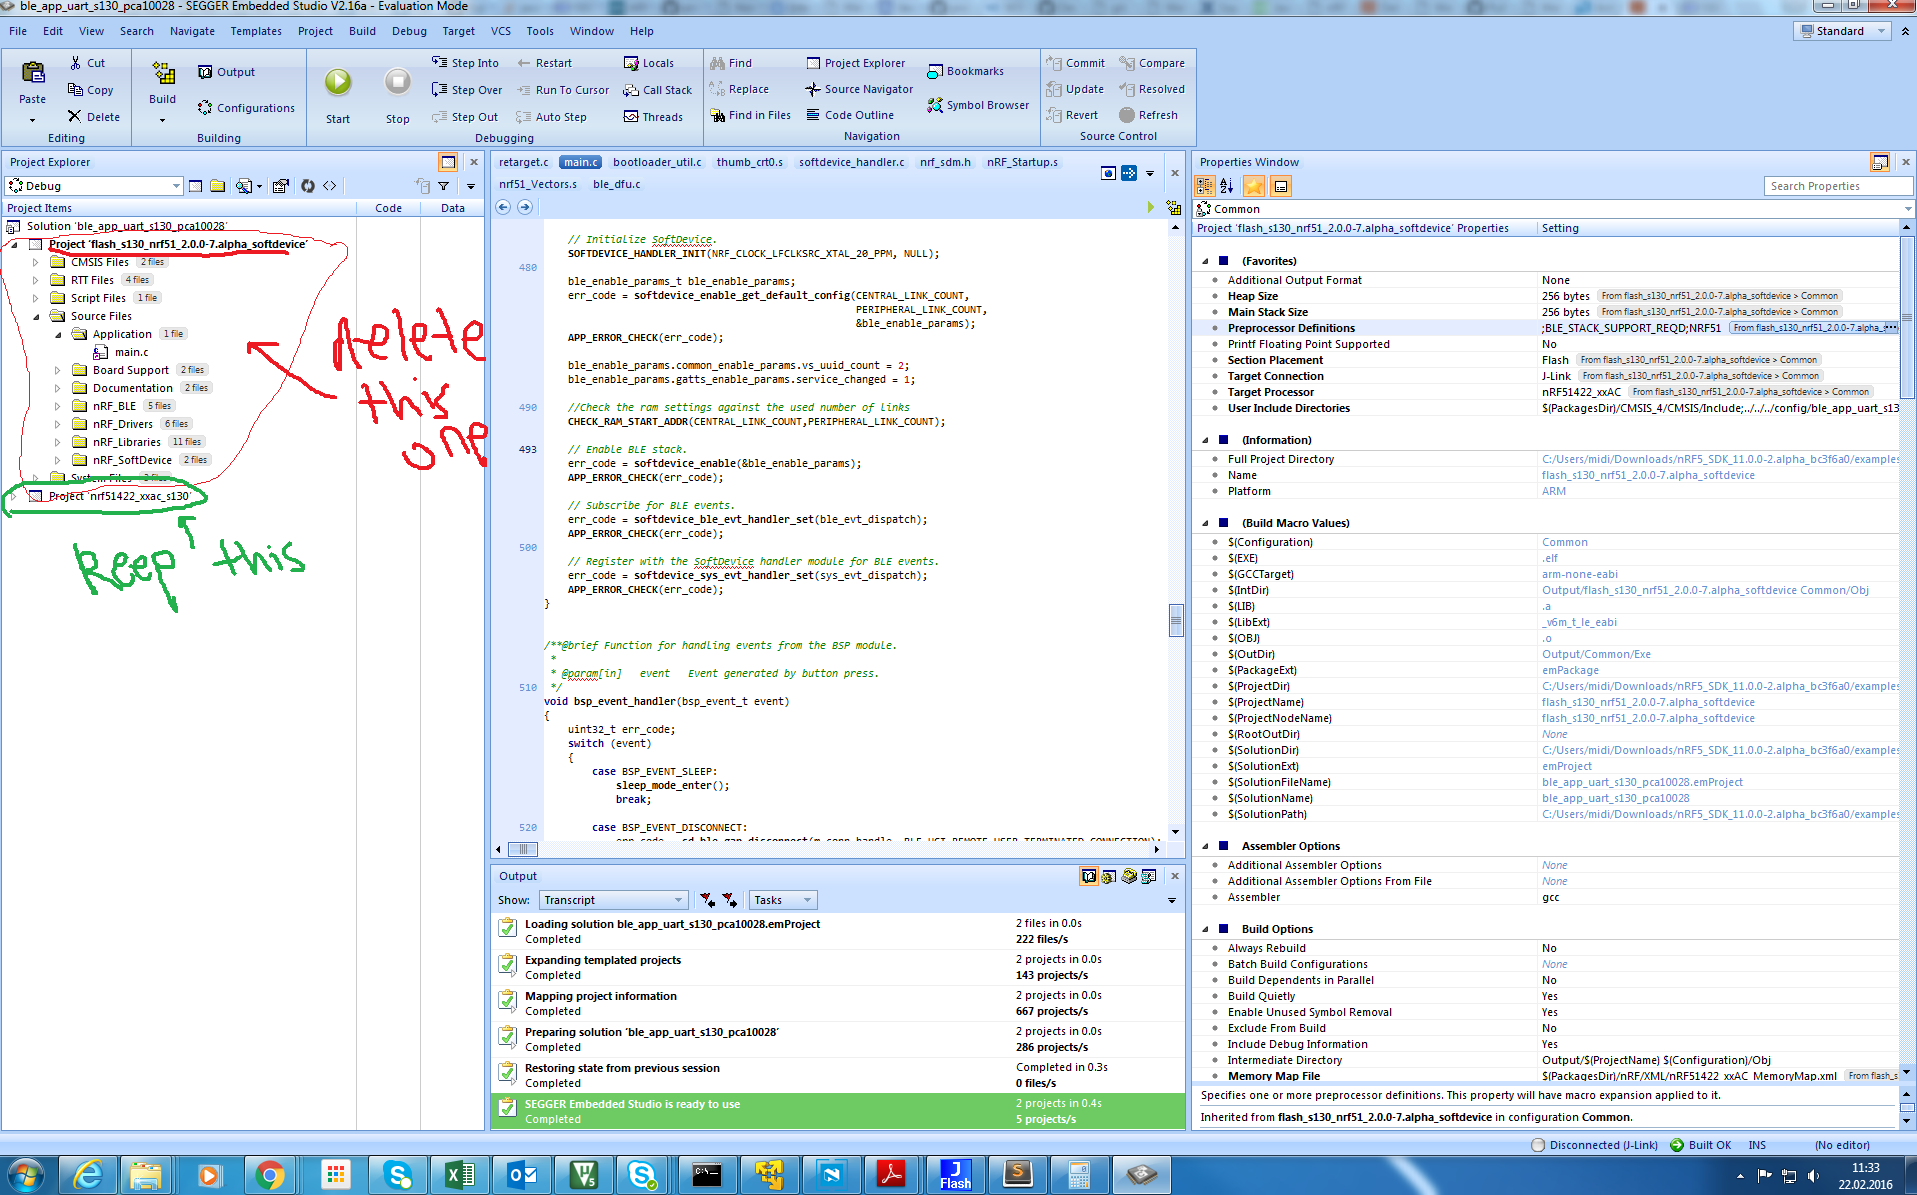
- Remove the "Source Files -> nRF_Segger_RTT" folder. Embedded Studio automatically includes RTT files as you can see and we want to use these (they are more up to date and correct for Embedded Studio).
- Open "retarget.c" and comment out lines 28 and 29 (// FILE __stdout; // FILE __stdin;). If you don't you will get a compiler error saying 'storage size of '__stdout' isn't known.' You can even remove "retarget.c" entirely from the project as it is not needed. For more information on why see: https://devzone.nordicsemi.com/question/29200/retargeting/.
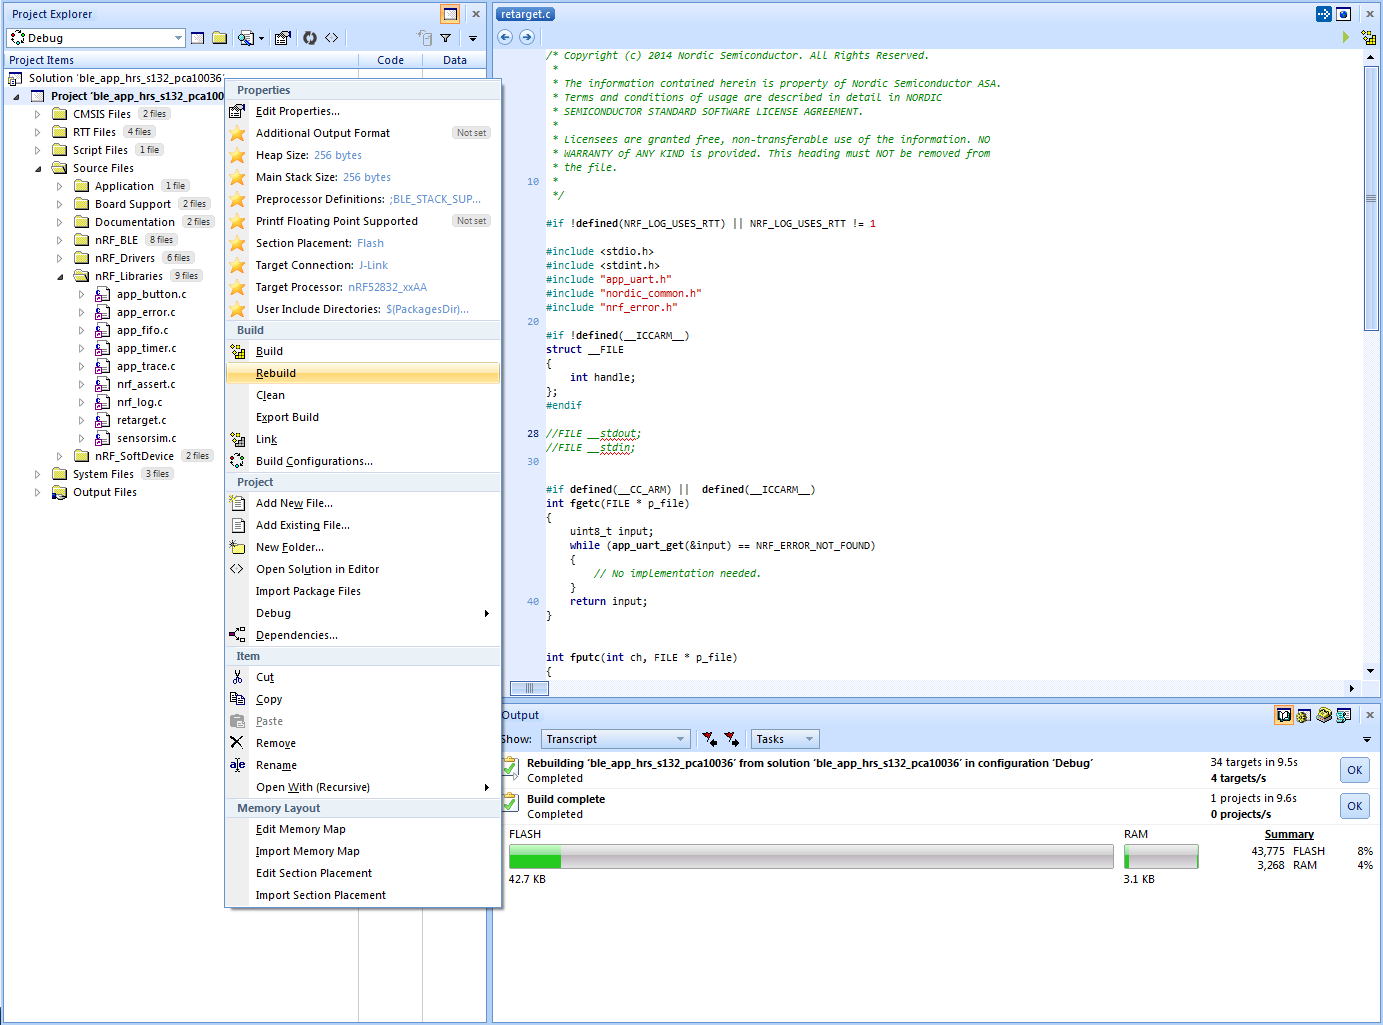
At this point your project should compile with no errors or warnings (but it won't run correctly)! Build it and make sure!
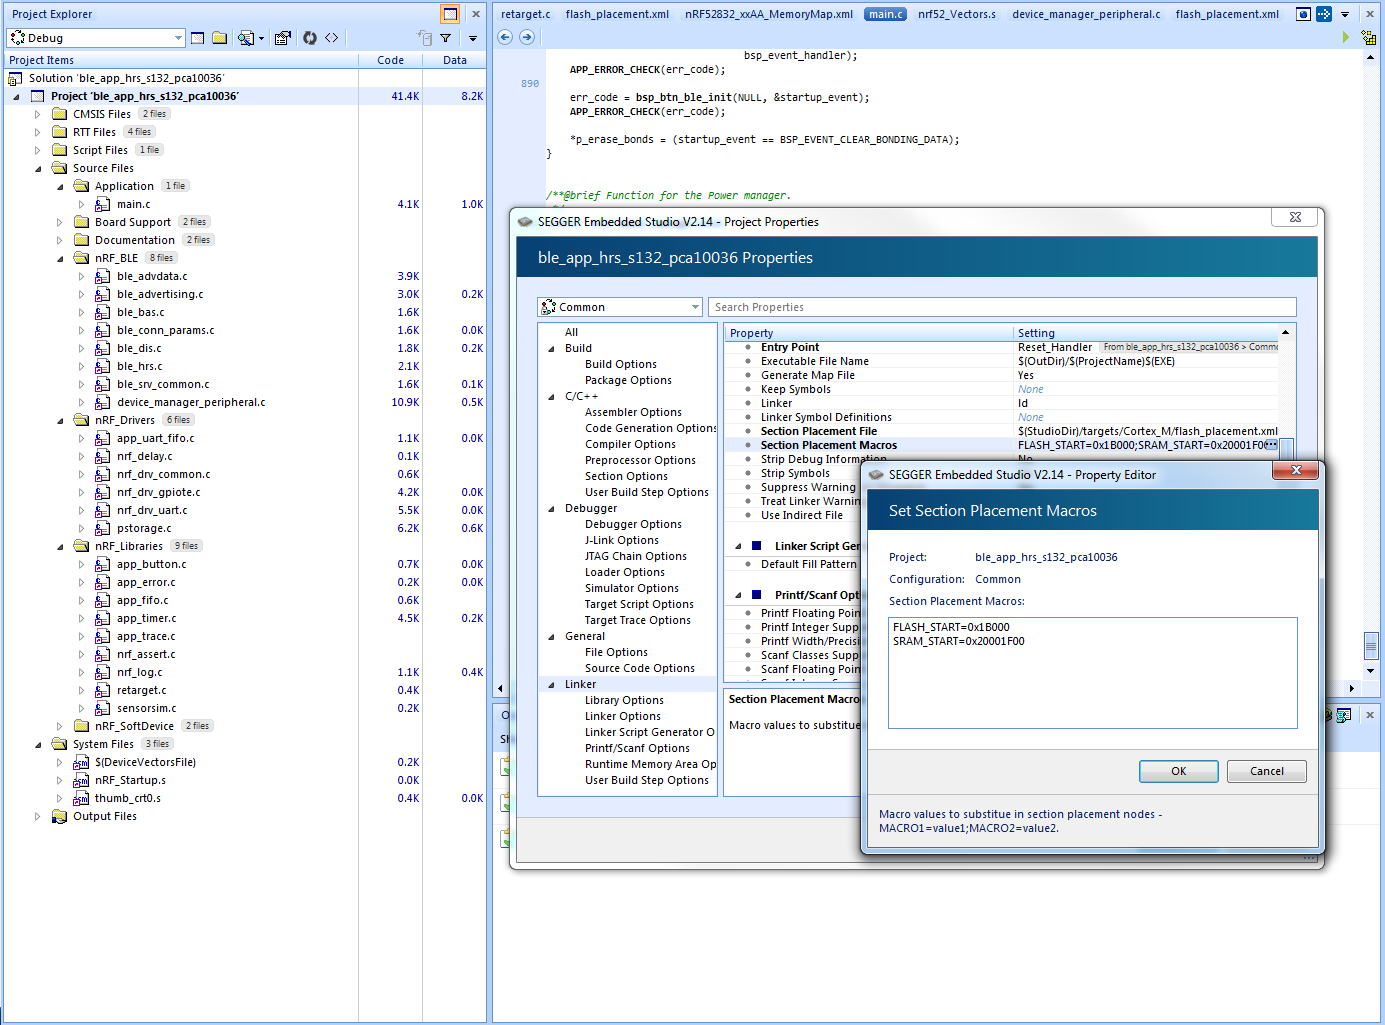
#The Softdevice As with every BLE project we will need to reserve some FLASH and RAM for the softdevice. To do this we need to set the Section Placement Macros used by "flash_placement.xml". This file tells our linker where to put the different parts of our application in FLASH and RAM. Go to "Project Properties -> Linker -> Linker Options" and in "Section Placement Macros" set FLASH_START=0x1b000 RAM_START=0x20001f00 (see screenshot below) or whatever these addresses should be for your specific softdevice.
Now we may need to edit the memory map for our device (most likely if you are using the nRF52 Preview DK). Go to "Edit Memory Map" (right above Import Section Placement) and double check that this is correct for your device. If you are using the nRF52 Preview DK change the size of RAM to 0x8000.
Now we want Embedded Studio to automatically program the softdevice to our board along with our application whenever we run/debug. To do this go to "Project Properties -> Debugger -> Loader Options" and set "Additional Load File[0]" to the full path of your softdevice.
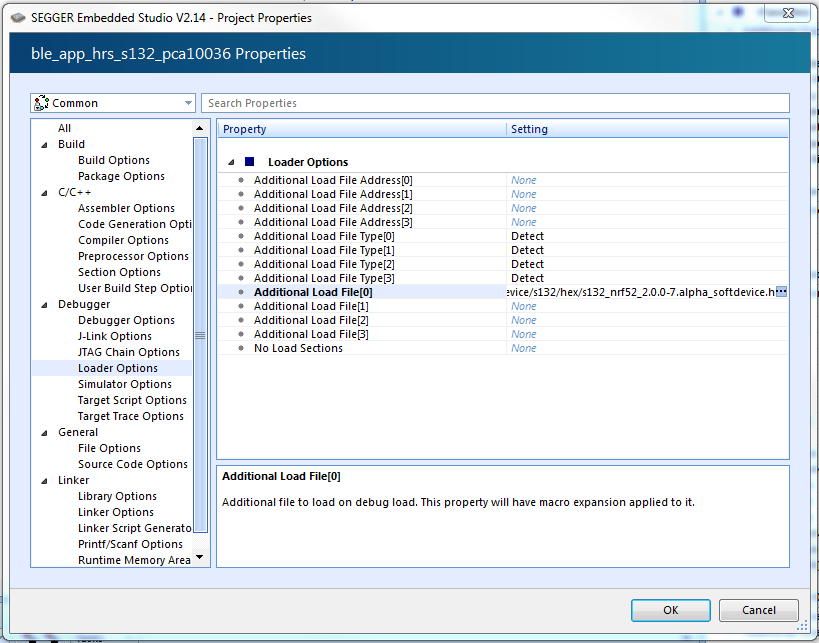
Now rebuild your project. Everything should compile without warnings or errors and you should notice that your application is leaving some space for the softdevice!
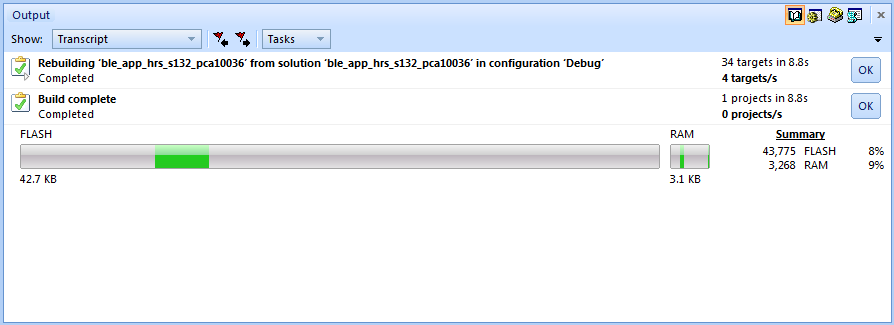
At this point you should be able to run and debug this application. Embedded Studio will program the softdevice and then the application. Your program should run until the first instruction in main().
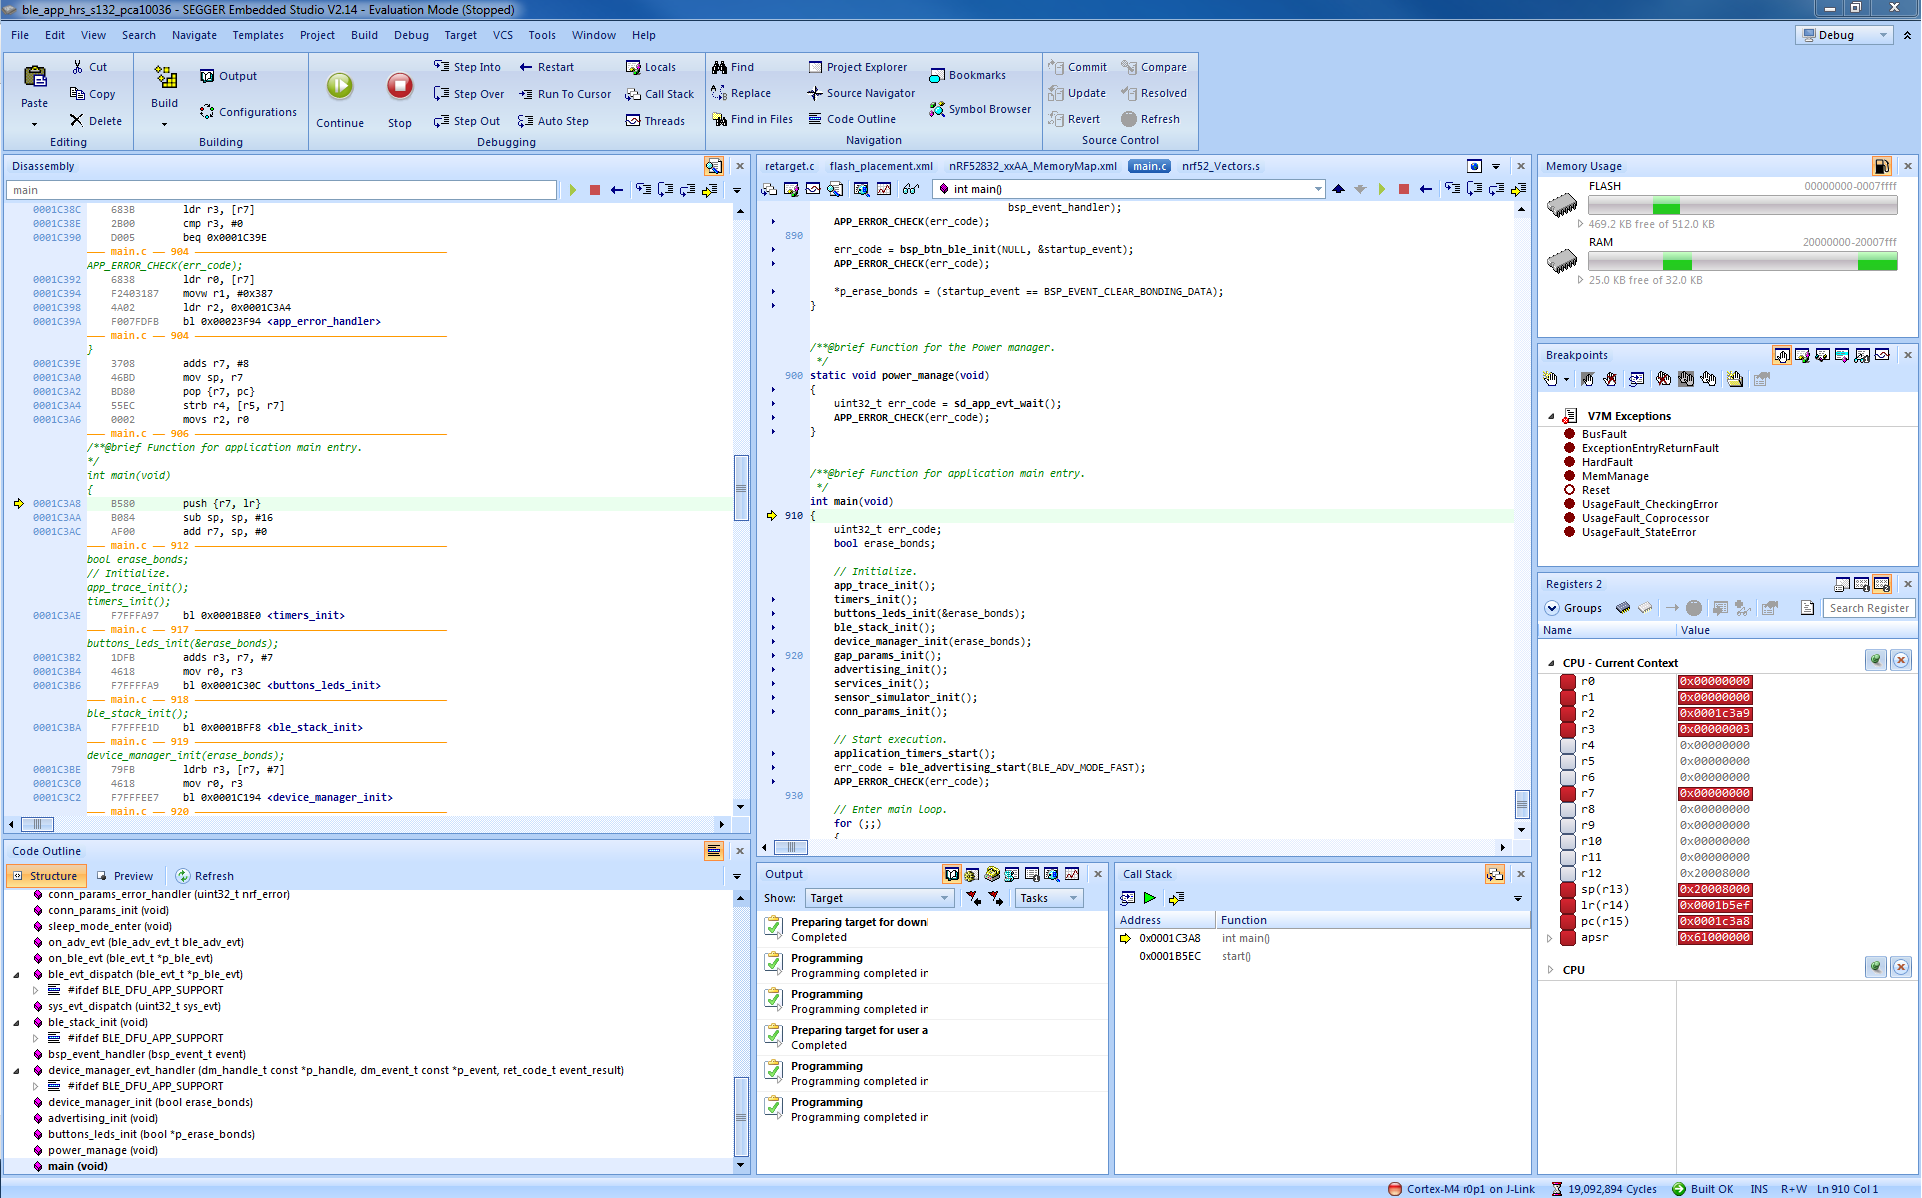
However you will hard fault. We have a few more fixes to do...
#Important Fixes
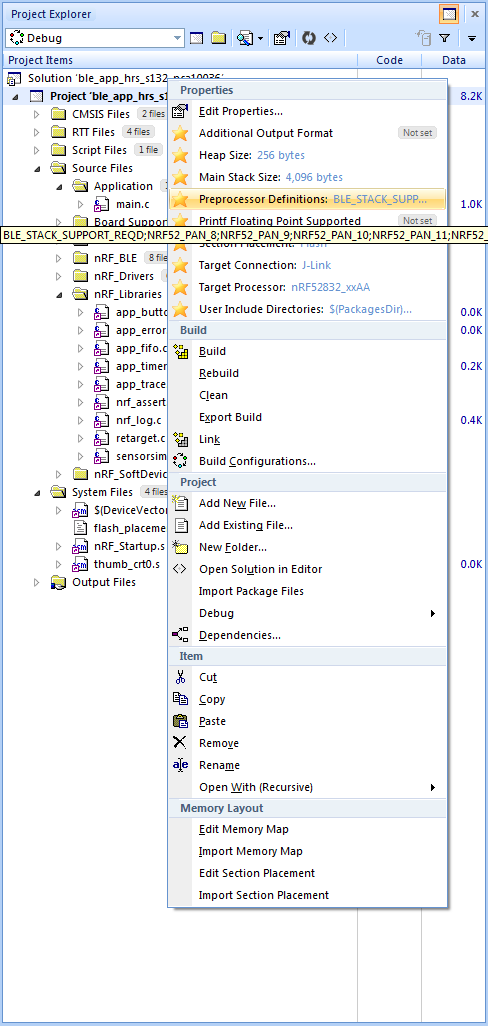
- Increase the stack size. The stack should be at least 1024 bytes but lets make it 2048 for this project. By default the SDK does not use heap but lets just leave the heap at 256 bytes. Do this by right clicking the project and changing "Main stack size" as seen in the screenshot below.
- Add NO_VTOR_CONFIG to the "Preprocessor Definitions."
- In Properties -> Debugger -> Debugger Options -> Start From Entry Point Symbol, set to 'No.' This is because we should enter our SoftDevice's ResetHandler(), not our applications. For more information, see RK's comment below.
Rebuild and run the application. Everything should work!
#Notes
- It seems that Embedded Studio can lose project settings (and this includes the memory map and flash placement section). We are working with them to fix this bug. It seems to happen occasional when cleaning the project. Just beware of this and if you start to have weird problems you shouldn't take a look at the project settings to see they are as expected (preprocessor definitions, stack size, softdevice in file loader, memory map modifications, flash placement modifications).
- You may need to change "Target Connection" from "Simulator" to "J-Link." This is done in project properties. If you get weird error messages when trying to run/debug your program check this.
#Future Thanks to all the great feedback on the last post about SEGGER Embedded Studio we decided to make this post! Note that there are still little workarounds we have to do that will be fixed very shortly. We are working with SEGGER to make Embedded Studio even easier to use with nRF5x devices. Please continue to give us feedback so we can keep improving! Nordic customers using OS X/Linux are no longer second class citizens and your feedback is driving this initiative!
Please experiment around with Embedded Studio. Tell us what you like, what you don't like, what you want to see and why you need this to be fully supported in the future!

