
Purpose
The purpose of this blog is to show how to create a Zephyr application that boots from the MCUBoot bootloader. We will also show how to update an application using the Device Firmware Update (DFU) feature of MCUBoot using a serial connection to a host PC.
Specifications as tested
Board: nRF52840 DK
NCS Tag: v1.4.0
Background
Creating a MCUBoot-compatible application
We will be doing a multi-image build which means that the application will be compiled along with MCUBoot. There is no need to compile MCUBoot separately in NCS. In the NCS nomenclature, the application is known as the parent image and MCUBoot is the child image. This is because building the parent image will trigger an automatic build of the child image. The relevant parameters to build MCUBoot correctly to work with the chosen application will be passed automatically to the MCUBoot build system so they are in concert with each other. We will use the Zephyr blinky and hci_usb examples to demonstrate this functionality.
1. Launch nRF Connect for Desktop.
2. Launch the Toolchain Manager applet: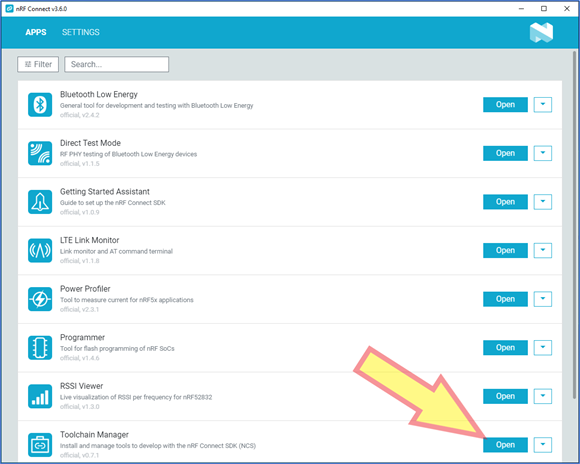
3. Click on Open Bash and Open command prompt: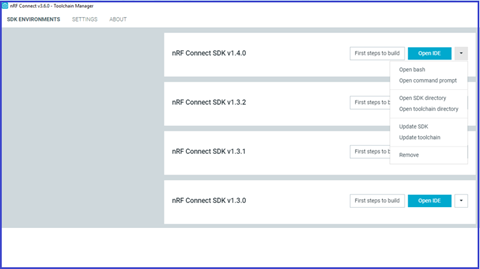
Bash shell: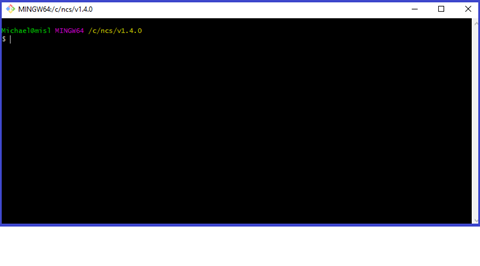
DOS Command shell: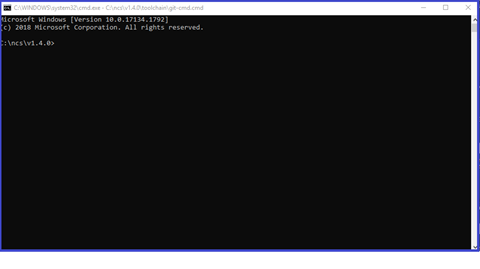
4. In the bash shell and the command shell, change directories to <NCS_Install>/v1.4.0/zephyr/samples/basic/blinky/.
5. Locate the file prj.conf and add the following to it using your favorite text editor:
CONFIG_BOOTLOADER_MCUBOOT=y
So the prj.conf should look like this: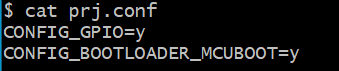
6. Copy the file <NCS_Install>/v1.4.0/bootloader/mcuboot/boot/zephyr/usb_cdc_acm_log_recovery.conf to the blinky directory <NCS_Install>/v1.4.0/zephyr/samples/basic/blinky/.
7. Now we are going to compile the application and the bootloader so issue the following command:
west build -b nrf52840dk_nrf52840 --pristine -- -Dmcuboot_OVERLAY_CONFIG=[Absolute Path]\usb_cdc_acm_log_recovery.conf
8. Observe the error statement: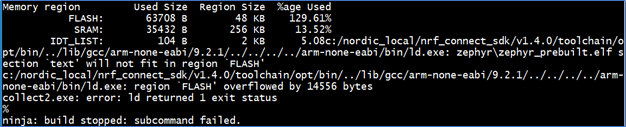
This error message signifies that the MCUBoot partition in flash has overflowed which means that the size of the generated MCUBoot code is too big by 14556 bytes. To remedy this, we will adjust MCUBoot’s flash partition size so that MCUBoot is able to fit.
9. Go to the DOS command shell and change directory to \v1.4.0\zephyr\samples\basic\blinky and issue the following command:
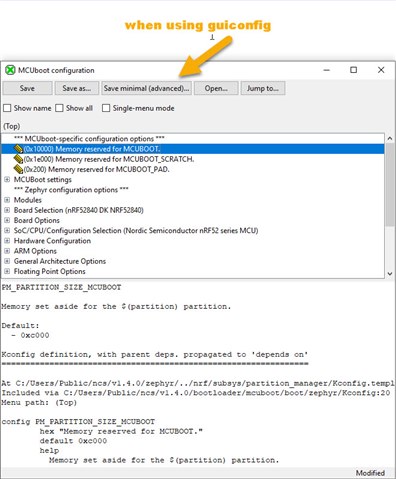
west build -b nrf52840dk_nrf52840 -–pristine -t mcuboot_menuconfig
or as menuconfig is being phased out for guiconfig
west build -b nrf52840dk_nrf52840 --pristine -t mcuboot_guiconfig
10. Choose Flash space reserved for MCUBOOT and press enter, update the value to 0x10000 as shown below: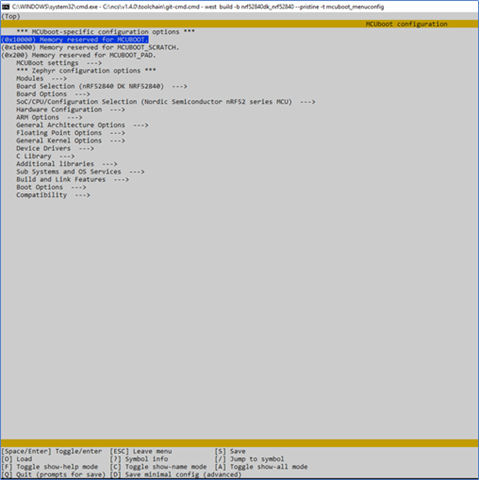
Note that 0x10000 is larger than the default value of 0xC000. We had to increase MCUBoot’s flash partition size because of the error we encountered in step 8.
11. Press D to save the minimal configuration file as defconfig_flash_space_update as shown below. Press ESC to exit the configuration menu.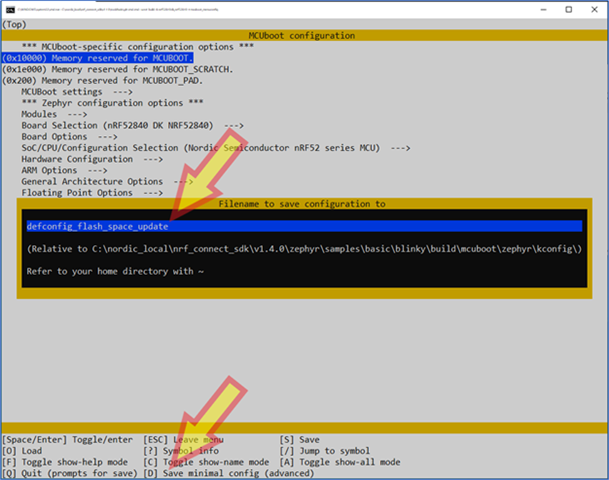
12. Open the minimal configuration file that was saved in the previous step and copy the line that reads CONFIG_PM_PARTITION_SIZE_MCUBOOT=0x10000 to the file usb_cdc_acm_log_recovery.conf. This is what it should look like: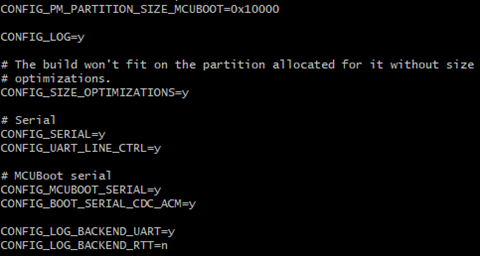
13. Now we are going to compile the application and the bootloader so issue the following command:
west build -b nrf52840dk_nrf52840 --pristine -–
-Dmcuboot_OVERLAY_CONFIG=<your_absolute_path_to_curr_dir>/usb_cdc_acm_log_recovery.conf
14. Observe successful build. The top shows the MCUBoot build statistics and the bottom shows the application build statistics: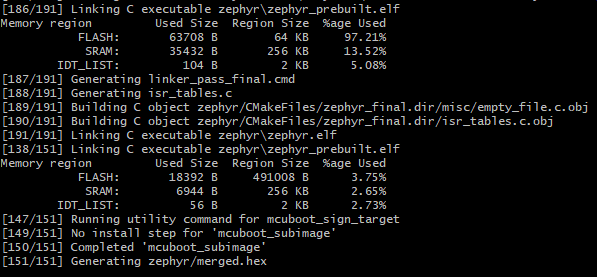
15. Now connect your PC’s USB cables to the DK as shown below: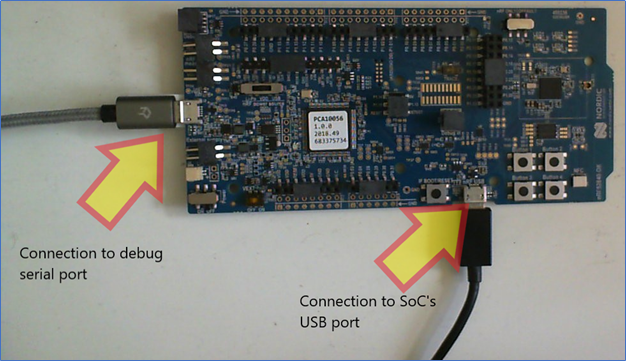
16. Launch your favorite terminal program and open the port the JLink CDC UART port (check your Window’s device manager) with the settings 8N1, 115200 baud, no flow control.
17. Type the following command to flash the code to the board:
west flash
18. Press the reset button on the DK and observe the output on the terminal:
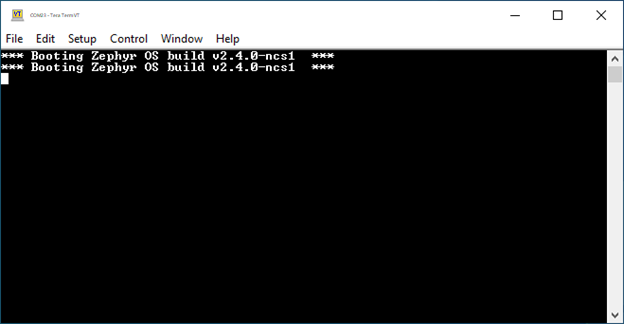
19. Observe the LED 1 blinking on the DK. This shows that MCUBoot executed and then ran the blinky program.
Creating separate MCUBoot-compatible application for DFU
20. Now we will demonstrate the DFU procedure by taking another application and sending it over the SoC’s USB port and observing it update and run. Change directory to <NCS_Install>/v1.4.0/zephyr/samples/bluetooth/hci_usb/.
21. Locate the file prj.conf and add this to it:
CONFIG_BOOTLOADER_MCUBOOT=y
22. Copy <NCS_Install>/v1.4.0/zephyr/samples/basic/blinky/usb_cdc_acm_log_recovery.conf to <NCS_Install>/v1.4.0/zephyr/samples/bluetooth/hci_usb/.
23. Build hci_usb using this command:
west build -b nrf52840dk_nrf52840 --pristine –-
-Dmcuboot_OVERLAY_CONFIG=<your_absolute_path_to_curr_dir>/usb_cdc_acm_log_recovery.conf
24. In hci_usb/build/zephyr, observe that the file app_update.bin was created. This is the MCUBoot-compatible package that we will use for DFU.
Running the DFU process
25. Install MCU Manager (mcumgr) on your Linux PC or Virtual Machine using the instructions in the Command line tool section.
26. Once installed, the mcumgr tool should be found in the ~/go/bin/ directory. Connect the SoC’s USB port to the Linux PC or VM.
27. Now we must put the DK into MCUBoot’s DFU mode. This is accomplished by pressing the reset button on the DK while holding down Button 1 on the DK.
28. Observe your terminal to that MCUBoot is in DFU mode:
29. Ensure that the Linux machine can see the serial port for the DFU as shown below (your serial port designation may vary depending on your Linux machine):
For Windows machines, identify the USB Serial Device using:
wmic path Win32_SerialPort Get Caption

30. In Linux, ensure you have device permissions so enter the following command:
sudo chmod 666 /dev/ttyACM0
31. Use mcumgr to verify the connection to the board using this command:
Linux:
mcumgr --conntype serial --connstring "/dev/<your_serial_port_name>,baud=115200" image list.

Windows:
mcumgr --conntype=serial --connstring=<USB Serial Device> image list
32. Observe the output from mcumgr:
Observe the output on your terminal:
33. If running mcumgr on a Linux machine, copy the file app_update.bin identified in step 24. Otherwise, Windows users can remain in <NCS_Install>\v1.4.0\zephyr\samples\bluetooth/hci_usb\. app_update.bin is the hci_usb application which is properly packaged to allow for the DFU.
34. Issue the following command to start the DFU process:
Linux:
mcumgr --conntype serial --connstring "/dev/[your_serial_port_name],baud=115200" image upload [your_path]/app_update.bin

Windows:
mcumgr --conntype=serial --connstring=[USB Serial Device] image upload build\zephyr\app_update.bin


Observe the output on your terminal:


35. Once the DFU is finished, hit reset on the DK and observe the hci_usb application output on the terminal:
You can see that the USB device is now ZEPHYR USB DEV by issuing the following command in Linux:
lsusb

36. Run the hcitool command in Linux to see the USB HCI device:
Conclusion
We compiled the blinky application along with MCUBoot and encountered a build error so we increased the MCUBoot partition size to fit MCUBoot. Then we flashed MCUBoot + blinky app and observed the LED blinking indicating that MCUBoot successfully executed the blinky app. Next, we compiled hci_usb and used the mcumgr tool to DFU the application from blinky to hci_usb. This demonstrates the MCUBoot DFU capability and how to use it within nRF Connect SDK.
-

Jeff4BLE
-
Cancel
-
Vote Up
0
Vote Down
-
-
More
-
Cancel
Comment-

Jeff4BLE
-
Cancel
-
Vote Up
0
Vote Down
-
-
More
-
Cancel
Children