NRF7002DK basic button example interrupts seem to fire at the opposite edge/level.

github.com/.../main.c

This example was used to test the button interrupt.

For the example, the interrupt seems to be setup to fire when the button goes to logic high i.e. when the button is RELEASED, based on the schematic.

I assumed this meant that the button_pressed function is called when the button is released: 

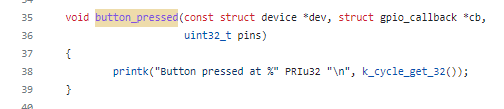
However, the function is called when the button is pressed ie. when it goes to logic low. 

The opposite happens when the interrupt is setup to GPIO_INT_EDGE_TO_INACTIVE. I assumed this meant that the function would be called when the button goes to logic low i.e. when the button is pressed. However the function is called when the button goes to logic high i.e. when the button is released.

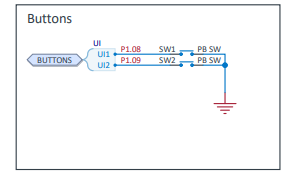
 Schematic for nrf7002dk buttons

Am I missing something? 

Parents
  • Hi

    The button pins are defined as active low in the board file, which means that active is defined as logical 0. 

    You can change this in the board file or in your overlay file by modifying the GPIO_ACTIVE_LOW field to GPIO_ACTIVE_HIGH, in case you want to design your own hardware:

    buttons {
    	compatible = "gpio-keys";
    	button0: button_0 {
    		gpios = <&gpio0 23 (GPIO_PULL_UP | GPIO_ACTIVE_LOW)>;
    		label = "Push button 1";
    	};
    	button1: button_1 {
    		gpios = <&gpio0 24 (GPIO_PULL_UP | GPIO_ACTIVE_LOW)>;
    		label = "Push button 2";
    	};
    	button2: button_2 {
    		gpios = <&gpio0 8 (GPIO_PULL_UP | GPIO_ACTIVE_LOW)>;
    		label = "Push button 3";
    	};
    	button3: button_3 {
    		gpios = <&gpio0 9 (GPIO_PULL_UP | GPIO_ACTIVE_LOW)>;
    		label = "Push button 4";
    	};
    };

    Best regards
    Torbjørn

Reply
  • Hi

    The button pins are defined as active low in the board file, which means that active is defined as logical 0. 

    You can change this in the board file or in your overlay file by modifying the GPIO_ACTIVE_LOW field to GPIO_ACTIVE_HIGH, in case you want to design your own hardware:

    buttons {
    	compatible = "gpio-keys";
    	button0: button_0 {
    		gpios = <&gpio0 23 (GPIO_PULL_UP | GPIO_ACTIVE_LOW)>;
    		label = "Push button 1";
    	};
    	button1: button_1 {
    		gpios = <&gpio0 24 (GPIO_PULL_UP | GPIO_ACTIVE_LOW)>;
    		label = "Push button 2";
    	};
    	button2: button_2 {
    		gpios = <&gpio0 8 (GPIO_PULL_UP | GPIO_ACTIVE_LOW)>;
    		label = "Push button 3";
    	};
    	button3: button_3 {
    		gpios = <&gpio0 9 (GPIO_PULL_UP | GPIO_ACTIVE_LOW)>;
    		label = "Push button 4";
    	};
    };

    Best regards
    Torbjørn

Children
Related