How To Program Thingy:52 nRF52832

I have Nordic Thingy:52 nRF52832, nRF6936. I am trying to upload application to this board.

I did read https://academy.nordicsemi.com/courses/nrf-connect-sdk-fundamentals/lessons/lesson-1-nrf-connect-sdk-introduction/topic/exercise-2-1/ .

Later, used this guide https://academy.nordicsemi.com/flash-instructions-for-the-thingy53/ to flash board.

Tried to get additional help from https://devzone.nordicsemi.com/f/nordic-q-a/88430/how-to-program-nrf6936 .

Now, I would like to request help.

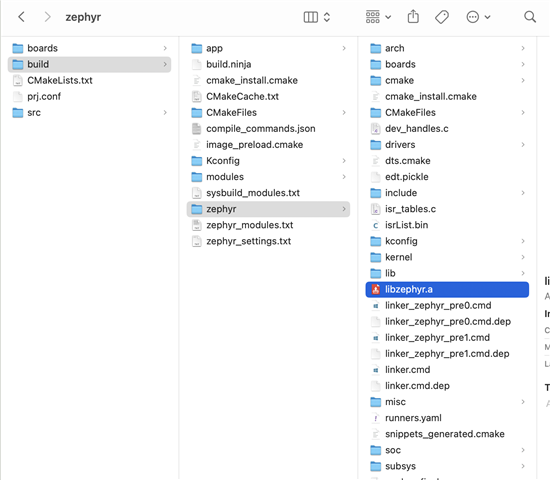
1. how could I build DFU zip, mentioned in one of the guides? <application root directory>\build\zephyr and select the folder dfu_application.zip

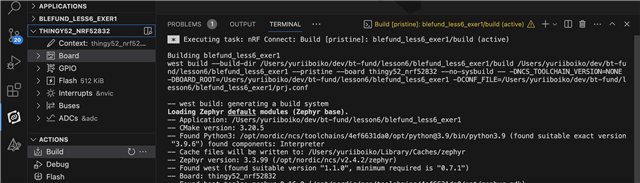
I use VS code, and do instructions described in this lesson https://academy.nordicsemi.com/courses/bluetooth-low-energy-fundamentals/lessons/lesson-6-bluetooth-le-sniffer/topic/blefund-lesson-6-exercise-1/ . Lesson 6 only has instructions for boards that appear in VS code. Not clear how do I build for Thingy:52. I tried to create build config for thingy52_nrf52832 and check out build folder. No mentions of zip files, only libapp.a or zephyr.hex or some c make files.

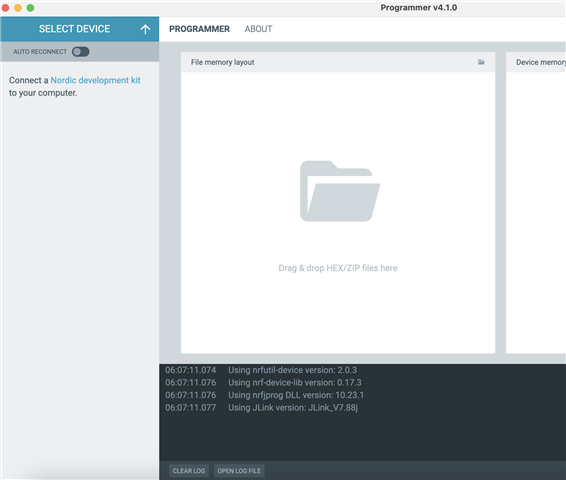
2. how do I connect Thingy:52 to programmer? It would not appear in programmer. I did start board with button 2 pressed for DFU. I did see light blinking in this mode. 

Note: I do not need debugger, uploading enough in this case.

Thanks!


Parents
  • Hi, Thingy52 does not have an onboard debugger. There is documentation on how to use Thingy52

    There is a blog that shows how to connect the thingy52 with a programmer here

    With Nordic Devacademy lessons, you should always prefer DK rather than a DK since DK has a lot of gpio pinouts available to be connected to any button/leds/sensors that you are experimenting with. Thingy52 is easy for proof of concept validation but DK is easy for prototyping. 

    If you still want to continue to use Thingy, then connect the debugger as shown in the blog I linked and compile your code in VSC chosing right Thingy board files.

Reply
  • Hi, Thingy52 does not have an onboard debugger. There is documentation on how to use Thingy52

    There is a blog that shows how to connect the thingy52 with a programmer here

    With Nordic Devacademy lessons, you should always prefer DK rather than a DK since DK has a lot of gpio pinouts available to be connected to any button/leds/sensors that you are experimenting with. Thingy52 is easy for proof of concept validation but DK is easy for prototyping. 

    If you still want to continue to use Thingy, then connect the debugger as shown in the blog I linked and compile your code in VSC chosing right Thingy board files.

Children
No Data
Related