Hi
I have encountered problems in conducting the mesh DFU test and cannot proceed further.
My test environment is as follows:
(1) Windows 10 System
(2) Visual Studio Code v1.86.2 (installed with the nRF Connect for VS Code extension Pack v2023.11.3 plugin)

(3) nRF52840 DK development board
(4) Ipad 6
(5) NCS v2.5.0
(6) Device Manager v1.6(8)
(7) nRF Mesh v4.1.0
My reference documents are as follows:
(1)Performing Device Firmware Updates (DFU) in Bluetooth Mesh
(3)Bluetooth Mesh: Device Firmware Update (DFU) distributor
(4)Bluetooth Mesh: Device Firmware Update (DFU) target
Here are my operating steps as detailed as possible:
Configuring and building an application
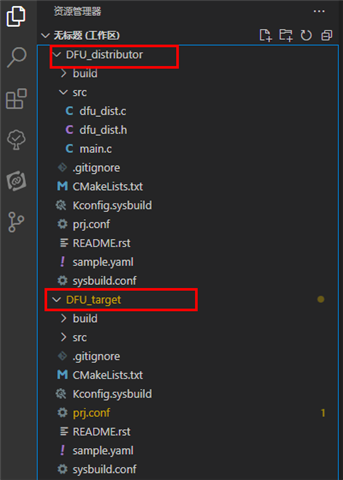
(1)Copy the distributor and target projects into VS CODE and configure the projects.

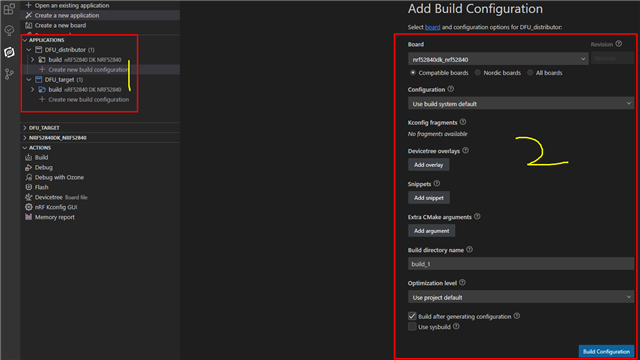
In the "APPLICATIONS" tab, generate the default configuration of the distributor and target projects.
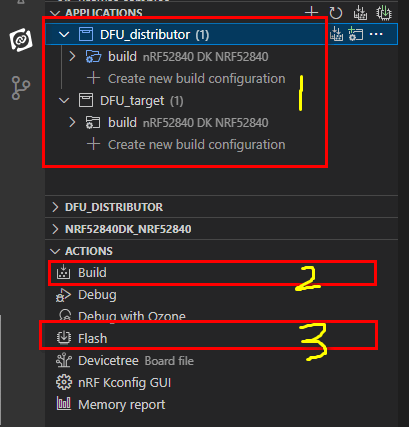
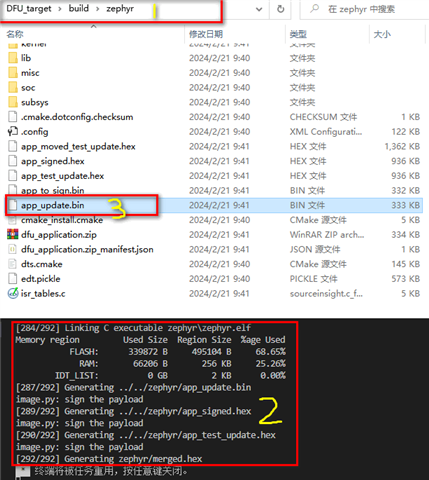
(2)Follow the steps as shown in the following figure to build and download the application to two different development boards.
(3)Change the macro definition CONFIG_MCUBOOT_IMGTOOL_SIGN_VERSION = "1.0.0+0" to CONFIG_MCUBOOT_IMGTOOL_SIGN_VERSION = "2.0.0+0".
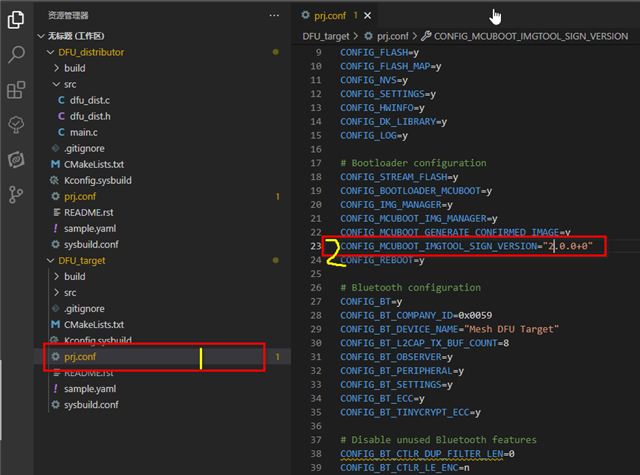
Rebuild the target project, and we will get the bin file "app_update.bin" in the build directory. Then place the "app_update.bin" in the shared folder of the nRF Connect application.
So far, after the above operations are completed, I have obtained the following products:
- Two development boards with programs: distributor board; target board; since they are generated using the default project and configuration, their software versions are both v1.0.0.
-
An iPad with the app_update.bin file, because I got it by modifying the macro definition CONFIG_MCUBOOT_IMGTOOL_SIGN_VERSION to "2.0.0+0", so its software version is v2.0.0.
Provisioning the device
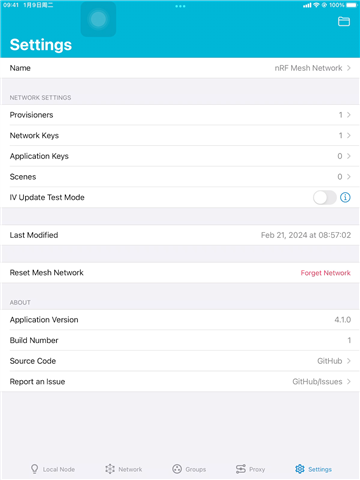
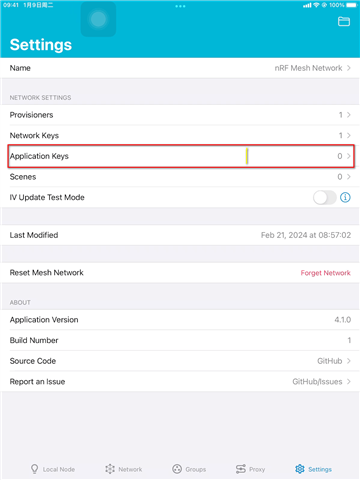
(1)The nRFMesh application adds Application Keys and binds them to the default Primary Network Keys.In the "Settings" tab, click on the "Application Keys" label.
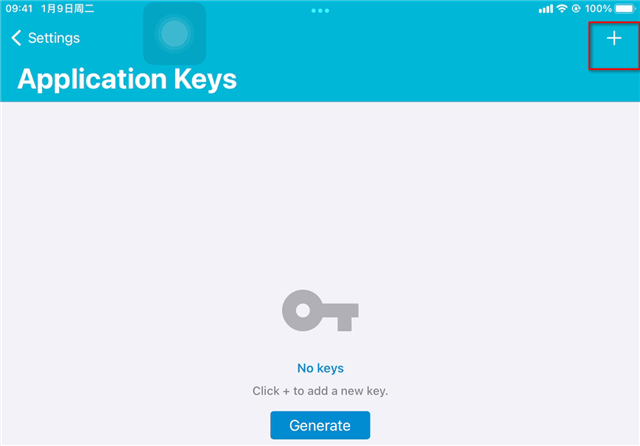
In the upper right corner, click the "+" to create and add Application Keys.
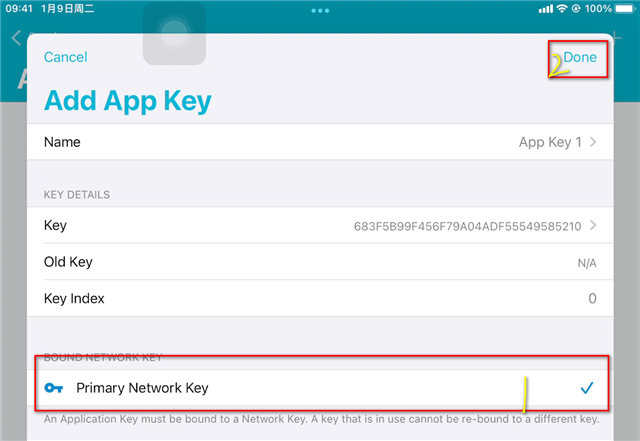
Bind App Key 1 to "Primary Network Keys", and then click "Done" in the top right corner.
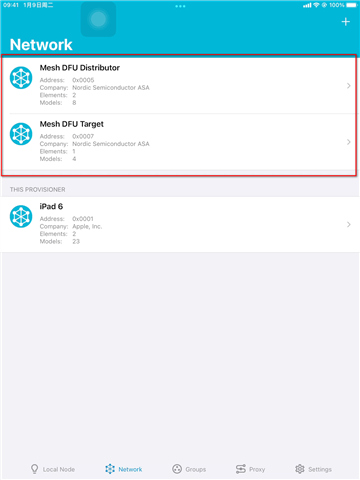
(2)Provisioning the distributor board and the target board using the nRFMesh application.Switch to the "Network" tab and click the "+" sign in the upper right corner to add devices.
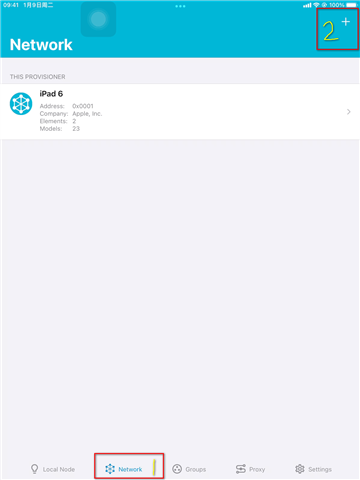
At this time, two device names, "Mesh DFU Target" and "Mesh DFU Distributor", will be displayed in the device list. First, select the Mesh DFU Distributor device for provisioning (at this time, the four LEDs on the board will blink), and simultaneously enter the Device Capabilities.
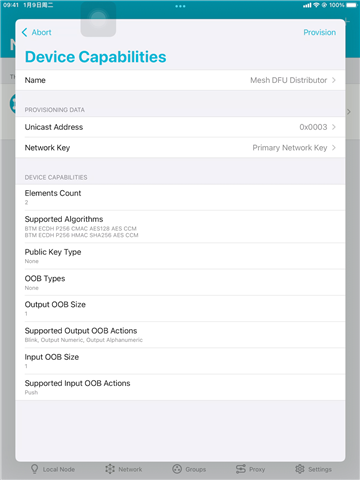
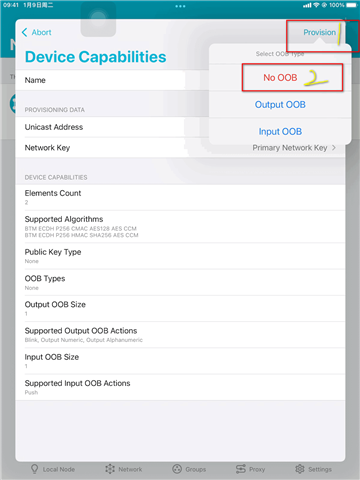
Click the "Provision" in the upper right corner and select the "No OOB" option, then the device starts to configure.
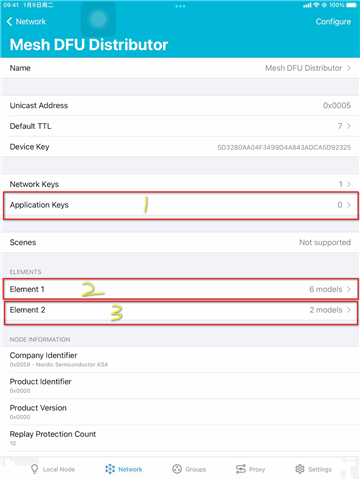
After the "Provisioning Complete" popup window appears, click the "OK" option, and you will enter the device page. First, click the "Application Keys" option to add the previous "App Key 1" to the device; then click to enter "Element 1" to bind the four models such as "BLOB Transfer Client", "Firmware Update Client", "BLOB Transfer Server", and "Firmware Update Client" to the just added "App Key 1". Finally, click to enter "Element 2" to bind the two models such as "BLOB Transfer Server" and "Firmware Update Server" to "App Key 1".
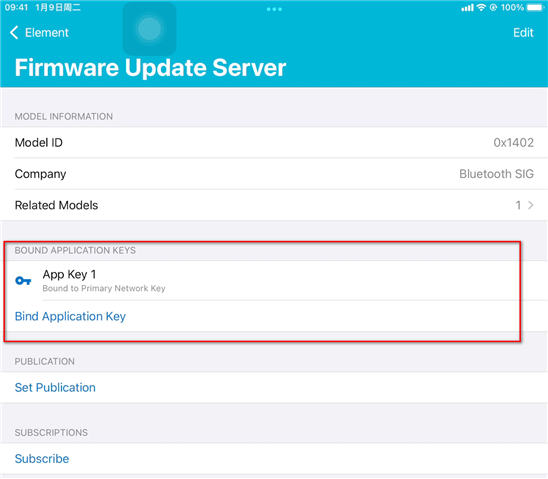
Then, perform the same operation on the "Mesh DFU Target" device. This device has only one "Element 1" and only two models: "BLOB Transfer Server" and "Firmware Update Server", which are bound to "App Key 1". At this point, two devices have been added in the "Network" tab, and their models are all bound to App Key 1.
Uploading the firmware to Distributor board
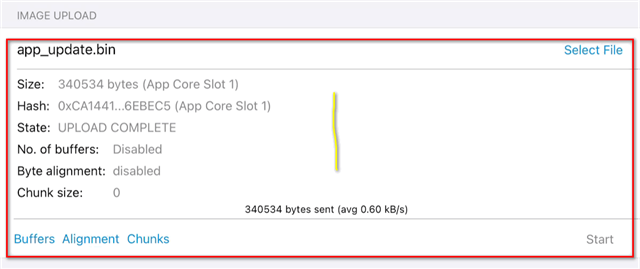
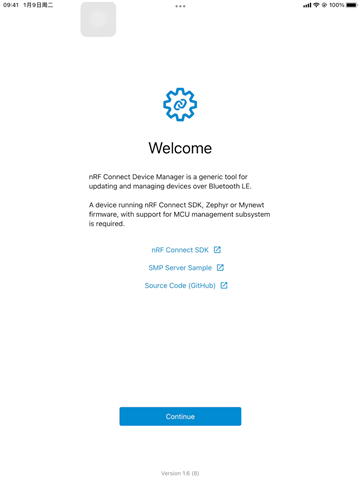
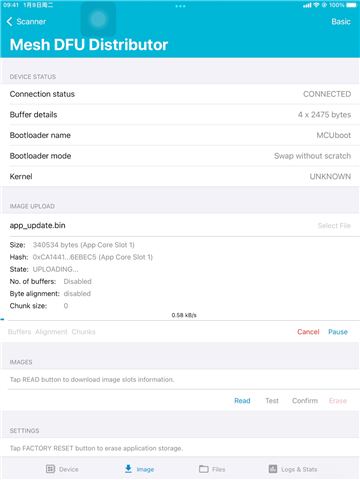
(1)Open the “Device Manager” application.Find and select the “Mesh DFU Distributor” device.Go to the “Image” tab.Press the “ADVANCED” button in the right top corner.Under the “IMAGE UPLOAD” area, press the “Select File” button and select the “app_update.bin” image.Press the “Start” button.
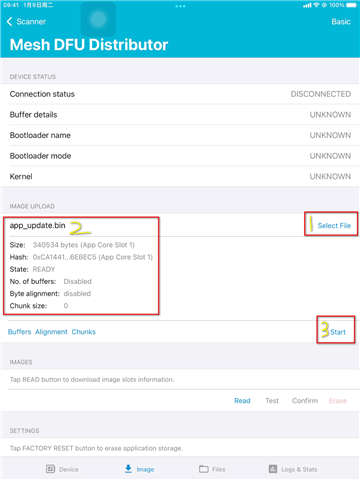
At this time, a popup window will appear, click on the "App Core Slot 1" option.
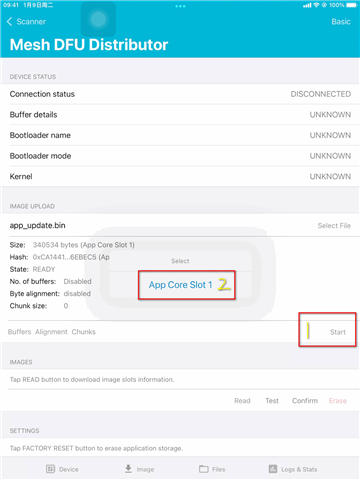
At this point, the firmware upload to the device begins, but for some reason, the transfer speed is very slow, basically stable at 0.60 kB/s.
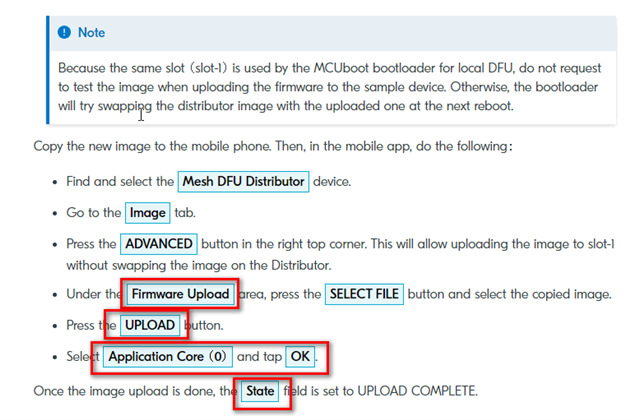
At this moment, I noticed that there are some differences between my operation process and the process in Bluetooth Mesh: Device Firmware Update (DFU) distributor. I don't know if such differences originate from the version change of the Device Manager software. The process described in the document is as follows:
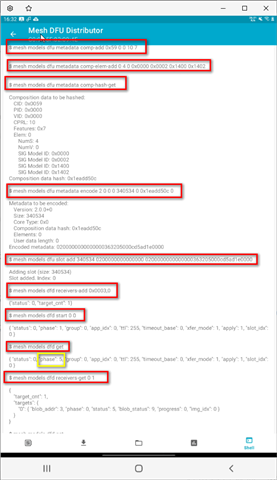
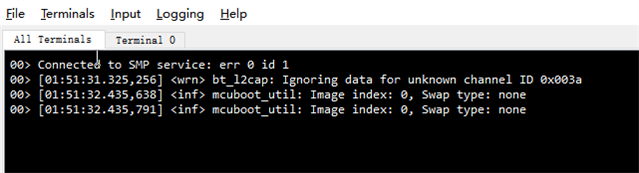
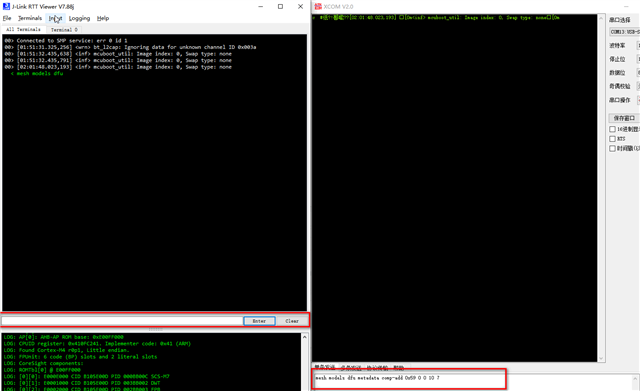
Meanwhile, the following LOG output can be seen in the RTT Viewer software:
The result after the progress bar is completed is as follows: In order to confirm that the image has been uploaded to the device, I clicked the "Read" button, and two images appeared in the "IMAGE" area.
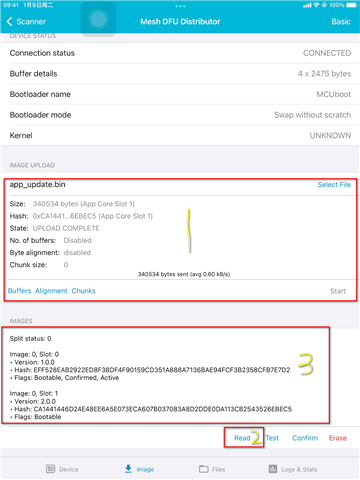
At this point, can I assume this way: Slot 0 stores the Mesh DFU Distributor firmware that is currently running, so its version is 1.0.0; Slot 1 stores the newly uploaded and successful Mesh DFU Target firmware, so its version is 2.0.0; and the firmware we want to distribute is the firmware in Slot 1.
However, there is one problem now: The document prompts that after the firmware is uploaded, the message "Distribution phase changed to Completed" will be printed.

However, neither on the serial port assistant nor on the RTT Viewer software, the above prompt appears. So, has my above operation been successful?
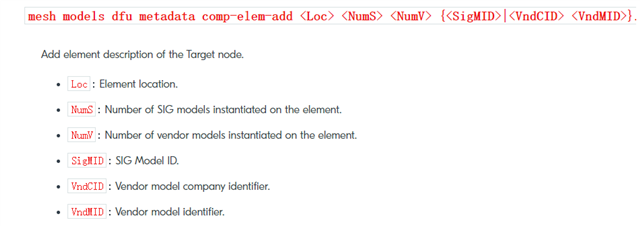
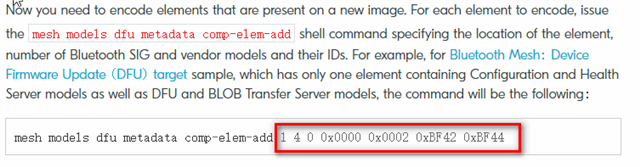
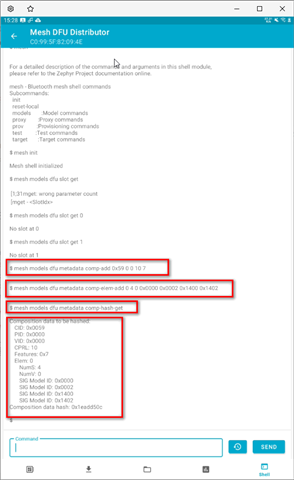
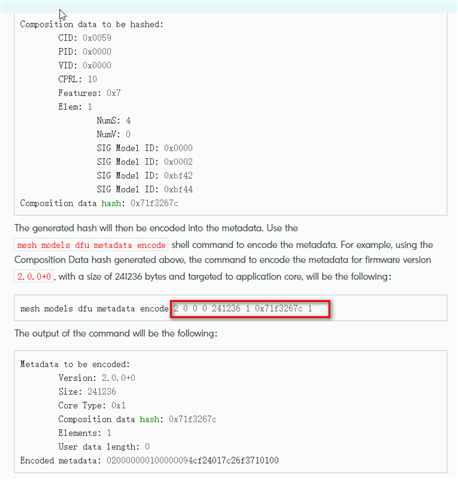
Send commands through the SHELL to control the firmware for distribution.
To be honest, my operation has come to a standstill at this point and I can no longer proceed. Because I don't know how to enter commands to perform the next steps.
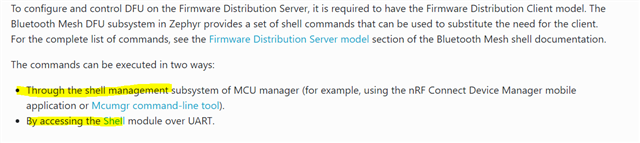
- According to the guidance of "DFU over Bluetooth Mesh",through the shell management subsystem of MCU manager.
I read this method and knew that it probably inputs commands through the RTT of J-Link.
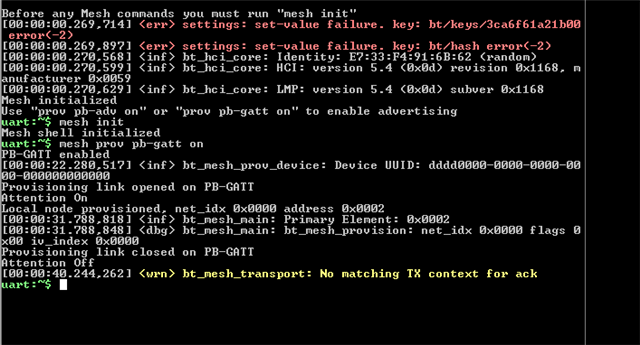
- By accessing the Shell module over UART.
This should be to input commands through the serial port assistant (such as the putty software).

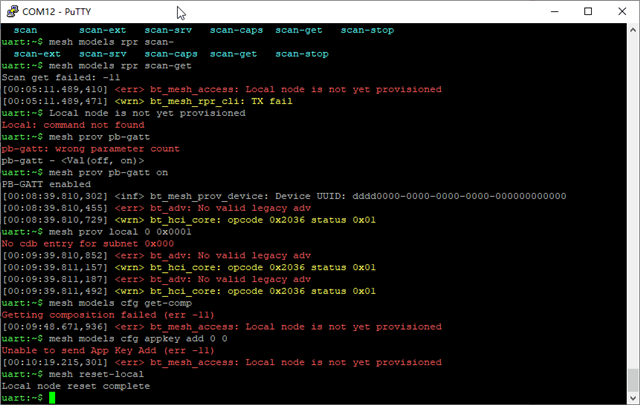
However, through my attempts, neither entering commands in the RTT Viewer software nor in the serial assistant works.
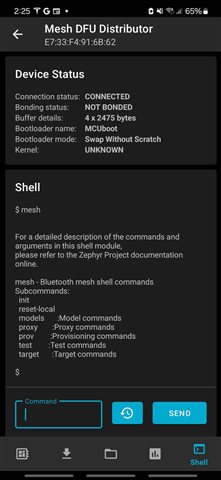
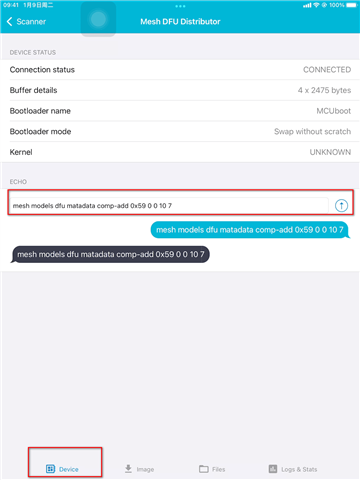
Subsequently, I also tried to send shell commands through the Device Manager, but still failed.
Therefore, could you please tell me how to operate next, so that I can continue the remaining steps?