New firmware with Zephyr and old bootloader

HI,

two years ago I started my adventure with the nRF52840 microcontroller. I started using SEGGER Embedded Studio for ARM as my development IDE. I created a peripheral BLE device and am able to update the firmware via bluetooth following the pca10056_s140_ble_debug example of the SDK.

Now I want to use Zephyr OS.

My question is: can I still use the bootloader I used previously?

If not, how can I update my device with the new firmware developed with the Zephyr?

Thank you.

Parents
  • Hi,

    It is possible to use the nRF5 Bootloader for nRF Connect SDK application. See  One bootloader to rule them all
    While more complicated, it is also possible to upgrade your application and the bootloader from nRF5 SDK to nRF Connect SDK over OTA. See Hang with nRF5 SDK 17.1.0 Bootloader and nRF Connect SDK 2.1.0 application .

    However, I would start by asking yourself: Do you need to upgrade the firmware on the devices in the field to the nRF Connect SDK? Or could you get by with keeping devices in the field to nRF5 SDK and then use nRF Connect SDK for new devices?

    Regards,
    Sigurd Hellesvik

  • HI,

    I didn't quite understand.

    My situation is this:

    1) I program nRF52840 microcontroller using nRF5_SDK_17.1.0 and SEGGER Embedded Studio for ARM.

    2) as bootloader I used the example pca10056_s140_ble_debug available in the SDK

    3) I create the DFU package using nrfutil tool and the following command

    python nordicsemi/__main__.py pkg generate --application myApplication.hex myApplication.zip --hw-version 1 --sd-req 0x100 --application-version 1 --key-file priv.pem

    4) finally I switch my device to DFU mode and, via the "nRF Connect" app on my smartphone, I connect and send the DFU package.

    Everything works fine.

    Now I want to switch to using the Zephyr.

    I wrote the code for my application using the Zephyr and it works.

    Now I want to create a DFU package to install my application on my device without changing the bootloader. It can be done?

    I tried to create the DFU package using the .hex file generated by the Zephyr:

    python nordicsemi/__main__.py pkg generate --application myZephyrApplication.hex myZephyrApplication.zip --hw-version 1 --sd-req 0x100 --application-version 1 --key-file priv.pem

    The DFU package is created but when I install it on my device nothing works.

    How can I do?

    Thank you

  • Hi,
    bear with me but I still don't understand where I'm wrong.

    I understand that CONFIG_FLASH_LOAD_OFFSET=0x27000 moves my application to address 0x27000.
    I read the documentation you gave me at the link but I couldn't find a solution to my problem. So I'll ask you some questions.

    1) Why when I enter CONFIG_FLASH_LOAD_OFFSET=0x27000 my application (without bootloader) doesn't work at all? Shouldn't it still work without a bootloader?

    2) in the documentation you indicated to me at the link there is no reference to the use of CONFIG_FLASH_LOAD_OFFSET and how to use it. Did I miss something?

    3) in the documentation you gave me at the link, MCUboot is used. This however is not my case. I want to use the bootloader provided by nRF5_SDK_17.1.0 (pca10056_s140_ble_debug). Is there an example that fits my situation?

    I hope you can help me.

    Thank you.

  • Stefano1984 said:
    1) Why when I enter CONFIG_FLASH_LOAD_OFFSET=0x27000 my application (without bootloader) doesn't work at all? Shouldn't it still work without a bootloader?

    MCU starts executing from 0x000.
    If nothing is at 0x0000, it will fail.
    So either bootloader or app must start on 0x000.

    Stefano1984 said:
    2) in the documentation you indicated to me at the link there is no reference to the use of CONFIG_FLASH_LOAD_OFFSET and how to use it. Did I miss something?

    I suggest that you read the entire page instead of Ctrl+F through for what you need. It gives some good background knowledge which can help you understand the root of your issue.
    The part I specifically referred to was this sentence:
    " When an nRF chip powers on, it will start executing code from address 0x00000000. Because of this, applications without a bootloader are stored from address 0x00000000 and onward. "

    Stefano1984 said:
    3) in the documentation you gave me at the link, MCUboot is used. This however is not my case. I want to use the bootloader provided by nRF5_SDK_17.1.0 (pca10056_s140_ble_debug). Is there an example that fits my situation?

    Yes, but the concept of a bootloader is the same for the nRF Connect SDK and the nRF5 SDK.

    Basically: The bootloader and the application does not really know about each other.
    The only thing is that the bootloader knows which address the application starts at, and then it hands over execution to that addr.

    The nRF5 SDK is a bit special, as it has the MBR that is at 0x000 which then hands over to the bootloader before the nRF5 bootloader starts the application.

    I think it will be beneficial if you do your project here in steps.
    Here are the steps I suggest. After each step, see that everything works as planned.

    1. Use MCUboot and NCS application. Flash merged.hex to the device, as this has both app and bootloader.
    2. Use MCUboot and NCS application. Flash hex files for MCUboot and application separately.  Use "west -vvv build ..." to see which files are used to make merged.hex.
    3. Use MCUboot and NCS application. Change start addr for application. Flash hex files for each.
    4. Use nRF5 application and nRF5 bootloader. Flash entire nRF5 project to device
    5. Use nRF5 application and nRF5 bootloader. Flash application and bootloader hex files each on their own.
    6. Use nRF5 bootloader and NCS application. Flash each hex file on their own.
    7. Then start looking into DFU.
  • Hi  ,

    I'm following your instructions starting from step 1: Use the MCUboot and NCS application

    I read the bootloader guide here and was able to put the MCUboot on my NCS application.

    Following the example "Exercise 3 – FOTA over Bluetooth Low Energy" is very simple, just add the following lines to the prj.conf file:

    CONFIG_BOOTLOADER_MCUBOOT=y
    CONFIG_NCS_SAMPLE_MCUMGR_BT_OTA_DFU=y

    Everything works perfectly. The only difference is that I don't use the merged.hex file, instead I use the app_update.bin file as indicated in the guide.
    At this point, before going any further, I have some questions:
    1) with the old bootloader (nRF5 bootloader) I had to define a private key in the dfu_public_key.c file. I guess it's to encrypt the DFU packet. Regarding the MCUboot, is there a private key to set?

    2) I can't use the west command. I use VSCode to compile the code and in fact VSCode uses the west command. For example:

    west build --build-dir c:/GitHub_Repository/spi_flash/build c:/GitHub_Repository/spi_flash

    I installed west with package manager (pip3) but when I use the same command I get the following error:

    west: unknown command "build"; do you need to run this inside a workspace?

    I run the west command in my workspace. How do I solve the problem?

    Thank you.

  • Stefano1984 said:
    1) with the old bootloader (nRF5 bootloader) I had to define a private key in the dfu_public_key.c file. I guess it's to encrypt the DFU packet. Regarding the MCUboot, is there a private key to set?

    Yes, see Adding MCUboot as an immutable bootloader -> Adding a custom signature key file

    Stefano1984 said:
    I run the west command in my workspace. How do I solve the problem?

    Using VS Code is more or less the same as using west, so no need to use both.

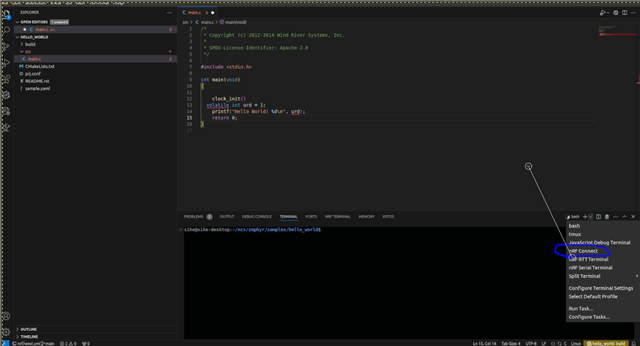
    However, you can use west if you open this terminal:

Reply Children
No Data
Related