This post is older than 2 years and might not be relevant anymore
More Info: Consider searching for newer posts

read back protection puts tag to high current consumption

Hi, I am seeing an issue where after enabling read back protection (rbp) on NRF52 and using sdk 12.1 the tag goes to state where it drains a lot of current.

command used: nrfjprog -f NRF52 --rbp ALL

I have used power profiler to check the behavior, current drain jumps to about ~1.5 mA, from ~120 uA. Since nrfjprog commands are disabled after rbp, issuing a reset command (nrfjprog -f NRF52 --reset) would not help the issue, rather increases the current consumption even higher to about ~3.5 mA (although I see an error message indicating recover command should be used to talk to the chip again, but still the command seems to succeed the first time around and increase current drain even more):

$ nrfjprog -f NRF52 --reset ERROR: The operation attempted is unavailable due to readback protection in ERROR: your device. Please use --recover to unlock the device.

The only way to recover is via a battery pull (pinreset, or debugreset commands also do not seem to fix the issue as the current drain stays high).

Can you please help explain why (and also under what conditions) the chip goes to this state (probably "debug state"?) and how can I recover without a battery pull. I would need to have the rbp enabled and it seems using rbp is only one way the chip could get into this high current drain mode.

**Please help explain other possible conditions that could lead to this high current drain mode.

Thanks.
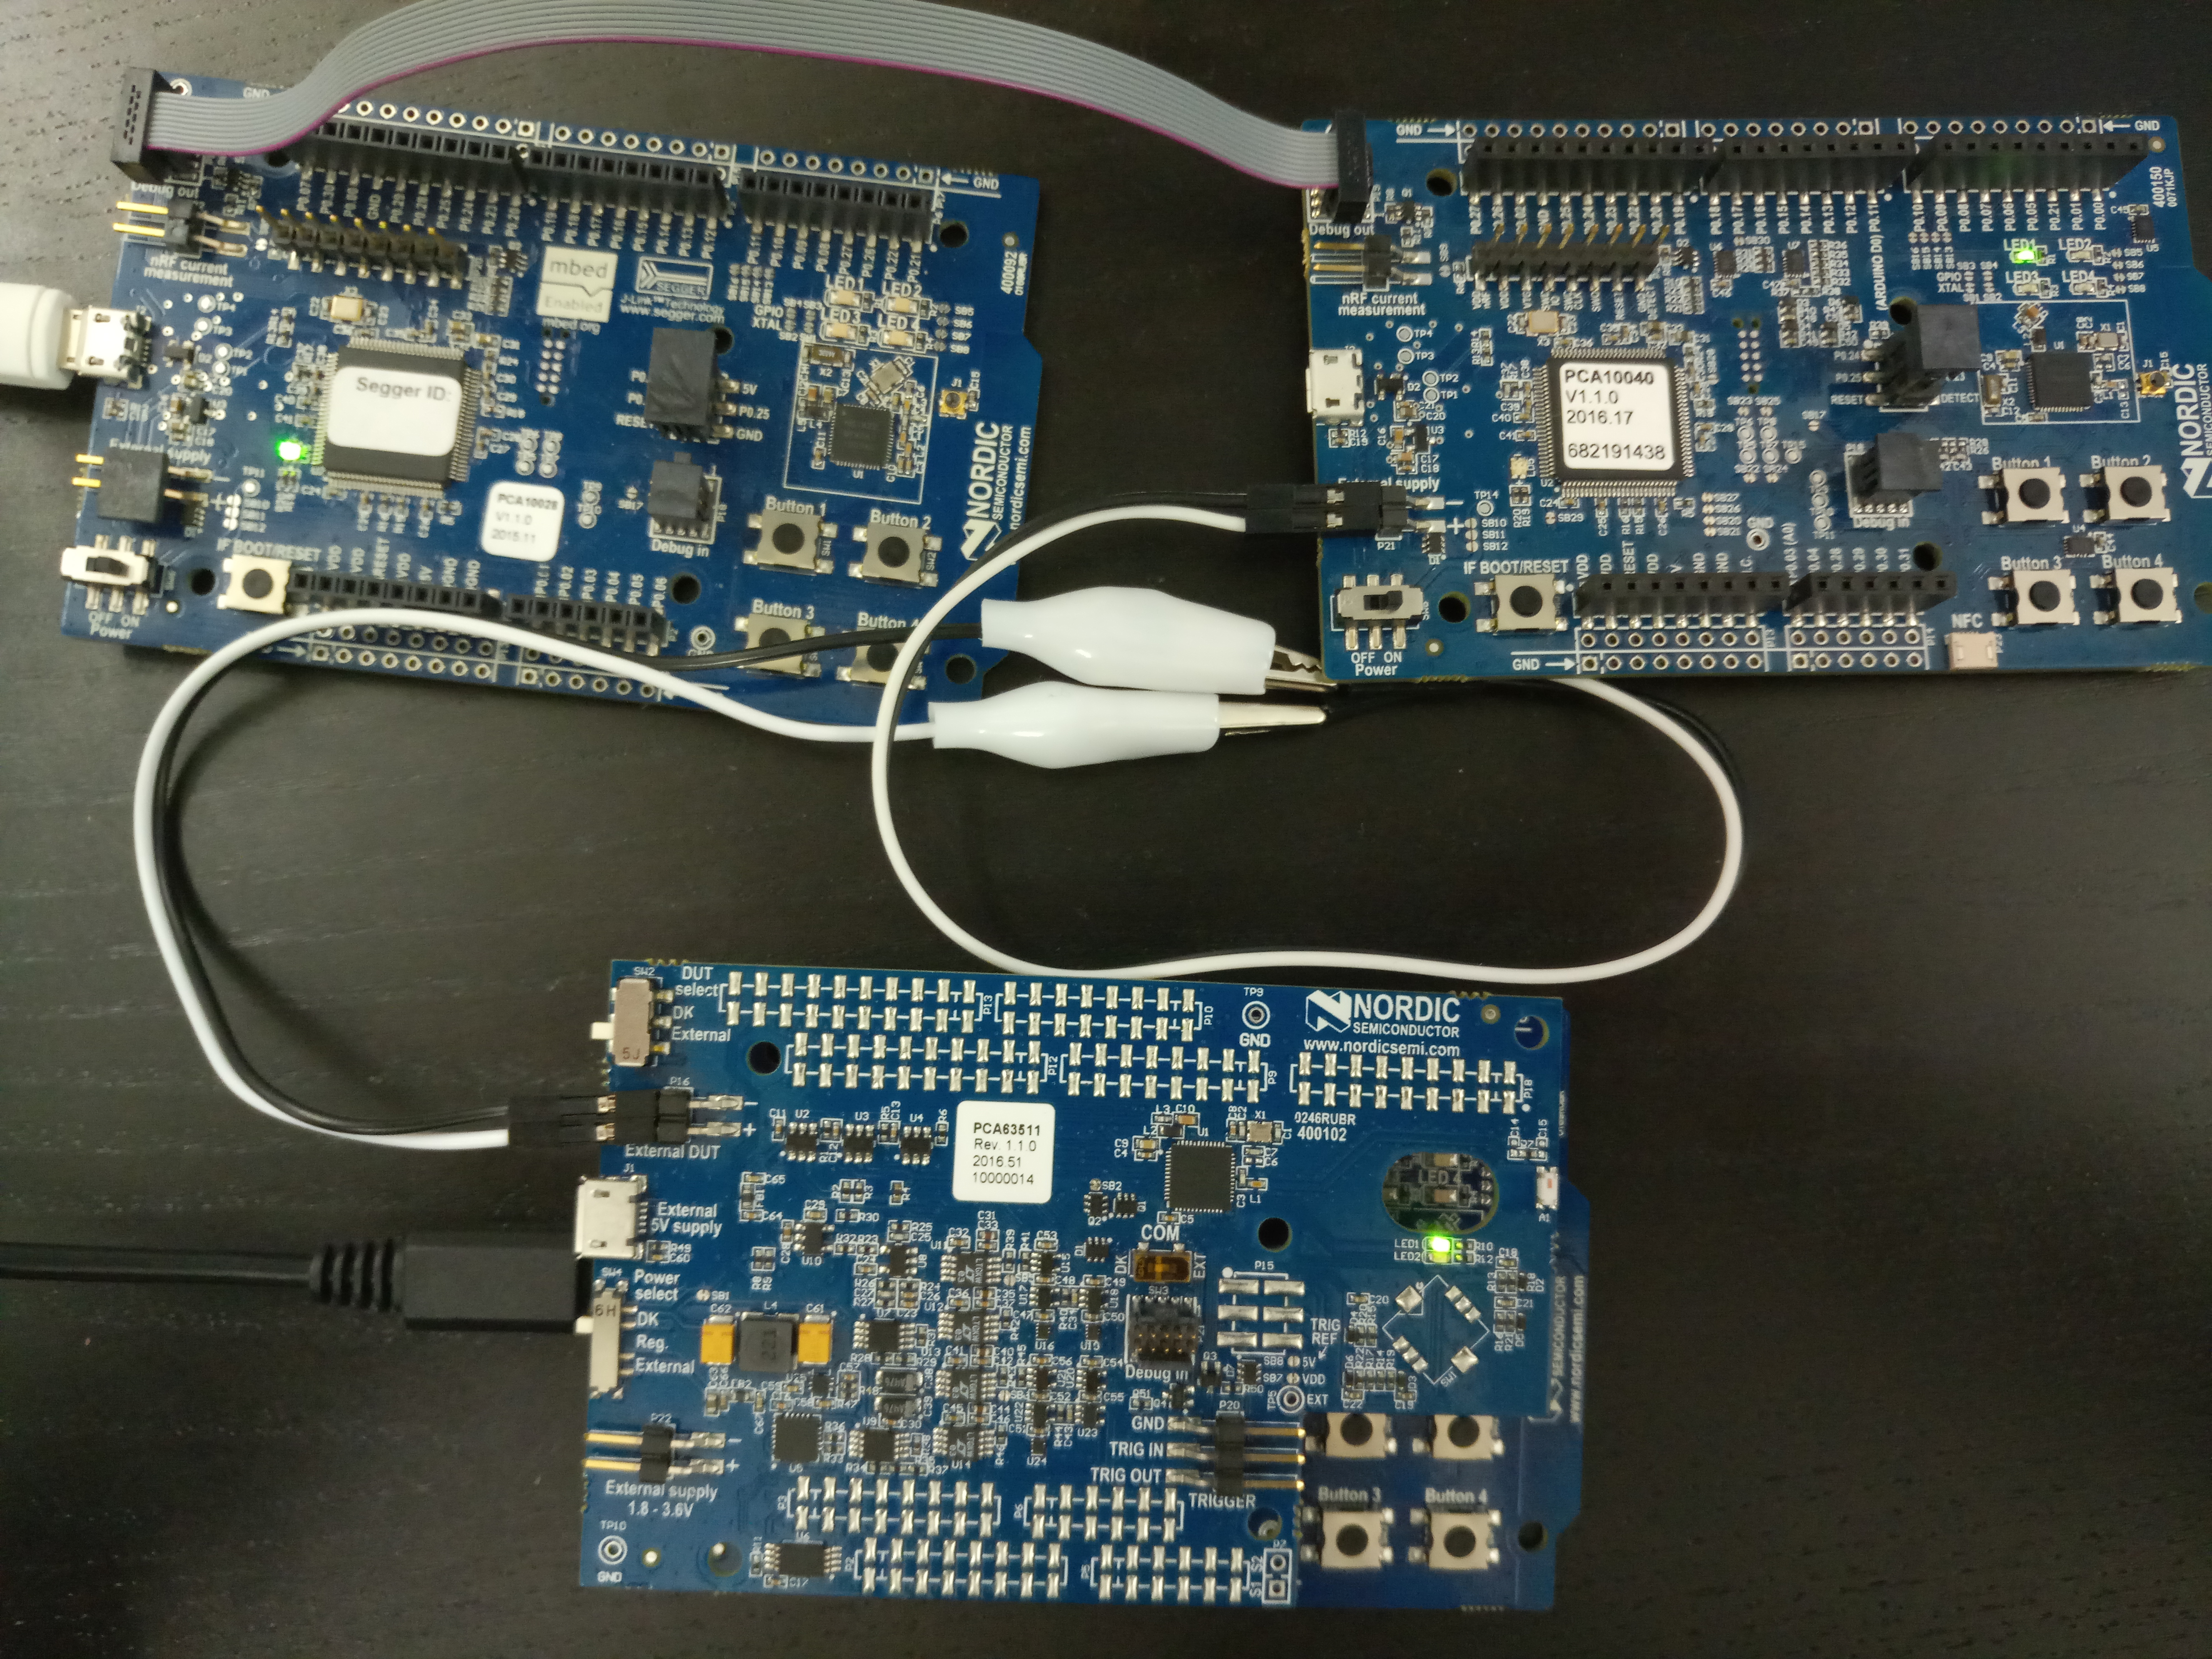
ppk setup

  • The command still works without the pin reset.

    I see that you are also using a Power Profiler Kit. Can it be that the SWD commands are sent to the PPK instead? What if you use a multimeter to monitor the current on P22 so that only the target is connected to your computer?

  • Hi Stian,

    I added a connection from the reset pin (p0.21 on schematics) to the pin 10 of the J1. I can see that the "nrfjprog -f NRF52 --pinreset" command now works and it initiates a reset when chip is locked (--rbp). However the current stays high still (~3.30 mA, after enabling the read back protection).

    Were you able to confirm the behavior on your side?

    I do not think the command is sent to the power profiler kit. Using voltmeter on the P0.19 (pin22) would show the voltage (around 2.71v) also measuring the current on the same pin would always show a constant value of around 190 uA regardless of debug/normal mode.

    Thanks.

  • I tried now with the PPK connected with a separate debugger, powering the DUT on the "External DUT" port. Based on your previous comments I believe this is equivalent to your setup.

    What I did:

    1. Idle current is 2 µA, reading from PPK
    2. nrfjprog --reset
    3. Current is still 2 µA
    4. nrfjprog --rbp ALL
    5. Current is now 3 mA
    6. nrfjprog --pinreset
    7. Current is still 3 mA, so I'm able to confirm the behaviour on my side.
    8. Open "JLink Commander" in windows (or JLinkExe in linux)
    9. SWDSelect
    10. SWDWriteDP 1 0x04000000
    11. Current goes down to 2 µA IDLE again.

    I tried first with JLink v5.10d. But then JLink Commander would not send the SWD commands. Then I tried with v6.16b, and it worked. So maybe it is something wrong with the version you are using. These are my versions:

    nrfjprog version: 9.2.0
    JLinkARM.dll version: 6.16b
    

    Are you using linux or windows?

  • I am using a Ubuntu vm to program chip and windows 7 to power profile (The commands are issued from Ubuntu therefore linux: JLinkExe).

    Tried your suggestion on my custom board, still seeing the same issue (does not exit debug mode). Here is the logs and revision of jlink/nrfjprog:

    $ nrfjprog -v
    nrfjprog version: 9.7.1
    JLinkARM.dll version: 6.20e
    
    $ JLinkExe
    SEGGER J-Link Commander V6.20e (Compiled Oct  6 2017 17:06:37)
    DLL version V6.20e, compiled Oct  6 2017 17:06:32
    
    
    Connecting to J-Link via USB...O.K.
    Firmware: J-Link OB-SAM3U128-V2-NordicSemi compiled Jul 24 2017 17:30:12
    Hardware version: V1.00
    S/N: 681792490
    VTref = 3.300V
    
    
    Type "connect" to establish a target connection, '?' for help
    J-Link>SWDSelect
    Select SWD by sending SWD switching sequence.
    Found SWD-DP with ID 0x2BA01477
    J-Link>SWDWriteDP 1 0x04000000
    Write DP register 1 = 0x04000000
    J-Link>
    

    I also have a board with pin reset connection you suggested earlier. Trying the same command on it would also not exit debug mode. Also tried just the pinreset command and it also seems to put the tag in the high current mode (very strange!). For your reference here are the command sequence:

    1. Program tag
    2. check the current drain and issue a reset to make sure: nrfjprog --reset
    3. run pinreset and monitor the current nrfjprog --pinreset
    4. the current drain jumps to around ~3 mA. This is even without rbp enabled.

    I am currently trying to use the same setup as yours to eliminate any hw issues on my custom board. Attached please find the setup I am using to measure the current and issue commands (rbp/reset/etc.) at the same time (screenshot attached above).

    1. The nrf52 dev kit is running the below hex file (top right dev kit). nRF5_SDK_12.1.0_0d23e2a\examples\ble_peripheral\ble_app_beacon\hex\ble_app_beacon_pca10040_s132.hex
    2. It is powered via the devkit(nrf51) and ppk setup (buttom dev kit -- connected to windows 7 host).
    3. A third dev kit (nrf51 -- top left -- connected to Ubuntu vm) is used to issue commands via the ribbon cable as shown on the screenshot. However, the commands are not directed to the NRF52 chip. Instead they are directed to the nrf51 kit (top left dev kit). (Please let me know if there is a jumper setup that would direct the command to the nrf52 kit. If the setup is not correct please share your setup).
    4. On the ppk ui I see the average current about ~550uA (which application you are using that would give 2uA?)
    5. Please note that this is the same setup I am using when using my custom board to measure current (here in the screenshot it is only replaced with NRF52 kit -- top right board).

    Thanks.

Related