This post is older than 2 years and might not be relevant anymore
More Info: Consider searching for newer posts

Program on Thingy52

I am starting with Thingy and I am having some troubles. Background is I have done some work with nRF52840 that sends beacons one-by-one with different payloads. And then receive the beacons and do decode. I am trying to do the same on Thingy but I cannot find startup examples. And I have several problems with Thingy.

First, I am not familiar with the words using across the materials, like firmware and bootloader. I have read the article about FW architecture from the infocenter, but I still have questions about it. Like, for my need, do I need to change the FW? And/or the bootloader? Second, I don't know how to flash a program onto the Thingy, it appears that you can use OTA with another 52DK to flash, is this correct? Third, I am using Thingy with 52832. Can I use S140 on it?

Parents
  • Hi mich_x. Firmware is essentially software (SW) which is designed for a specific piece of hardware. So for the Nordic Thingy, the firmware is the SW that makes the Thingy:52 do the things it can do. The SW has been specifically designed to work for the Nordic Thingy:52. A basic bootloader executes an application located at a specific memory location (see the bootloader module for more info). You will most likely need to change the FW to run the Thingy as a beacon, yes. To run custom FW on the Thingy, you will need use the secure dfu bootloader. Also, take a look at this link for compiling new FW for the Thingy. As the Thingy FW is based off of SDK v13, you should take a look at SDK 13 examples if you want to use the Thingy as a beacon.

    For flashing the Nordic Thingy FW onto the Thingy, you can either use Over the Air DFU or use a wired connection. See this link for more info on OTA-DFU. See this link for more info on the wired connection option.

    Regarding the softdevice, you cannot use the S140 Softdevice on it. You will need to use the s132 v4.0.2 Softdevice.

  • You can still flash your custom FW via OTA-DFU. OTA-DFU is a bit more complicated when flashing custom FW because you need to use the secure dfu bootloader I refer to in the answer. I am pretty sure you can re-flash the same FW OTA. The wired connection option is easier because you can just connect the Thingy to an nrf51/52 DK, plug in the 10 pin cable to the Debug Out Pin (P19) in the DK, turn both devices on & then use nrfgostudio to erase the DK, program the correct softdevice on the Thingy (i.e. v4.0.2) & then flash your custom FW.

  • So I was following the instructions on how to OTA-DFU. But I came into some problems. First of all, the nRF Connect interface seems different now from the instructions. I have to choose an APP to start connecting. So I chose Bluetooth Low Energy to connect to nRF528400. 

    Then in the tutorial. It says "Expand the FE59 service section and enable notifications by clicking Toggle notifications. Then, type 01 into the FE59 field. Press Enter or click Write."

    But I cannot see FE59 services in the new connect interface. Does this mean something is wrong?

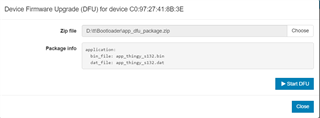
  • So I tried to DFU anyway. First, I tried the firmware update button on the nRF Connect

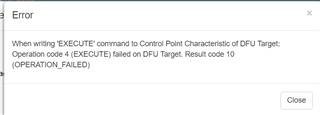
    But I got this error

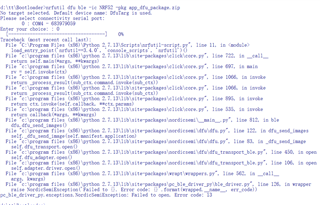
    Then I tried the command line nrfutil tool. But got this error

    I have confirmed that the Thingy has entered the DFU mode. I can see the name changed to ThingyDFU and the address plus by one.

  • I have a quick question: Is there a good reason why you are using OTA-DFU with the Thingy instead of programming via a 10-pin SWD cable via an nrf52 DK? The wired solution is a lot easier to do if you do not require the DFU functionality. I have not tried OTA-DFU on the Nordic Thingy yet, so if you really want to figure this out, I will need to test it out myself.

Reply Children
Related