This post is older than 2 years and might not be relevant anymore
More Info: Consider searching for newer posts
This discussion has been locked.
You can no longer post new replies to this discussion. If you have a question you can start a new discussion

UNABLE TO GENERATE PRIVATE KEY

Hi,

I am following a tutorial in order to learn the procedure for DFU OTA . I installed the nrfutil but still unable to generate the private key.

I have tried several commands like :

nrfutil.exe keys generate private.key

nrfutil.exe keys generate priv.pem

but it did not work

I think i am using the latest version . 5.0.0

I am getting such errors : TypeError: write() argument must be str, not bytes
NameError: name 'raw_input' is not defined

Please suggest.
Could I be in wrong directory while writing these commands ?
C:\Users\ArshdeepMalik>nrfutil.exe keys generate private.key

Thanks much!

Parents
  • Hi.

    Please answer these questions:

    1. Which version of Python do you use? (You can check by typing python --version in cmd)

    2. Do you have the correct path in Environment Varables? (Check the path by typing where python in cmd)

    3. Can you check which version of nrfutil you have? (Check by typing nrfutil version in cmd)

    4. Have you also added the folder Python27\Scripts to the path in Environment Varables? 

    Best regards,

    Andreas

  • Hi Andreas,

    Which version of Python do you use? 3.7.2

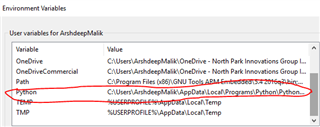
    Do you have the correct path in Environment Varables?  Yes,

    Can you check which version of nrfutil you have? 5.0.0

     Have you also added the folder Python27\Scripts to the path in Environment Varables ? I did not have it before, but added after your comments but still getting error .

    NameError: name 'raw_input' is not defined

    Please suggest!!

    Thanks,

  • Hi Arshdeep.

    Can you try to do it the following way:

    1) Program the bootloader found in the folder \examples\dfu\secure_bootloader\pca10056_ble_debug with the private key you generated.

    2) Compile the project found in the folder \examples\ble_peripheral\ble_app_blinky\pca10056.

    3) Take the .hex file from step 2 and generate the DFU packet with the private key from step 1.

    nrfutil pkg generate --hw-version 52 --application-version 1 --application ble_app_blinky_pca10056_s140.hex --sd-req 0xA9 --key-file private.pem app_dfu_package.zip

    4) Do a nrfjprog -e on the board to erase the pervious stored memory.

    5) Program the bootloader from step 1.

    6) Open nRF Connect Bluetooth Low Energy and try to do the DFU from your second board.

    Can you post some screenshots and log of the process? Does this work?

    Best regards,

    Andreas

  • Hi Andreas,

    1) Program the bootloader found in the folder\examples\dfu\secure_bootloader\pca10056_ble_debug with the private key you generated. : You mean public_key.c right ??? and not the private key . 

    5) Program the bootloader from step 1. : Program the bootloader again? I did not understand this . should I program the bootloader in the second board ? 

    6) Open nRF Connect Bluetooth Low Energy and try to do the DFU from your second board. How to do the DFU using the second board ? I do not know. Do you have any link where i can learn how to do DFU using second board. 

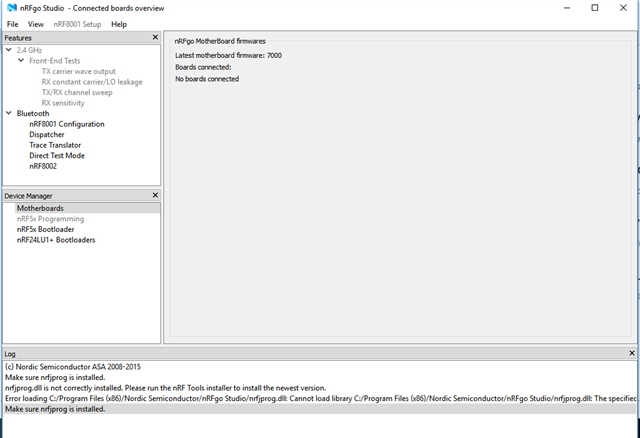
    Also, my nrfGo studio is not able to detect boards :

    It used to work fine in past. I tried uninstalling and installing it again. Did not work. Does this give any clues for DFU ?

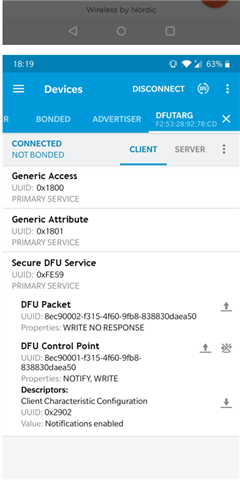
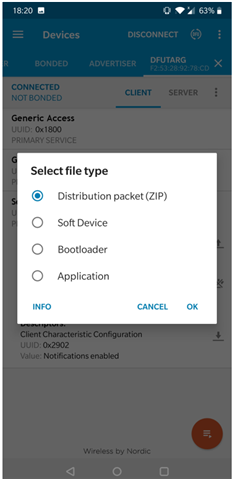
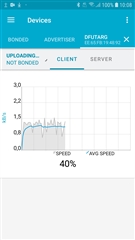
    Also please check the steps that i do when connected through nrfConnect app:

  • Hi.

    Sorry about the confusion, I wrote wrong in step one, i should have been "build", and then you could program it later.

    If you use your phone, then you don't need a second board, I thought that you had two boards, sorry about that.

    nRFgoStudio is outdated, so you should not use that. You should use nRF Connect for Desktop and the nRF Connect Programmer Application.

    I did the procedure with my mobile phone now, and it succeeded.

    I built the bootloader with the private key and programmed it onto the board.

    I then built the blinky application.

    I then created the DFU packet with the command in my previous reply.

    And then I did as you show in your pictures and selected the zip file I generated.

    When I finished, the board resets and LED 1 is on.

    Does this happen with your board?

    Best regards,

    Andreas

  • How do I build the bootloader using the private key? it should be the public key right ??

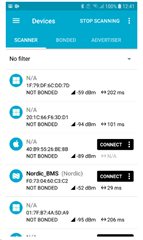
    As I told you, I did try this procedure once but now every time I flash (with normal SES IDE using a USB cable, not even with dfu) any program from ble_peripheral example, I end up in a DFU mode Though it works fine if I flash any program from peripheral example.

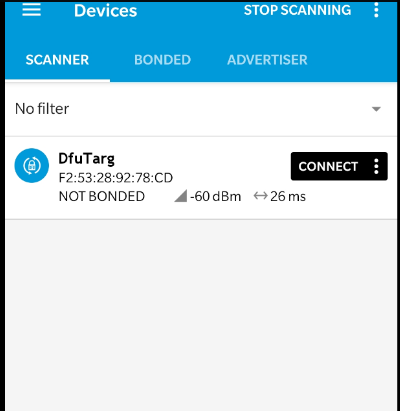
    see in the attached pictures, I flashed ble_app_bms example but the board is advertising as DfuTarg

  • Also can you please tell the steps to erase the memory using command line tools (nrfprog -e) . Have never used command line tool. or is there any other way to do so ? if knew how to do it using nrfGo studio but now that does not work . 

    Thanks, 

Reply
  • Also can you please tell the steps to erase the memory using command line tools (nrfprog -e) . Have never used command line tool. or is there any other way to do so ? if knew how to do it using nrfGo studio but now that does not work . 

    Thanks, 

Children
  • Hi.

    Sorry for the confusion, I will try to make things a bit clearer.

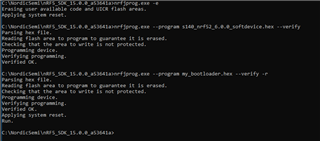
    nrfjprog is a part of the nRF5x Command Line Tools and you can find a user guide here. The installation is described here. And a command reference list is described here.  When you have installed the Command Line Tools, you can open a cmd window and type "nrfjprog.exe -e". This will erase available code and UICR flash areas and reset the device, like this:

    The bootloader question:

    Can we start from scratch, where you follow this procedure:

    Step 1.

    Generate a private key by running this command in cmd in your SDK 15 folder:

    nrfutil keys generate priv.pem

    Step 2.

    Generate a public key file from that private key by running this command in cmd in your SDK 15 folder:

    nrfutil keys display --key pk --format code priv.pem --out_file dfu_public_key.c

    You should now have a file named dfu_public_key.c in your SDK 15 folder.

    Step 3.

    Open the folder nRF5_SDK_15.0.0_a53641a\examples\dfu

    You see that there is a file named dfu_public_key.c, delete this file.

    Take the file you generated in step 2 and move it to this folder.

    Step 4.

    Open up the SES project in the folder nRF5_SDK_15.0.0_a53641a\examples\dfu\secure_bootloader\pca10056_ble\ses and build it.

    After you have built it the folders: \Output\Release\Exe will appear in the folder structure. Open these folders and copy the file named secure_bootloader_ble_s140_pca10056.hex to your SDK 15 folder. This is the .hex file for the secure bootloader you have created.

    Step 5.

    Open the folder nRF5_SDK_15.0.0_a53641a\components\softdevice\s140\hex, and copy the .hex file s140_nrf52_6.0.0_softdevice.hex to your SDK 15 folder.

    Step 6.

    Create an application, for example the ble_app_bms example, and copy the .hex file as you did for the bootloader to your SDK 15 folder (you find the .hex file in nRF5_SDK_15.0.0_a53641a\examples\ble_peripheral\ble_app_bms\pca10056\s140\ses\Output\Release\Exe, named ble_app_bms_pca10056_s140.hex)

    Step 7.

    Generate a bootloader settings page by running this command in cmd in your SDK 15 folder:

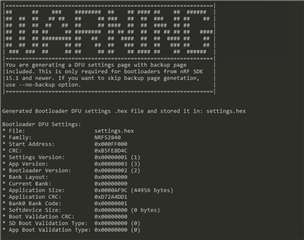
    nrfutil settings generate --family NRF52840 --application ble_app_bms_pca10056_s140.hex --application-version 3 --bootloader-version 2 --bl-settings-version 1 settings.hex

    The output looks like this:

    Step 8.

    Merge the settings.hex and secure_bootloader_ble_s140_pca10056.hex together by running this command in cmd in your SDK 15 folder:

    mergehex.exe --merge settings.hex secure_bootloader_ble_s140_pca10056.hex --output my_bootloader.hex

    The output looks like this:

    Step 9.

    Generate the DFU packet by running this command in cmd in your SDK 15 folder:

    nrfutil pkg generate --hw-version 52 --application-version 3 --application ble_app_bms_pca10056_s140.hex --sd-req 0xA9 --key-file priv.pem app_dfu_package.zip

    The output looks like this:

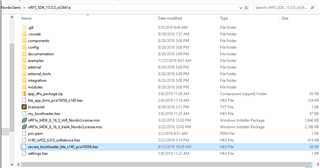
    Step 10.

    You should now have these files in the SDK 15 folder:

    app_dfu_package.zip

    ble_app_bms_pca10056_s140.hex

    my_bootloader.hex

    priv.pem

    s140_nrf52_6.0.0_softdevice.hex

    secure_bootloader_ble_s140_pca10056.hex

    settings.hex

    Step 11.

    Open the SDK 15 folder in cmd, and write the commands:

    nrfjprog.exe -e

    nrfjprog.exe --program s140_nrf52_6.0.0_softdevice.hex --verify

    nrfjprog.exe --program my_bootloader.hex --verify -r

    The output looks like this:

    You have now programmed the SoftDevice and the Bootloader including the bootloader settings page.

    Step 12.

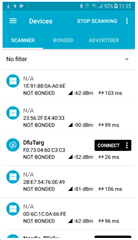
    Open nRF Connect on your mobile phone and scan:

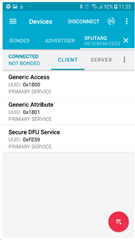
    When you find DfuTarg click on Connect.

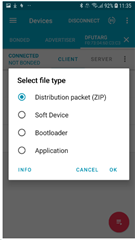
    And click on the DFU button and Select distribution packet (ZIP)

    And select the file app_dfu_package.zip.

    After you have finished the device will reset and start advertising as Nordic_BMS

    Does this make things a bit clearer?

    Best regards,

    Andreas

  • Hi Andreas,

    It did work!!!  You were a great help and support . I am glad to be using a Nordic product.

    I only have one last question, which if you will say I can open a separate ticket for:

    What will be the procedure for our customers to be able to upgrade the firmware using OTA DFU? I see that every time we will have to do a DFU, we need to program the bootloader first . How will our customer using the product will do that ?

    Every time we have a new firmware release, will we have to generate a new set of private and public key ?

    Thanks again Andreas for all the help.

    Regards,

    Arshdeep

  • Hi.

    Sorry for the late reply, I have been away for a few days.

    It depends on what you want to upgrade.

    The reason for programming the bootloader first in the examples, is that we need a bootloader in order to do the DFU. If your Application already has a bootloader, you don't need to program another bootloader.


    The DFU procedure is well documented here, could you take a look at that?

    Best regards,

    Andreas

  • Hi Andreas,

    Yes i figured that by reading through the app notes that I will not have to upload the bootloader again. But my big question is how to switch to DFU mode without a button ??Our custom board does not have a dedicated button for this task . 

    So we will like our board to always start in a  DFU mode, look for new firmware package for initial 30sec and switch back to normal application after that.  This will happen every time we power up the board. 

    To achieve this, I was reading a lot about DFU_BUTTONLESS example but could not figure out the right procedure to do so.  

    Will I have to change the structure of my application or will this logic be implemented inside the bootloader? 

    Can you please provide some guiding steps to do so and if possible a pseudo code .

    Thanks,

    Arshdeep

  • Hi.

    I see that you created a new ticket for this question, so it will be answered there by one of my colleagues.

    Best regards,

    Andreas

Related