This post is older than 2 years and might not be relevant anymore
More Info: Consider searching for newer posts

Having problems with uploading code to my Thingy52.

Hey, i having problems with uploading code to my Thingy52.

Equipment that i using:
nRF DK https://www.nordicsemi.com/Software-and-Tools/Development-Kits/nRF52-DK
Nordic Thingy:52

My computer is using windows 8.1

Things i have done:

Downloaded the Thingy:52-SDK-zip version 2.1.0  from nordic semiconductors webpage.

Followed the Prerequisites steps and run the setup_sdk.sh on this website: https://github.com/NordicSemiconductor/Nordic-Thingy52-FW

Generated the keys as described here: https://nordicsemiconductor.github.io/Nordic-Thingy52-FW/documentation/dfu_generating.html

Replaced the public key with the new public key in this direction “\project\bootloader_secure\” in the Thingy:52-SDK.

Successfully built the project in the direction “\project\bootloader_secure\pca20020\armgcc” in the Thingy:52-SDK with the “GNU Tools ARM Embedded 4.9 2015q3” compiler.

Did this command to generate a zip-file to upload: “nrfutil pkg generate --application nrf52832_xxaa_s132.hex --application-version 25 --hw-version 52 --sd-req 0x98 --key-file private-key.pem dfu-app.zip”

The file nrf52832_xxaa_s132.hex is the file generated from the project in the direction “\project\bootloader_secure\pca20020\armgcc” in the Thingy:52-SDK.

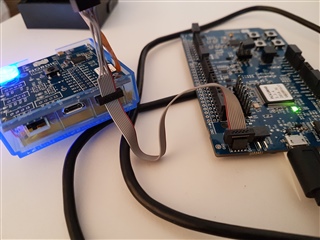
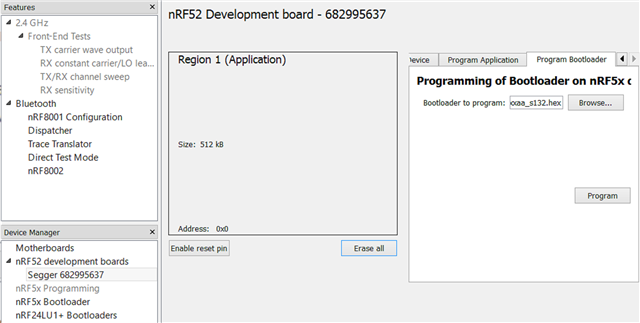
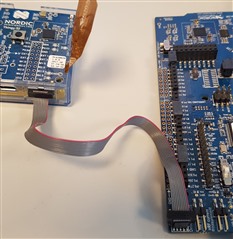
Started nRFgo studio and pressed “erased all” on the softdevice and application for the nRF DK.

Started nRF Conenct v2.6.2 and connected the Thingy52 to th nRF DK and did the following steps:

1. Pressed the "Start Secure DFU button"

2.Choosed the previously generatde zip-fil and then pressed the "Start DFU"

3.And then i get this error message: “When writing 'EXECUTE' command to Control Point Characteristic of DFU Target: Operation code 4 (EXECUTE) failed on DFU Target. Result code 5 (INVALID_OBJECT)”

Does anyone know why i get this error message?

I have also tried the steps above with the SDK from nordic semiconductors git repository from this address:https://github.com/NordicSemiconductor/Nordic-Thingy52-FW

  • Hi,

    You will not be able to update the bootloader of Thingy with your own customer build bootloader, using the DFU solution. This is only possible with bootloaders built by Nordic with our private key.

    It is possible to flash your own bootloader using the debug out port of the DK and a cable like this one.

    Best regards,
    Jørgen

  • Thanks for the answer,

    is flashing the bootloader when you do like this: Starting the nRFgo studio -> choosing your device under the motherboard tab -> program bootloader -> choosing your bootloader hex-file -> press program button?

    I have done the exact same steps as described above but with the project in the directory "project\pca20020_s132\armgcc" in the Thingy:52-SDK and then i also got the error message:  “When writing 'EXECUTE' command to Control Point Characteristic of DFU Target: Operation code 4 (EXECUTE) failed on DFU Target. Result code 5 (INVALID_OBJECT)”. Do you know why i get the error message then also?

  • Did you connect a nRF5x DK debug out port to the Thingy:52, erase the flash, and then flash the new custom bootloader? 

    nRFgo Studio is not recommended for use with nRF52, nrfjprog or nRF Connect Programmer app is the recommended way to erase and flash bootloader/application.

  • Yes i have connected it like this:


    After that i started the nRFgo studio and pressed "Erase all" on both SoftDevice and Application.
    After that i clicked on "Program Bootloader" and choosed the hex-file from the build of the project in the directory “\project\bootloader_secure\pca20020\armgcc” in the Thingy:52-SDK. After that i pressed program and it succeeded.

    Then i started nRF Conenct v2.6.2 and connected the Thingy52 to the nRF DK and did the following steps:

    1. Pressed the "Start Secure DFU" button

    2.Choosed the zip-fil that i generated with the nrfutil from the built project in the directory "project\pca20020_s132\armgcc" in the Thingy:52-SDK and then pressed the "Start DFU"

    3.And then i still get this error message: “When writing 'EXECUTE' command to Control Point Characteristic of DFU Target: Operation code 4 (EXECUTE) failed on DFU Target. Result code 5 (INVALID_OBJECT)”

    The nRFgo studio looks like this for me, should the Thingy52 be visible here cause it seems like the nRF52 DK is visible for me.


  • I do not thing that cable has correct pinout. If you look at the connection on the cable on below image, the red line is swapped on your DK. If it is not correctly wired, you will program the DK rather than the Thingy. You can check this by flashing the blinky application to the DK before performing the erase on Thingy. If the DK stops running blinky, the Thingy have not been erased.

Related