This post is older than 2 years and might not be relevant anymore
More Info: Consider searching for newer posts

Hello World Hard Fault When Executed from mcuboot

Hi,

I am trying to have mcuboot in Zephyr to execute the hello world sample (mcuboot\samples\zephyr\hello-world).

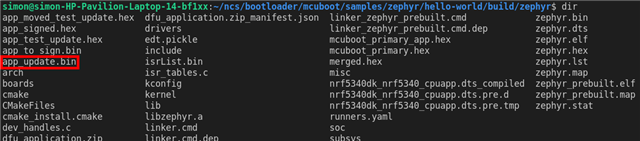
I generated the bin for hello world and signed it as shown below:

python.exe .\imgtool.py sign --key <my_path>\bootloader\mcuboot\root-rsa-2048.pem --header-size 0x200 --align 8 --version 1.2 --slot-size 0x60000 --pad-header <my_path>\bootloader\mcuboot\samples\zephyr\hello-world\build_nrf5340dk_nrf5340_cpuapp\zephyr\zephyr.bin <my_path>\bootloader\mcuboot\samples\zephyr\hello-world\build_nrf5340dk_nrf5340_cpuapp\zephyr\signed-hello.bin

I then program the signed bin to the slot0 partition which starts at address 0x10000. So far so good.

Then, I run mcuboot in Segger, it appears to validate the signed image correctly, but when it jumps to it a hard fault is generated, see below:

*** Booting Zephyr OS version 2.4.99 ***
[00:00:02.678,649] [0m<inf> mcuboot: Starting bootloader[0m
[00:00:02.679,382] [0m<inf> mcuboot: Primary image: magic=unset, swap_type=0x1, copy_done=0x3, image_ok=0x3[0m
[00:00:02.679,901] [0m<inf> mcuboot: Secondary image: magic=unset, swap_type=0x1, copy_done=0x3, image_ok=0x3[0m
[00:00:02.680,328] [0m<inf> mcuboot: Boot source: none[0m
[00:00:02.680,725] [0m<inf> mcuboot: Swap type: none[0m
[00:00:02.773,071] [0m<inf> mcuboot: Bootloader chainload address offset: 0x10000[0m
[00:00:02.773,437] [0m<inf> mcuboot: Jumping to the first image slot[0m
[00:00:06.367,126] [1;31m<err> os: ***** HARD FAULT *****[0m
[00:00:06.367,401] [1;31m<err> os: Fault escalation (see below)[0m
[00:00:06.367,675] [1;31m<err> os: ***** BUS FAULT *****[0m
[00:00:06.367,950] [1;31m<err> os: Precise data bus error[0m
[00:00:06.368,225] [1;31m<err> os: BFAR Address: 0xc[0m
[00:00:06.368,499] [1;31m<err> os: r0/a1: 0x24822bd9 r1/a2: 0x0eef9269 r2/a3: 0xbf1a8b0a[0m
[00:00:06.368,957] [1;31m<err> os: r3/a4: 0x8e883ccf r12/ip: 0xec0c134d r14/lr: 0xb818b317[0m
[00:00:06.369,415] [1;31m<err> os: xpsr: 0xf9e12b51[0m
[00:00:06.369,689] [1;31m<err> os: Faulting instruction address (r15/pc): 0xc5ce9894[0m
[00:00:06.370,056] [1;31m<err> os: >>> ZEPHYR FATAL ERROR 0: CPU exception on CPU 0[0m
[00:00:06.370,422] [1;31m<err> os: Fault during interrupt handling
[00:00:06.370,697] [1;31m<err> os: Current thread: (nil) (unknown)[0m
[00:00:06.376,007] [1;31m<err> os: Halting system[0m

So I think I need to better understand how the signing and addition of the header to the signed image affects the resulting binary. As mentioned, the partition for the image starts at 0x10000, so the code is linked having that as the start address. But if the header is added to the image prior to where it starts, to which address should the signed binary be flashed to? I don't think it should be flashed to 0xFF80 so the header starts there and the application at 0x10000, because that would be overlapping to the mcuboot partition. On the other hand, flashing the image to start at 0x10000 is what I'm currently doing; I think the cause of fault may be because of the shift of addresses due the addition of the header.

Thoughts?

Thanks in advance!!

Parents
  • You don't need to sign the image yourself. Simply add CONFIG_BOOTLOADER_MCUBOOT=y (will add mcuboot as a child image to the sample) to the prj.conf file of the sample <ncs location>/zephyr/samples/hello_world and a signed version of the .bin file should be located in <ncs location>/zephyr/samples/hello_world/build/zephyr/app_update.bin.

    Check out https://developer.nordicsemi.com/nRF_Connect_SDK/doc/1.5.1/mcuboot/readme-ncs.html for more information.

    If you want to use a custom key, use any of the methods below:

    https://devzone.nordicsemi.com/f/nordic-q-a/69344/how-to-create-a-mcuboot-image-and-an-application-image-without-modifying-the-sdk/307039#307039

    Best regards,

    Simon

  • Hi Simon,

    I have CONFIG_BOOTLOADER_MCUBOOT=y in the hello world prj.conf, but I don't see any app_update.bin file generated. The only two bin files I see are the normal output, in this case it is named zephyr.bin, and the isrList.bin.

    Below is the original prj.conf for hello world:

    ------------------------------------------------------------------------------

    # Print a banner on the UART on startup.
    CONFIG_BOOT_BANNER=y

    # Enable console and printk()
    CONFIG_PRINTK=y
    CONFIG_STDOUT_CONSOLE=y

    # Enable Zephyr application to be booted by MCUboot
    CONFIG_BOOTLOADER_MCUBOOT=y

    ------------------------------------------------------------------------------

    This is mine:

    ------------------------------------------------------------------------------

    CONFIG_LOG=y
    CONFIG_LOG_DEFAULT_LEVEL=3
    CONFIG_USE_SEGGER_RTT=y
    CONFIG_LOG_BACKEND_RTT=y
    CONFIG_LOG_BACKEND_UART=n
    CONFIG_LOG_PRINTK=y

    CONFIG_NO_OPTIMIZATIONS=y

    # Enable Zephyr application to be booted by MCUboot
    CONFIG_BOOTLOADER_MCUBOOT=y

    ------------------------------------------------------------------------------

    From the documentation, only CONFIG_BOOTLOADER_MCUBOOT=y should be needed to get a signed image.

    Thoughts?

    Thanks in advance.

  • Could you try to delete the build folder and build it again, and see if you can find "app_update.bin" then?

    Try the following (I used NCS v1.6.0-rc3):

    • Swap original content of <ncs location>/bootloader/mcuboot/samples/zephyr/hello-world/prj.conf with:

    CONFIG_LOG=y
    CONFIG_LOG_DEFAULT_LEVEL=3
    CONFIG_USE_SEGGER_RTT=y
    CONFIG_LOG_BACKEND_RTT=y
    CONFIG_LOG_BACKEND_UART=n
    CONFIG_LOG_PRINTK=y
    
    CONFIG_NO_OPTIMIZATIONS=y
    
    # Enable Zephyr application to be booted by MCUboot
    CONFIG_BOOTLOADER_MCUBOOT=y
    

    • cd <ncs location>/bootloader/mcuboot/samples/zephyr/hello-world
    • west build -b nrf5340dk_nrf5340_cpuapp
    • cd build/zephyr
    • dir
      • Then you should see the following:

    The image "app_update.bin" is the signed image.

    If you don't, please report back to me

    uhrm said:
    From the documentation, only CONFIG_BOOTLOADER_MCUBOOT=y should be needed to get a signed image.

    Yes, that is true. However, a default private key is used to sign the image, so this should not be used in production, only for testing.

Reply
  • Could you try to delete the build folder and build it again, and see if you can find "app_update.bin" then?

    Try the following (I used NCS v1.6.0-rc3):

    • Swap original content of <ncs location>/bootloader/mcuboot/samples/zephyr/hello-world/prj.conf with:

    CONFIG_LOG=y
    CONFIG_LOG_DEFAULT_LEVEL=3
    CONFIG_USE_SEGGER_RTT=y
    CONFIG_LOG_BACKEND_RTT=y
    CONFIG_LOG_BACKEND_UART=n
    CONFIG_LOG_PRINTK=y
    
    CONFIG_NO_OPTIMIZATIONS=y
    
    # Enable Zephyr application to be booted by MCUboot
    CONFIG_BOOTLOADER_MCUBOOT=y
    

    • cd <ncs location>/bootloader/mcuboot/samples/zephyr/hello-world
    • west build -b nrf5340dk_nrf5340_cpuapp
    • cd build/zephyr
    • dir
      • Then you should see the following:

    The image "app_update.bin" is the signed image.

    If you don't, please report back to me

    uhrm said:
    From the documentation, only CONFIG_BOOTLOADER_MCUBOOT=y should be needed to get a signed image.

    Yes, that is true. However, a default private key is used to sign the image, so this should not be used in production, only for testing.

Children

  • Hey Simon,

    We use SES to build our applications. We don't use West so I'm not too familiar with it; still I tried but it is not recognizing the 'build' argument, see below:

    I'm also confused by your previous response to swap the prj.conf because what you wrote are the same contents of the prj.conf file I have.

    As reference, see the contents of the zephyr folder after compiling the hello-world project: 

    I also noticed that you have a couple of files mcu_boot_primary_app.hex and mcu_boot_primary.hex, are those also generated as part of compiling the hello-world project with CONFIG_BOOTLOADER_MCUBOOT=y ?

    Thanks

  • What version of NCS are you using? I just tested this with NCS v1.5.0 opened through the Toolchain Manager:

    • To get the hello-world, I clicked on the three dots left of the "Projects" field and chose C:\Users\<user name>\ncs\v1.5.0\bootloader\mcuboot\samples\zephyr\hello-world
    • Notice that I change the build name to "build" instead of "build_nrf5340dk_nrf5340_cpuapp" due to Windows Path length issues
    • I also checked "Clean Build Directory"

    • Then I clicked on "Build Solution"

    These files were then generated, including "app_update.bin"

    Can you follow the exact same steps and see if you get the same result?

    uhrm said:
    We use SES to build our applications. We don't use West so I'm not too familiar with it; still I tried but it is not recognizing the 'build' argument, see below:

     Check out 1.3.2 Build and flash to see how to build using west

    Best regards,

    Simon

  • Hi Simon,

    I use NCS v1.5.1. So, I moved ncs to make the overall path shorter, and also shortened the build folder as you did. Followed the same steps than you and now I get the signed files! There seems to be a strong dependency on the path length though.

    Anyway, I will keep an eye on this, but for now seems to work. Thanks for the help.

  • Hi Simon,

    I have now a board programmed with the mcuboot and the smp_svr sample, and I can see the device in the nRF Connect app in an Android phone. I have signed another application that I use to test the DFU (note that this application does not currently have BLE support).

    So, I start the DFU process and in the app I am prompted to select a mode:

    - Test and Confirm

    - Test only

    - Confirm only

    When I either select 'Test and Confirm' or 'Test only' I see the download starts followed by a validation. Then after a reboot the application runs, but I see from mcuboot that the swap type is 'test'. As expected, after another reboot the device reverts and runs the smp_svr sample. If I reconnect with the phone app and do the DFU again selecting 'Confirm only', then this time the swap type will be 'permanent'. The latter is the scenario I would like to have.

    My question is, shouldn't 'Test and Confirm' download the image and make the swap permanent? If not, what is the difference between 'Test and Confirm' and 'Test', because from an outside perspective they appear to do the same thing, and only after 'Confirm only' the application is permanently swapped.

    Is there any documentation for the modes that one can select in nRF Connect?

    Thanks in advance.

Related