This discussion has been locked.
You can no longer post new replies to this discussion. If you have a question you can start a new discussion

nRF53: What files to add to project Git Repo

Sorry if this is a repeat ticket. I've done some searches and they result in information around Zephyr and RF Connect SDK Git repos and West usage to manages related source files and builds. But the search hasn't not yet reveled any info about what directories / files in my development environment I should be put in my project Git repo to be able to reproduce the build at a later date.

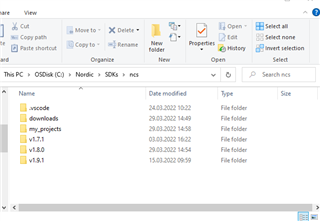
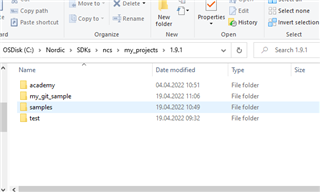
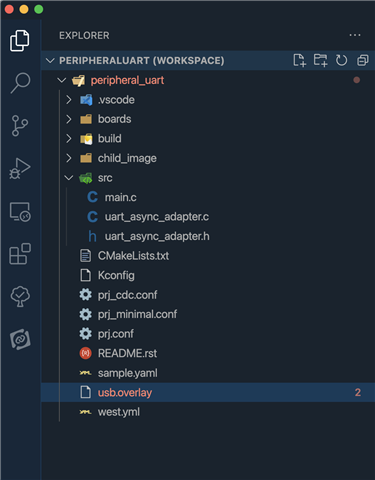
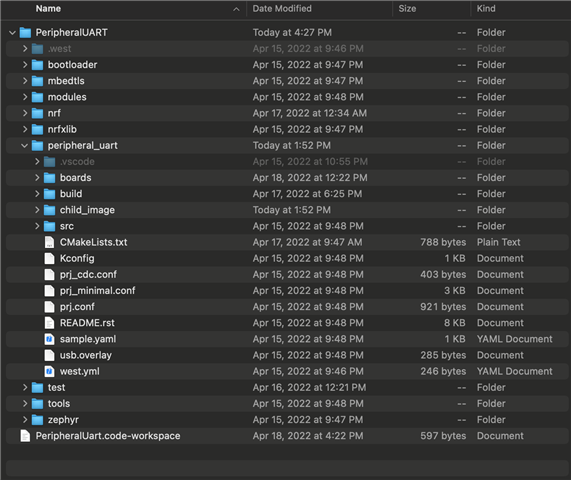
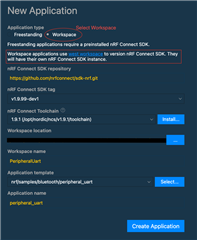
In my case, I used VSCode with the nRF Connect Extension Pack plugin and started with the peripheral UART sample created as a "workspace". So, I think my environment has all of the source files, moet cloned from versioned repos by west, and some files I am modifying or adding to the project.

So now I want to take what I have created and get it into a new project Git repo that I will manage on Github. But I don't know what directory to init my git repo, how to define my .gitignore (is there a standard nRF Connect SDK ignore file?), and what files to confirm are under source code management.

Any suggestions or pointers to info that defines how to manage my files with Git would be great.

-Brad

  • Hi Brad,

    Correct me if I'm wrong, but as far as I'm understanding you're getting started developing and want to upload a NCS-projects that you've written such as a modified peripheral_uart to to your own github repository. Also, in case you're either new or intermediary to developing with nRF Connect for Desktop in VSCode, the Nordic Academy page has a great getting started guide you might want to check out!

    So now I want to take what I have created and get it into a new project Git repo that I will manage on Github. But I don't know what directory to init my git repo,

    In general you only want your application uploaded to git and to have the SDK (nRF Connect for Desktop) and its toolchain set up locally on the computers. Doing it this way allows you to build and flash the application on your local device where you clone your github-repo to. If you're doing it this way, then I would add the build folder to the .gitignore file.

    There are multiple ways to create and work with your application, but I personally prefer to write my projects in a "my_projects"-folder on the same level as the toolchain. The application you're writing can still be created from existing samples through the nRF Connect extension and developed in VSCode.

    Where you may organize your applications according to what toolchain you're working with (1.9.1 or 1.8.0 etc), where "my_git_sample" is the sample app for demonstration purposes. This folder contains a "hello_world"-sample with an additional .gitignore.

    From here, you must have installed git on your Windows machine through a tutorial such as this step by step guide from pheonixnap.com (or other similar tutorials. This was just the first search I found). 

    So now I want to take what I have created and get it into a new project Git repo that I will manage on Github

    The first step is to create a empty git-repo on your github. 

    After this, you will be prompted from a quick-setup to either add something to the repo through bash/cmd/desktop. Choose the method suited for you based on if its a new or existing project. 

    If you choose method "existing repository", open up a git bash window to that application folder (in my case the path is C:\Nordic\SDKs\ncs\my_projects\1.9.1\my_git_sample), and write the lines from the quick setup. You might have to set up a git token or two-factor on your git to allow you to set up remotes from bash, but that should be relatively quick to set up if you have not done so already.

    how to define my .gitignore

    The .gitignore can be defined by simply creating a new file in the application folder (either from explorer or adding a new file in vscode), and naming it ".gitignore". Here you write what folders you want to ignore, such as "build/", meaning all files in the folder named build.

    I hope this gets you started, and let me know if you have any additional questions!

    Kind regards,
    Andreas

  • Hello ,

    Thank you for that very thorough explanation. It was helpful and I think it will be helpful to many others as well.

    I have been developing on nRF528xx devices for some time now, but just getting start with the Zephyr based nRF Connect SDK for a nRF5340 project. Could you help me a little more with a specific case? Sorry for repeating the scenario, but I want to give a little more detail.

    As I stated I’m used VSCode with the nRF Connect Extension Pack plugin. From the “nRF Connect for VS Code” welcome screen I selected “Create a new application from sample…”. In the next screen, for Application type I selected “Workspace”. I made this selection because, as the description states,

    “Workspace applications use west workspace to version nRF Connect SDK. They will have their own nRF Connect SDK instance”.

    This is a great option because it means if I clone the git repo on a different machine, or a colleague clones the repo, we don’t have to worry about what SDK / tool chain version to install, as “west” will pull in everything needed, with the correct versions.

    So, when I complete the process, this is what my VS Code project looks like:

    And it builds without error, and I can flash it to my nRF5340 dk, step through code, see variables and memory space, etc. Alls great so far but notice in the image above, none of the zephyr or nRF Connect files are in the workspace. So where are they? One level up as you can see in this image:

    So, my questions are with respect to this configuration...

    1. Where do I initialize the git repo in this directory structure so when it is cloned, and west invoked, the entire project is replicated, which will build, flash, and run without error? Looking at the second image, should it be at the PeripheralUART level? Or the peripheral_uart level?

    2. What should the contents of the .gitignore be so only the necessary files are added and tracked in git? I know how to create the .gitignore, but in need to know, for the zephyr based project that uses west workspace, what should be ignored in addition to the build directory.

    A follow up question that has come up since my first post

    3. If changes are needed to the nRF SDK or zephyr files, how do those get included and tracked in git. For example, if NUS is used but the UUID needs to be changed how would that be done so change would be in the git commit? Would he whole SDK have to be added to the git repo?

    Thank you,

    Brad

  • Hi Brad,

    Thanks for filling in with more details on your configuration. I will do my best to answer them in turn!

    1) In this case it would be where the SDK is installed, I.E the root workspace folder PeripheralUART. If you initialize the git repo at periphehral_uart, it will only take the application project folder in a similar manner to what I suggested in my previous reply.

    Although this might seem like a optimal solution, I believe this will and may cause some possible time consuming issues down the line.

    One possible issue is that the SDK- and your project folder is over 4GB large, which will require quite a lot of files to both commit, pull and push whenever you're swapping devices or your colleagues clones the repository. 

    A second issue I foresee is that you will spend some time to set the SDK up properly due to either some missing paths or that requirements such as nrfjprog has not been installed. The best way to guarantee this is to perform the SDK setup through either the toolchain manager in nRF Connect for Desktop, or through this manual installation guide. Both of these installation methods allows you to quickly swap between west workspaces or SDK versions if desired so after the installation procedure.

    2) This will be trickier. If you end up with going for your desired configuration where the SDK is a part of the git-repo, the only files I can guarantee that it would be ok to omit without diving deep into the SDK structure is the sample folders in zephyr and nrf. This will come with a drawback of having to look up the samples either online or in a separate NCS SDK workspace if you want to investigate how a sample such as central_uart sample works. 

    3) The sample you are suggesting would not require you to change any of the files in SDK or Zephyr, but rather through configuring your application files either within prj.conf in the peripheral_uart folder above or by defined macros in the .c or .h files. All these files can be found within properly initialized application folder. But in case you modify a SDK or Zephyr file, the changes are handled by git! Git only tracks changes in your files, relative to the origin repository. So lets say you have a local repo on your computer that only has the UUID changed (1 code line) relative to the origin, the commit that will be pushed will only be that one line of code. 

    To summarize, if I've understood your configuration properly, you will have to add the whole SDK to the git repo to get it to work as you describe. I would instead recommend you to install the SDK locally either through the automatic install in nRF Connect for Desktop or the manual installation guide linked above, and to only have your application in the repository. Every project I've worked on with NCS has used this "workspace philosophy", since what you want to change is on the application level of folders, and extremely rarely in the SDK files. 

    Let me know if this helps you in any way, and feel free to follow up with more questions if you have any regarding this issue/topic!

    Kind regards,
    Andreas

  • To summarize, if I've understood your configuration properly, you will have to add the whole SDK to the git repo to get it to work as you describe. I would instead recommend you to install the SDK locally either through the automatic install in nRF Connect for Desktop or the manual installation guide linked above, and to only have your application in the repository. Every project I've worked on with NCS has used this "workspace philosophy", since what you want to change is on the application level of folders, and extremely rarely in the SDK files. 

    Actually, I don't think you have understood this correctly. I suggest that you try creating a project from a sample as I have with the Nordic tools, specifically in VS Code with the nRF Connect Extension Pack. If you follow the steps I did, creating the project as a "Workspace" (not Freestanding) you will find that I did not "add the whole SDK to the git repo", but the nRF Connect VS Code plug-in (through the use of "west workspace") cloned all these additional git repos. As you can see in the following screenshot, the Nordic tool tells you the "west workspace" is used to manage the SDK version and it will create its own instance.

    This is not bad, it is actually good. The "west" pulls in the correct version of every thing needed to build the app. But, as you said, I do not want to add these to my git repo as it is unnecessary. I do not need a copy in my git repo because the "west" tool will pull in the correct version of the other git repos; that is its purpose.

    The guidance I need from your engineering team (please reach out to them for their guidance) is clear definition of what items need to be in my git repo so, when cloned and "west update" is executed, the west tool has the correct information to pull in everything else correctly. 

    Again, these are the initial steps I did in VS Code (please, try it yourself): 

    As I stated I’m used VSCode with the nRF Connect Extension Pack plugin. From the “nRF Connect for VS Code” welcome screen I selected “Create a new application from sample…”. In the next screen, for Application type I selected “Workspace”.

    If you try this and look in the director above your project you will see all the other repos were cloned as the workspace was created from the sample. 

  • Hi Brad,

    bbbakke said:
    I suggest that you try creating a project from a sample as I have with the Nordic tools, specifically in VS Code with the nRF Connect Extension Pack.

    This is what I based my previous answer on. If you investigate the folders from your workspace setup and compare it to the SDK installation folder from the automatic installation you will find that they contain the same files, e.g you clone the entire SDK with the exception of the west.yml file within your application folder.

    bbbakke said:
    but the nRF Connect VS Code plug-in (through the use of "west workspace") cloned all these additional git repos.

    Yes, this is what "Application type workspace" does. It "sets up" the SDK in a new instance where you get your instance verified with the addition of a west.yml file that instances which version this application is for. In a freestanding this is not done and instancing and organizing where to put the application is left to the developer. You could compare the west.yml in peripheral_uart in your peripheralUART workspace and consult with the resources below if instancing the project fixes your issue.

    bbbakke said:
    The guidance I need from your engineering team

    Tech support at Nordic Semiconductor are a part of the engineering team, so you've already reached us.

    bbbakke said:
    But, as you said, I do not want to add these to my git repo as it is unnecessary

    Without restating my previous reply here are some new suggestions and resources I recommend you try and/or read up on.

    • Brute force through deleting folders in the SDK, upload to git, clone back, pristine build and flash to see if it works. If it does not work, then there are some dependencies that causes you to require that folder.
    • Managing the code base should give you some tips and tricks if you want to work with git based development and how the SDK folders are related through git and west as well as more info about how to instance 
    • NCS Structure and content as well as this older, but still valid NCS tutorial should tell you more about how the SDK is set and maybe give you more clues about the dependencies between the SDK folders. 

    - Andreas

Related