
Requirements
This hands-on tutorial uses:
- Segger Embedded Studio (SES)
- nRF5 SDK v17.1.0
- an nRF52840 DK
- a BLE-enabled mobile device
You can use an nRF52 DK or nRF52833 DK instead of the nRF52840 DK, but you will need to adapt the steps for those boards.
Setup
- Download and install nRF Connect for Desktop to your PC. Open the tool and install the Programmer.
- Download and install nRF Connect for Mobile to your mobile device.
- Download and install nRF Toolbox on your mobile device. nRF Toolbox is a collection of mobile applications. Source code can be found on GitHub.
- Install nrfutil. The nRF Util application is a Python package and command-line utility that supports Device Firmware Update (DFU) and cryptographic functionality.
- Install micro-ecc. Micro-ecc is a small ECDH and ECDSA security implementation for 32-bit microcontrollers. Step 1 on the linked page says to install 4.9-2015-q3-update of the GCC compiler toolchain for ARM. You should instead install the 9-2020-q2-update. Step 5 is redundant.
- Connect the nRF52840 DK to your PC’s USB port with a data-capable micro-USB cable. Make sure to use the micro-USB port nearest the power switch. Move the DK’s power switch to the ON position. If the LED nearest to the white decal blinks continuously, the USB data lines are not connected. Try another cable or USB port.
Test the Debug example
First, let’s practice running the debug version of the bootloader to understand how the bootload process works. The bootloader will run at boot since there is no other application in place (actually, when programmed, it always runs at boot). Later, we will run the bootloader by pressing a button. Buttonless operation will be covered at the end of the document.
- Open nRF Connect for Desktop on your PC and open the Programmer In the upper-left, click SELECT DEVICE and then click on the nRF52840 DK. Click Add file and browse to:
…\nRF5_SDK_17.1.0_ddde560\examples\dfu\secure_bootloader\pca10056_s140_ble_debug\hex
Select the hex file in the folder and click Open. Click Erase and write. If you are prompted to unlock the part, do so. Wait for the process to complete. This process will completely erase the nRF52840 flash memory and program both the SoftDevice and Bootloader into it.
LED1 and 2 will light on the DK and it will start advertising over BLE as a DfuTarg. Close the Programmer app. - Using Windows Explorer, browse to: …\nRF5_SDK_17.1.0_ddde560\examples\dfu\secure_dfu_test_images\ble\nrf52840
Copy the hrs_application_S140.zip file to your mobile device in a known folder so you can find it in the following steps. I always use the DCIM folder. - There are several mobile and desktop apps that can be used to perform the mobile side of the DFU process. Open nRF Toolbox on your mobile device and tap the DFU Perform the additional installation if required

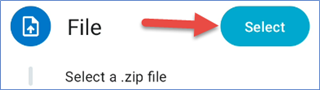
- Tap the Start button and then tap the Select button for the zip file to DFU.
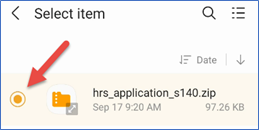
- Browse to the folder where you copied the zip file. Tap hrs_application_s140.zip to select it. Then tap Done at the bottom
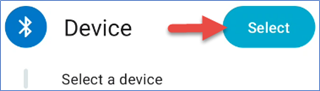
- Tap the Select button for the Device to use. Tap the Grant permission button if needed
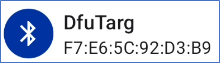
- Find DfuTarg in the Scanner window and tap it
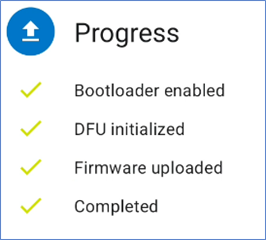
- Tap the Start button and watch the status and progress
- When the DFU is complete, DfuTarg will disconnect, the nRF52840 will reboot and the HRS application will run.
Note that LED1 on the DK is blinking, indicating that advertising is occurring (if the LED stops blinking, press the reset button to reset the timeout).
Run nRF Connect on your mobile device to scan and find Nordic_HRM - Tap the Heart Rate button within nRF Toolbox on your mobile device to connect to the nRF52840. Connect to the Nordic_HRM. Note that LED1 is solid, indicating a connection

The Heart Rate application is programmed to time out and stop advertising after 3 minutes without a connection. Press the reset button on the DK to restart advertising.
Button Initiated DFU
To run the DFU process again, press and hold button 4 on the DK while cycling power. LEDs 1 and 2 will light and you can repeat the process from step 3 above.
Building the Secure DFU Example
In the following steps, we will walk through the DFU build process from a normal customer perspective. In this case, the customer wants to program the SoftDevice, Bootloader, Settings file and Application via SWD during production, and also allow for over-the-air updates in the field by pressing a button when powering up. In both cases, the application must run after the device is booted. However, the bootloader always runs first and will determine if a valid application is in memory via a CRC check. If there is, execution transfers to the application. If not, execution remains at the bootloader.
Keys
- Create a folder called keys on your PC and open a command window in that folder. Referencing these steps, run the commands below to generate your private and public keys. It is crucial to protect your private key to keep your design secure. Nordic has no “back door” to retrieve your keys or break the security if you lose them
nrfutil keys generate priv.pem
nrfutil keys display --key sk --format hex priv.pemnrfutil keys display --key pk --format hex priv.pem
nrfutil keys display --key pk --format code priv.pem
nrfutil keys display --key pk --format code priv.pem --out_file dfu_public_key.c
Do a DIR to verify that new dfu_public_key.c and priv.pem files have been created.
Bootloader
- Browse to:
… \nRF5_SDK_17.1.0_ddde560\examples\dfu\secure_bootloader\pca10056_s140_ble\ses
and double-click on the Segger Embedded Studio (SES) emProject file to open it. - In the Project Items pane on the left, right-click on dfu_public_key.c and remove it from the project.

- Right-click on the Application folder in the Project Items pane and select Add Existing File..
Browse to the keys folder from above, select the dfu_public_key.c file and click Open. On the SES menu bar click Build → Build Solution. Close SES when the build has completed. - Browse to:
…\nRF5_SDK_17.1.0_ddde560\examples\dfu\secure_bootloader\pca10056_s140_ble\ses\Output\Release\Exe
Copy the secure_bootloader_ble_s140_pca10056.hex file and paste it into a temporary folder you create, like C:\NordicWork.
Rename the file there to BL.hex for ease of typing later.
Application
- Browse to:
…\nRF5_SDK_17.1.0_ddde560\examples\ble_peripheral\ble_app_beacon\pca10056\s140\ses
and double-click on the emProject file there to open it in SES. Since your DK is advertising the heart rate service now, we’ll use a different application so that we know the process works.
On the SES menu bar click Build → Build Solution and close SES when the process completes. - Browse to:
…\nRF5_SDK_17.1.0_ddde560\examples\ble_peripheral\ble_app_beacon\pca10056\s140\ses\Output\Release\Exe
Copy ble_app_beacon_pca10056_s140.hex and paste it into your C:NordicWork folder. Rename the file there to APP.hex for simplicity.
SoftDevice
- Browse to:
…\nRF5_SDK_17.1.0_ddde560\components\softdevice\s140\hex
Copy the s140_nrf52_7.2.0_softdevice.hex file and paste it into your C:NordicWork folder. Rename the file there to SD.hex for simplicity.
Bootloader Settings File
- By default, the GPIO connected to button 4 and LEDs 1 and 2 are used for the bootloader. The button is used to trigger the DFU on reset. You can change this behavior as outlined below.
Ignoring the default behavior will likely mean that your design uses those same pins for other purposes, creating a conflict. Buttonless examples will be covered later.
If you want to change the default behavior of the bootloader, there are two methods:
a. Build the bootloader with certain configurations in the h file. This can include changing the GPIO pin for the button, changing to buttonless (which requires application code changes), starting as a Dfutarg and timing out after a certain period, etc. See here .
b. Create a bootloader settings file. The most common change users make is to allow the application to run when the SoftDevice, Bootloader and Application are all programmed via SWD. To do this, a settings file will need to be created and merged with the code to be loaded by SWD. The settings file loads the correct CRC in place to “fool” the bootloader into believing it has already successfully bootloaded the application.
-
Open a command window in the C:\NordicWork folder and use the following command to create a settings file:
nrfutil settings generate --family NRF52840 --application APP.hex --application-version 0 --bootloader-version 0 --bl-settings-version 1 SETTINGS.hex - Do a DIR to verify that the file has been created
Merging Files
- In your C:\NordicWork folder, run the following command to merge the four files into a single hex file. The order that the files are merged is not important.
mergehex -m APP.hex BL.hex SD.hex SETTINGS.hex -o APP+SETTINGS+BL+SD.hex - Do a DIR to verify that the file has been created
Programming
- Run the following command to fully erase the nRF52840 flash. No LEDs will be lit, and no advertising will be occurring (since there is no longer any software in flash).
nrfjprog -e
- Open nRF Connect for Desktop on your PC and open the Programmer app. In the upper-left, click SELECT DEVICE and then click on the nRF52840 DK. Click Add file and browse to the C:/NordicWork folder.
Select the APP+SETTINGS+BL+SD.hex file in the folder and click Open. Click Erase and write. If you are prompted to unlock the part, do so. Wait for the process to complete. This process will completely erase the nRF52840 flash memory and will program all four elements into flash. In a production environment, this is the file that you would program to your nRF52. Close the Programmer app. - LED1 on the DK will be blinking, indicating that the application is running, and the beacon is advertising. Since we have used a Settings file, this behavior is expected.
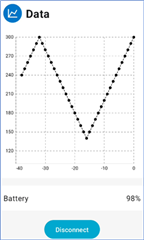
Open nRF Connect on your mobile device and it will automatically scan. Tap on nRF Beacon in the nRF Connect window to display the beacon payload.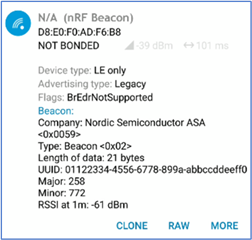
Creating a DFU Package
When we perform the next DFU, it will be more interesting to transfer a completely different application. In that way, we’ll know for sure that the code has changed. For that reason, we’re going to create a zip package using the GLS example.
- Browse to:
…\nRF5_SDK_17.1.0_ddde560\examples\ble_peripheral\ble_app_gls\pca10056\s140\ses
and double-click on the emProject file to open it in SES.
Build the ble_app_gls project as shown earlier and then close SES when the process completes. - Browse to:
…\nRF5_SDK_17.1.0_ddde560\examples\ble_peripheral\ble_app_gls\pca10056\s140\ses\Output\Release\Exe
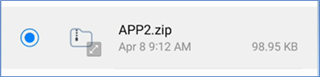
Copy ble_app_gls_pca10056_s140.hex and paste it into the C:\NordicWork folder. Rename the file there to APP2.hex for simplicity. - Copy the priv.pem file from your keys folder into C:\NordicWork.
- Referencing the original steps here, run the following in the C:\NordicWork command window to create a DFU package using your private key. Explanations of the parameters can be found on this InfoCenter page. The Firmware ID (FWID) can be found in the release notes for the SoftDevice being used.
nrfutil pkg generate --hw-version 52 --sd-req 0x0100 --application-version 0xff --application APP2.hex --key-file priv.pem APP2.zip - Do a DIR to confirm that a new APP2.zip file has been created. Copy this file to your mobile device as before. This is the file that you would distribute for performing a DFU in the field, after passing your rigorous acceptance process of course.
- Remember that the DK is currently advertising as a beacon. Double-check if you like using nRF Connect on your mobile device.
- Open nRF Toolbox on your mobile device and tap the DFU button:

- Tap the Start button and then tap the Select button for the zip file to DFU.
- Browse to the folder where you copied the zip file. Tap hrs_APP2.zip to select it. Then tap Done at the bottom
- Press and hold button 4 while cycling the power on the DK. LED1 and 2 will light solidly and the DK will be advertising as DfuTarg. Double-check using nRF Connect on your mobile device if you like.
- Tap the Select button for the Device to use. Tap the Grant permission button if needed
- Find DfuTarg in the Scanner window and tap it
- Tap the Start button and watch the status and progress
- When the DFU is complete, DfuTarg will disconnect, the nRF52840 will reboot and the GLS application will run. Close the nRF Connect DFU application
Note that LED1 on the DK is blinking, indicating that advertising is occurring (if the LED stops blinking, press the reset button to reset the timeout).
Run nRF Connect on your mobile device to scan and find Nordic_Glucose advertising. - To fully run this process again, perform the following steps:
- Use nrfjprog -e to erase the ‘840 flash
- Use the Programmer application to program the APP+SETTINGS+BL+SD.hex file into flash.
- Verify that nRF Beacon is advertising
- Press and hold button 4 on the DK while cycling power
- Use the nRF Toolbox DFU app to DFU the zip file.
- Verify that Nordic_Glucose is advertising
Buttonless DFU
Note that using the button triggered DFU requires no changes at all to your application. The buttonless DFU approach, however, requires that you add an additional service to be advertised by your application. A mobile app can then connect to that service and transmit a code which causes the nRF52 to reboot into DFU mode and advertise as a DfuTarg.
A buttonless DFU template has been included in the nRF5-SDK for you to add this service. See:
https://infocenter.nordicsemi.com/topic/sdk_nrf5_v17.1.0/ble_sdk_app_buttonless_dfu.html?cp=8_1_4_4_1
It is important, if at all possible, to provide a fail-safe for the DFU process if the buttonless process becomes inoperative, usually via a programming mistake in the application code. A coding mistake that breaks the buttonless process will render the device unable to be updated. This can be quite costly and there is no way for Nordic to provide any form of “fix”. Use a button, a DFU timer or other backup technique to alternately trigger the DFU. It may save a lot of money and frustration.
-

Caleb Dueck
-
Cancel
-
Vote Up
0
Vote Down
-
-
More
-
Cancel
Comment-

Caleb Dueck
-
Cancel
-
Vote Up
0
Vote Down
-
-
More
-
Cancel
Children