

The purpose of this document is to give a brief introduction to AWS services, and explain how to connect to these services using nRF9160 devices and the MQTT protocol. The tutorial covers the necessary configurations to the nRF9160 firmware to be able to connect to an AWS IoT endpoint. It also covers how to set up the AWS IoT broker, and how to forward inbound data to other AWS services. The example project in the tutorial is a basic application that sends the modem temperature from the nRF9160 to the AWS IoT core, which forwards the data to the S3 data storage service. For more information about the AWS services, please refer to the AWS documentation. For a more in-depth rundown of the concepts in this post, you should also have a look at the Bifravst example project.
This tutorial was last updated to work for the NCS tag v2.6.0. The tutorial expects users to have either an nRF9160 DK or the Thingy:91, and used the Toolchain Manager app in nRF Connect for Desktop to ensure the development environment, nRF Connect SDK, is configured correctly. Make sure the modem firmware on the device is up to date. Before starting the tutorial you should be registered as a user (root or IAM) on the AWS site.
It is also expected that users have gone through the following guides:
- Getting Started with nRF9160 DK
- nRF Connect SDK Tutorial (Part 1 and 2)
Documentation for master branch (latest) is found in the nRF Connect SDK Documentation.
Contents
- Prerequisites
- AWS cloud services
- Configuring the AWS endpoint
- Configuring the nRF9160 device
- Handling MQTT messages in AWS
Amazon offers a wide range of services for cloud computing on their AWS platform. Some of these are specifically intended for IoT applications, like the IoT service, whereas others can be very useful when processing data from IoT devices, like the Simple Storage Service (S3), or AWS Lambda.
It could be worth looking at the AWS glossary if you are unfamiliar with some of the AWS related terms used in the tutorial, or the AWS documentation in general. I will not be covering any more detailed background information about the AWS services for the rest of the tutorial.
This step requires an AWS account with administrative privileges. If you haven't already registered, this document describes the entire process of registering and setting up the necessary permissions.
In the AWS IoT console, go to 'Manage->Things' and click 'Create things' and then 'Create single thing' and go next. This will create a new endpoint that the nRF9160 device is going to interact with. Before creating the endpoint you will be asked to enter a name for the 'thing', which should correspond to the client-ID when configuring the nRF9160 device later on. You can name it whatever, just make sure to give the client-ID the same value. You will also be asked to give the 'thing' a type and add it to a group, as well as setting searchable attributes, which is something you can do at your own discretion. When you are done, click 'next'.
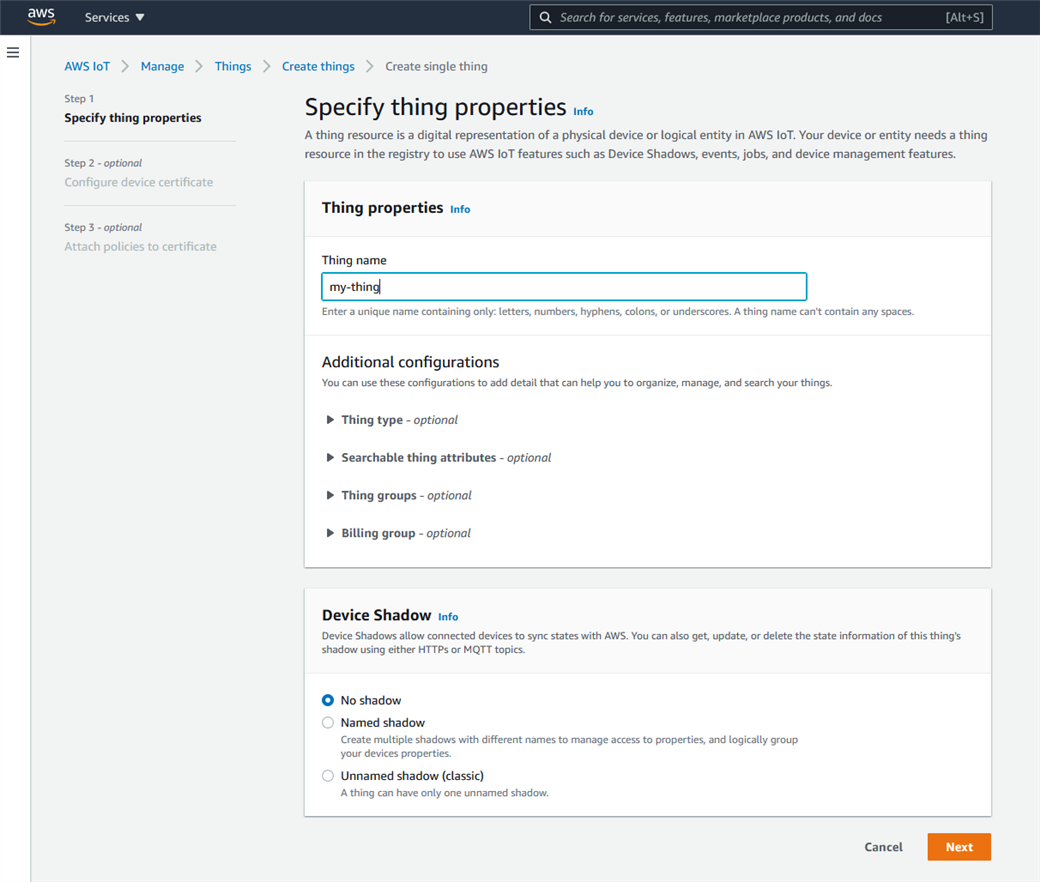
You will be given the option to generate a certificate for the endpoint. Click 'Auto-generate a new certificate' and go next. Skip ahead without creating a policy and click "Create thing". Policies will be handled at a later stage.
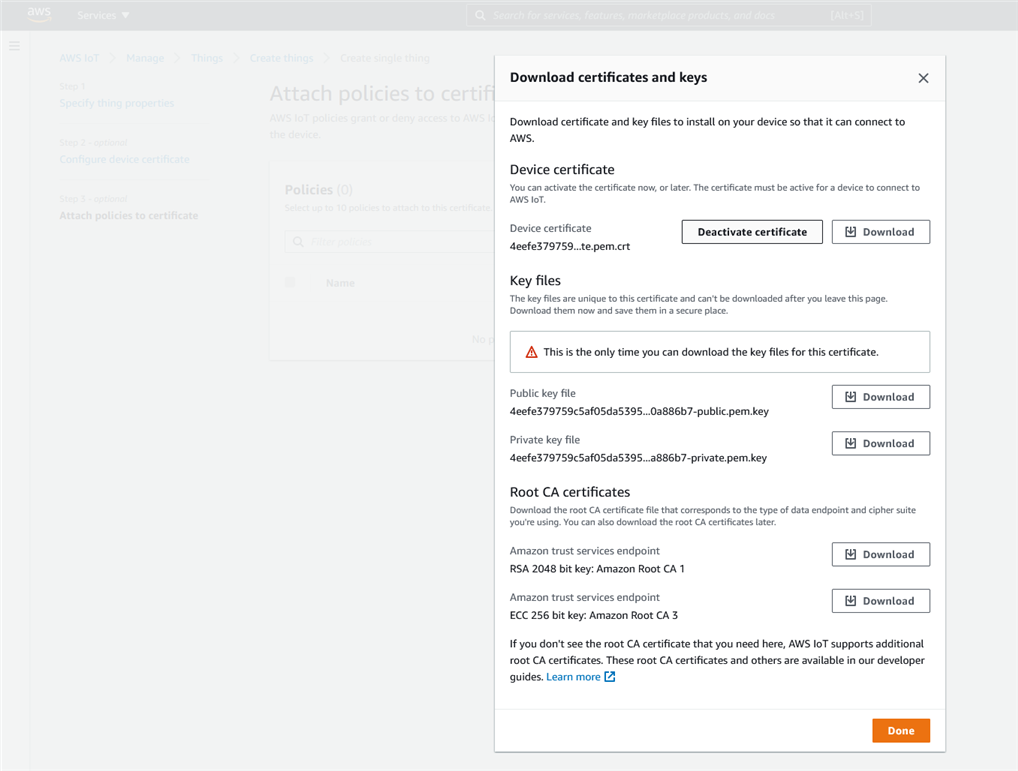
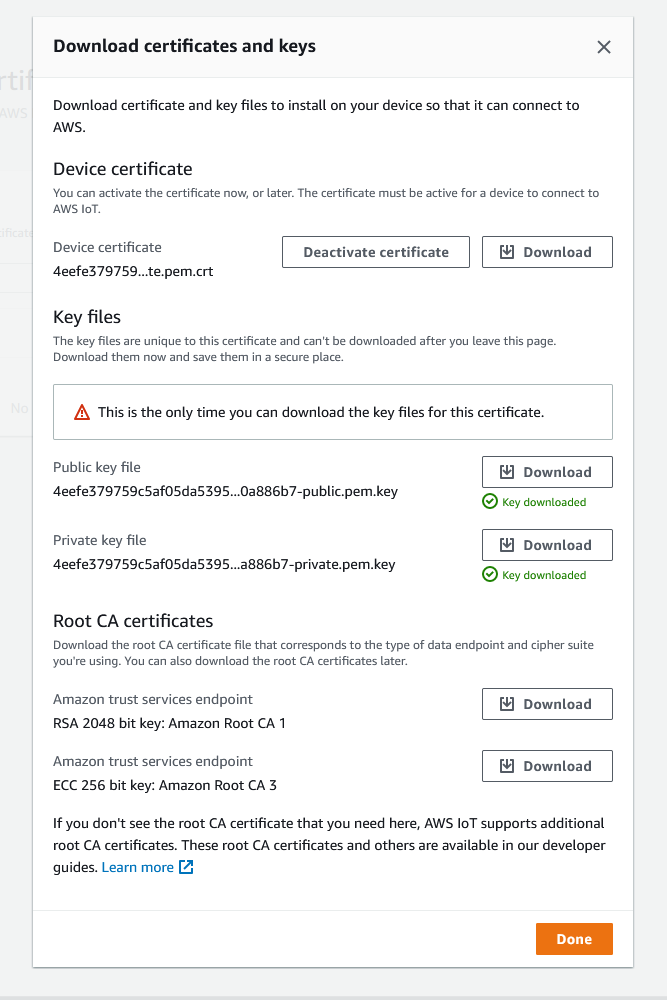
When you get to the next page, you should download the device certificate, as well as the private key and the CA certificate, and store them somewhere safe. You will need them later on when configuring the nRF9160 device. When you leave the certificate page you will no longer be able to retrieve the certificates unless you have downloaded them. When the certificates are downloaded, click done.
You will also need a policy attached to the certificate. Navigate to 'Secure->Policies', and click 'Create'. You will be presented with a page looking something like the below picture.
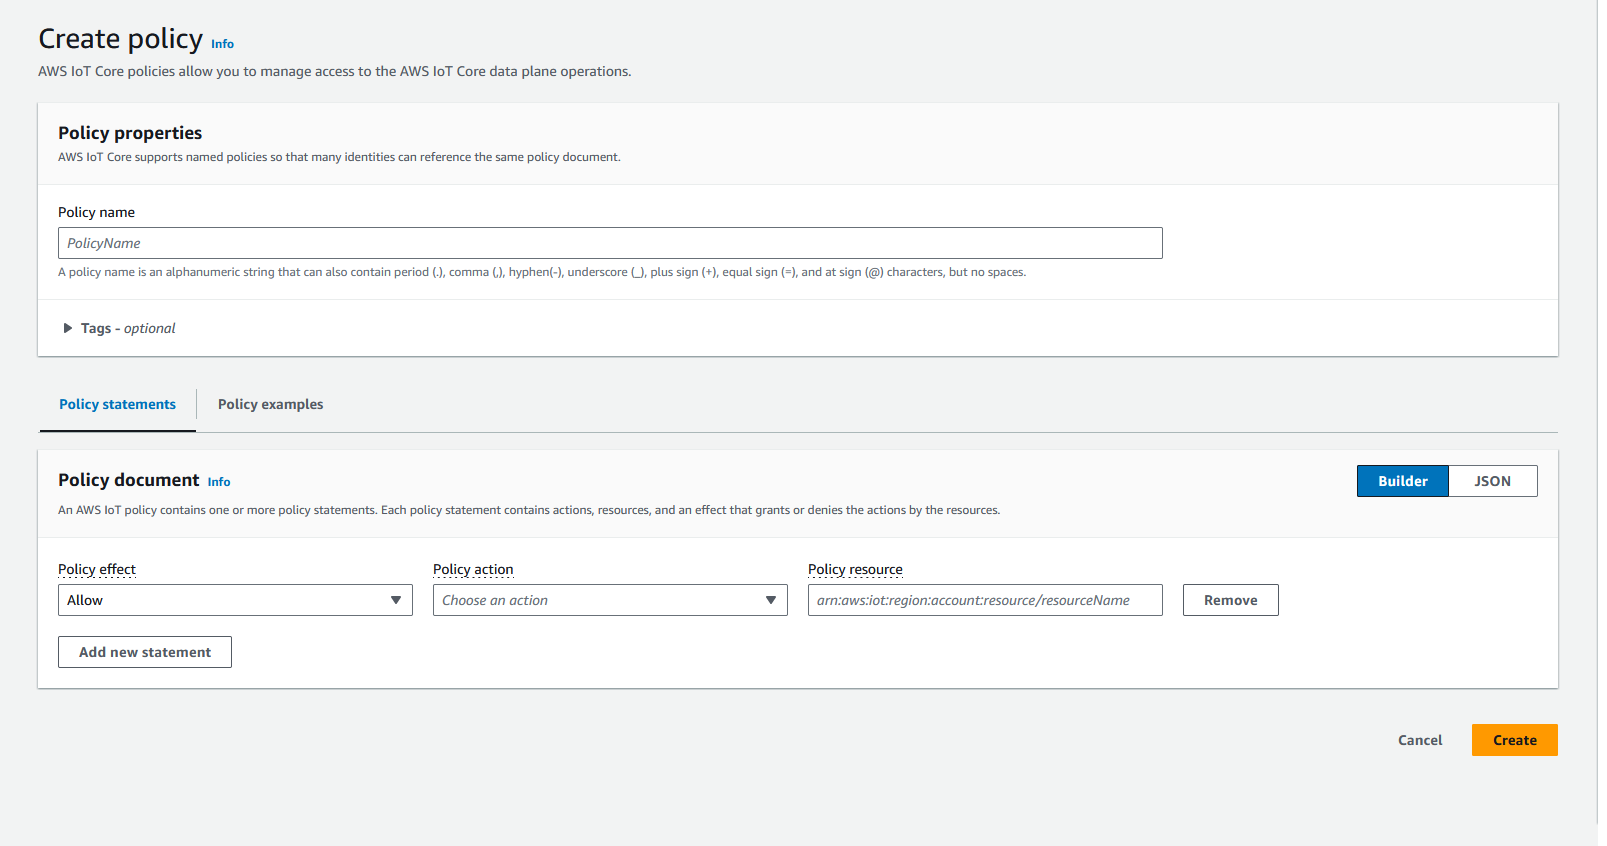
Enter a name for the policy. Click 'JSON' and paste the following text into the box.
{
  "Version": "2012-10-17",
  "Statement": [
    {
      "Effect": "Allow",
      "Action": "iot:*",
      "Resource": "*"
    }
  ]
}
Then click 'Create'. This is a basic policy that allows the device to connect, subscribe, and publish anything to the endpoint.
(Warning; This basic policy is just used as a proof of concept, and should not be used in any sort of commercial solutions or otherwise not strictly for educational purposes. More information about how to set up policies can be found in the AWS documentation about policies.)
Next go to 'Secure->Certificates' and find the certificate that was generated earlier. It should have the status "Active". If you are unsure which certificate to choose, you can check the time it was created by clicking on it. When you have selected a certificate, click 'Actions->Attach policy' and select the policy that was created above.
Configuring the nRF9160 device
At this point, all the necessary configurations to the AWS endpoint should be done. This section will focus on how to install the certificates on the nRF9160 device and how to get a connection to the AWS endpoint.
There are several ways to flash the certificates to the device, but the tutorial will just cover how it is done in the certificate manager. Make sure you have the Cellular Monitor or LTE Link Monitor installed in the nRF Connect app. You also need to flash the AT host to the device. You can do this by building and programming the AT client sample. Open the Cellular Monitor (or LTE Link Monitor), put the modem in offline mode (can be done with 'at+cfun=4' if AT host is enabled), and then go to 'Certificate manager'.
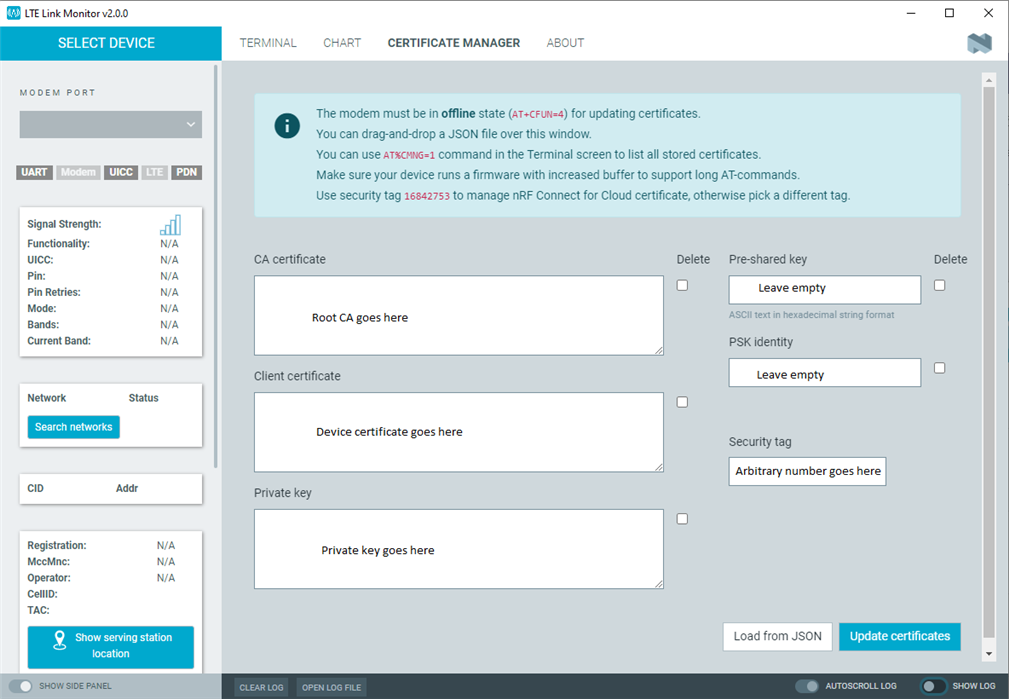
Paste in the CA certificate and private key from earlier where they belong, and put the Device certificate in the box labeled "Client certificate'. Leave "Pre-shared key' and 'PSK identity' empty. For 'Security tag', write down an arbitrary number between 0 and 2147483647 that is currently not in use. Avoid using a sec tag like 16842753, as this is the sec tag that is used by nRF cloud and could overwrite those certificates. Make sure you have the sec tag memorized or written down, as it will be important later on. Click 'Update certificates'. This should download the certificates to the device.
The next step is to program the device so it connects to the endpoint using the AWS credentials. aws_iot_tutorial.zip is a simple application that connects to an AWS IoT broker and publishes data with an interval of five seconds. It is a modified version of the AWS IoT sample. The application uses the AWS IoT library to set up the MQTT connection, handle MQTT events, and publish data. For the moment publishing to the broker does nothing because there is no rule to forward the data yet. Before using this application to connect to your own endpoint, you need to change a few options in the prj.conf file to match your respective values.
- Set CONFIG_AWS_IOT_CLIENT_ID_STATIC to the 'thing' name you entered when configuring the endpoint. If you chose a name that is longer than 15 characters, you need to set CONFIG_AWS_IOT_CLIENT_ID_MAX_LEN to accommodate for that.
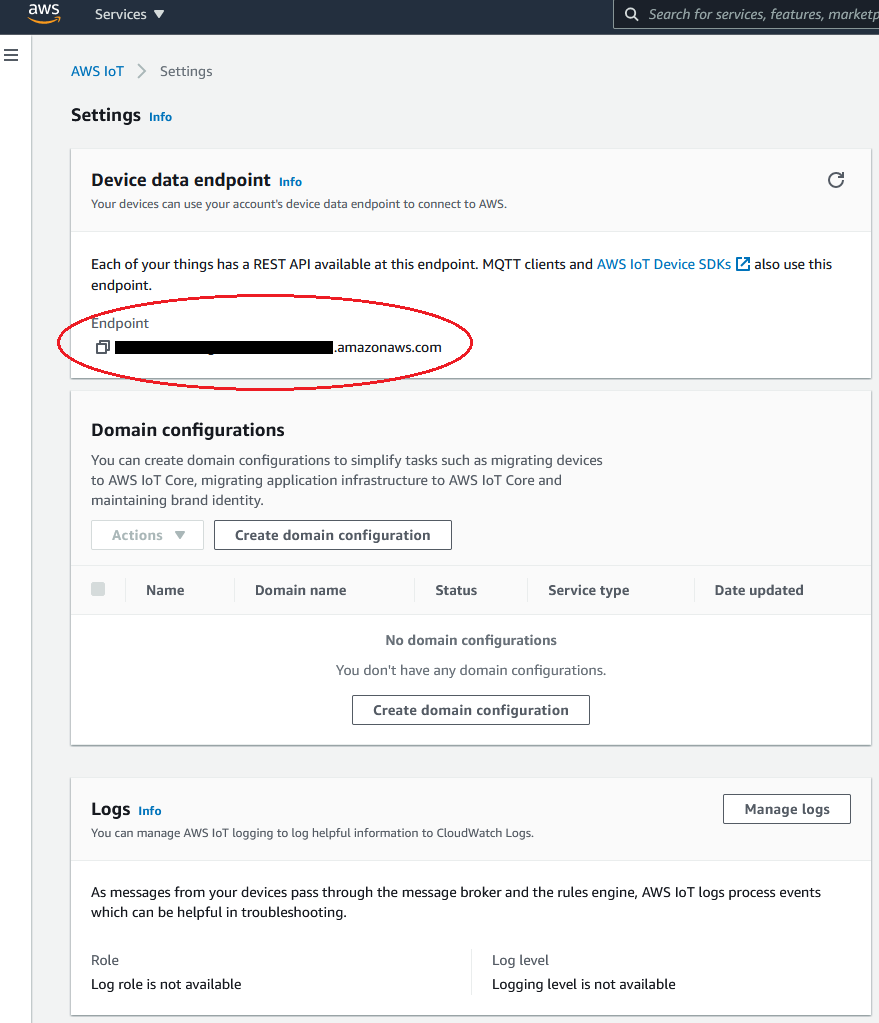
- Set CONFIG_AWS_IOT_BROKER_HOST_NAME to the address of your endpoint. You will find the address in the console in 'Settings'. See below picture.
- Set CONFIG_AWS_IOT_SEC_TAG to the security tag you entered in the certificate manager.
When running the application, you should get an AWS_IOT_EVT_CONNECTED event if the device successfully connects to the broker. If you get the AWS_IOT_EVT_DISCONNECTED event right after trying to connect, you should check if the certificates and policy are correct.
The last part of this tutorial will be about the handling of inbound MQTT data on the AWS broker, and how the data can be passed on to other AWS services. The way it is done in AWS is by implementing rules to tell AWS how to filter the data and where to send it.
As previously mentioned, the example application publishes MQTT messages with a fixed interval. The messages contain a temperature measurement of the modem and are published to the topic "sensor/temperature". The function send_temperature_data() is called from the system work queue every five seconds, which measures the modem temperature and then calls the aws_iot_send() function to send the MQTT message to the broker. The MQTT message is organized in an aws_iot_data struct;
struct aws_iot_data tx_data = {
	.qos = MQTT_QOS_0_AT_MOST_ONCE,
	.topic.type = 0,
	.topic.str = send_topic,
	.topic.len = strlen(send_topic),
	.ptr = message,
	.len = strlen(message)
};
topic.str is set to "sensor/temperature" which is the MQTT topic being published to. ptr is set to the JSON object that contains the measured temperature.
One easy way to test if the data is received properly on the AWS endpoint is to use the MQTT client which is incorporated in the AWS IoT console. In the AWS IoT console, go to 'Test'.
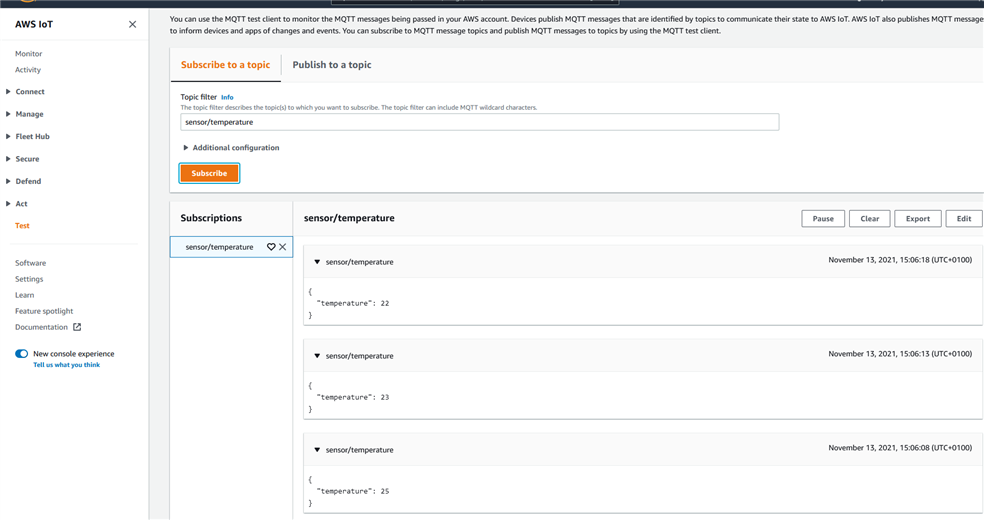
Then type in 'sensor/temperature' and click 'Subscribe to topic'. You should see the MQTT messages displayed in the console if the device is connected and publishing. If you don't see any messages, it could be that you are not allowing devices to publish data in the policy.
When you have confirmed that the device is publishing and the messages are received on AWS, the next thing to do is make a rule to pass the data to another service. A simple way to demonstrate this concept is to forward all of the temperature data received on the topic 'sensor/temperature' to the S3 service. If you haven't used S3 before, reading this can be useful. Once you have created an S3 bucket, go to the IoT console, then go to 'Act->Rules' and click 'Create a rule'. Name the rule whatever you would like. In 'Rule query statement', type in the statement
SELECT * FROM 'sensor/temperature'
This will filter out anything that is not from the topic 'sensor/temperature'. Click 'Add action' under 'Set one or more actions'. Select 'Store a message in an Amazon S3 bucket'. Choose the S3 bucket you created and set the 'Key' to
${topic()}/${timestamp()}
This is the location the data will be stored at.
Click 'Create role', give the role a name, and click 'Create role'. This role should automatically have the necessary permissions to write to the S3 bucket. If it does not, you can go to the IAM Management Console and manually change the permissions of the role.
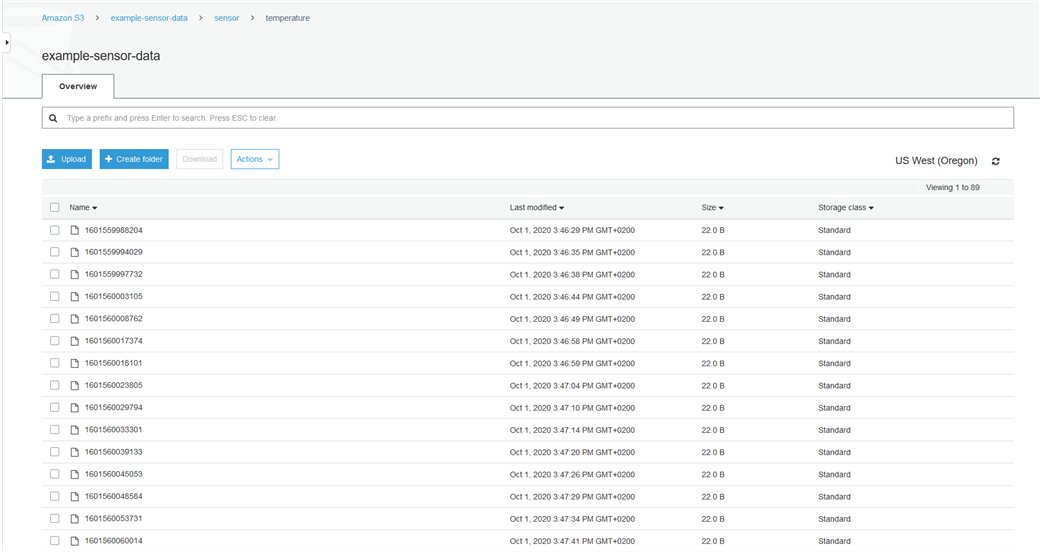
Click 'Add rule' and click 'Create rule'. The next time the device publishes temperature data it will be stored in the S3 bucket. You can check this by going to the S3 console and select the bucket you set up and navigating to 'sensor->temperature'. The message that was published should be stored in a file with the same name as the time it was stored, in a format shown below.
You can of course substitute the service you want to pass the data to to any other AWS service of your liking. If you want to use DynamoDB instead of S3, that's perfectly fine too.
Top Comments