

This blog introduces how to create tunnel broker service in order to support IPv6 on your IPv4 network. The tunnel broker is providing IP conversion service with 6in4.
Preparation
- Raspberry Pi with Installed raspbian and 6LowPAN module
Following IoT SDK pages
Step by Step creating tunnel broker
-
Go to HE website
-
Create your account
※ Needs verification your account on your written email address after created account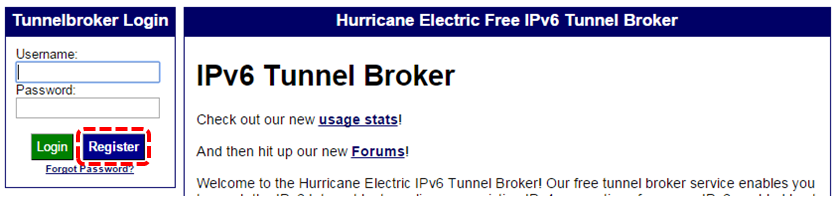
-
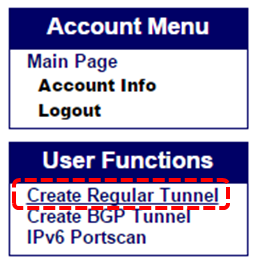
Login and Create Regular Tunnel
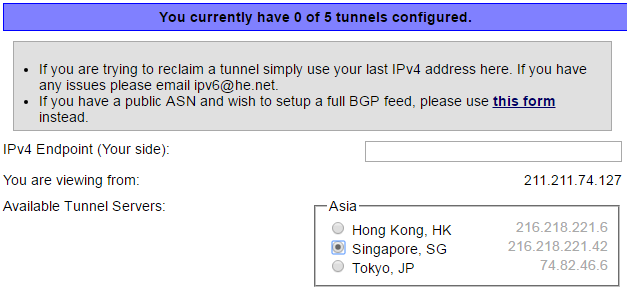
- Insert your own IPv4 address and select closest server by your location (In this case “Tokyo,JP”)
▣ IPv4 address should be same as shown on the web page
▣ It will check automatically after you entered your IPv4 address
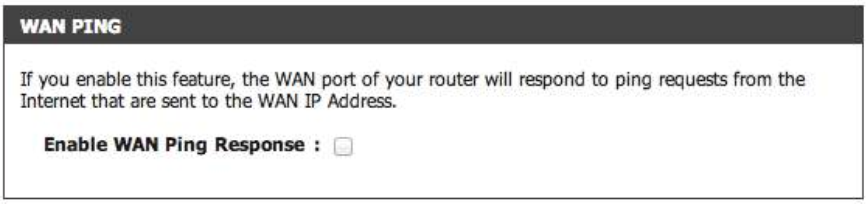
※ if you have issue as below you need to configure router to allow pinging from external server
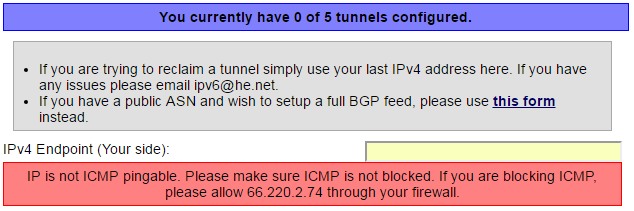
For My case I enabled WAN ping response feature on my router
 5. You can get details of tunnel broker information after successfully create tunneling service
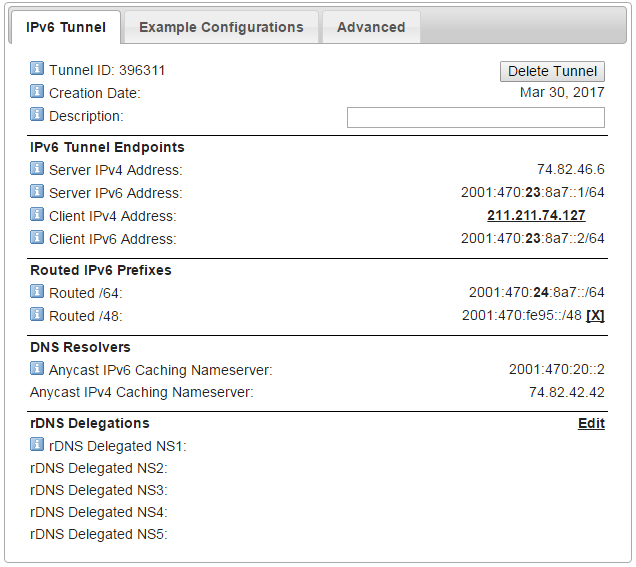
- To easily set up tunneling service on your device it provides example configuration.
- Click "Example configurations" tab on "Tunnel Details" web page and select "Debian/Ubuntu" for linux OS
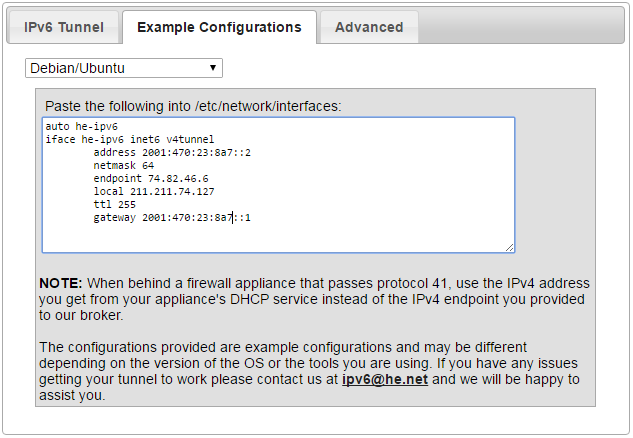
- Copy and add this information to RPi. interface file
- Click "Example configurations" tab on "Tunnel Details" web page and select "Debian/Ubuntu" for linux OS
$ sudo vi /etc/network/interfaces
auto he-ipv6
iface he-ipv6 inet6 v4tunnel
    address 2001:470:23:8a7::2
    netmask 64
    endpoint 74.82.46.6
    local 211.211.74.127
    ttl 255
    gateway 2001:470:23:8a7::1
Tips. Setting for internal network (for NAT)
If you are in NAT network you can use your internal network IP address
$ sudo vi /etc/network/interfaces
auto he-ipv6
iface he-ipv6 inet6 v4tunnel
    address 2001:470:23:8a7::2
    netmask 64
    endpoint 74.82.46.6
    local 192.168.0.190
    ttl 255
    gateway 2001:470:23:8a7::1
- Assign IPv6 address to RPi. ethernet port. (in my case used 48bit prefix)
up ip addr add 2001:470:fe95:aaaa::1/64 dev eth0
down ip addr add 2001:470:fe95:aaaa::1/64 dev eth0
- Configure RADVD configration file.
$ sudo vi /etc/radvd.conf interface eth0
{
AdvSendAdvert on;
AdvHomeAgentFlag off;
MinRtrAdvInterval 30;
MaxRtrAdvInterval 100;
AdvDefaultLifetime 9000;
prefix 2001:470:fe95:aaaa::/64
{
AdvOnLink off;
AdvAutonomous on;
AdvRouterAddr on;
AdvValidLifetime infinity;
AdvPreferredLifetime infinity;
DeprecatePrefix on;
};
};
- reboot RPi.
$ sudo reboot- Now you have own your IPv6 address and network!!
Sample configuration files
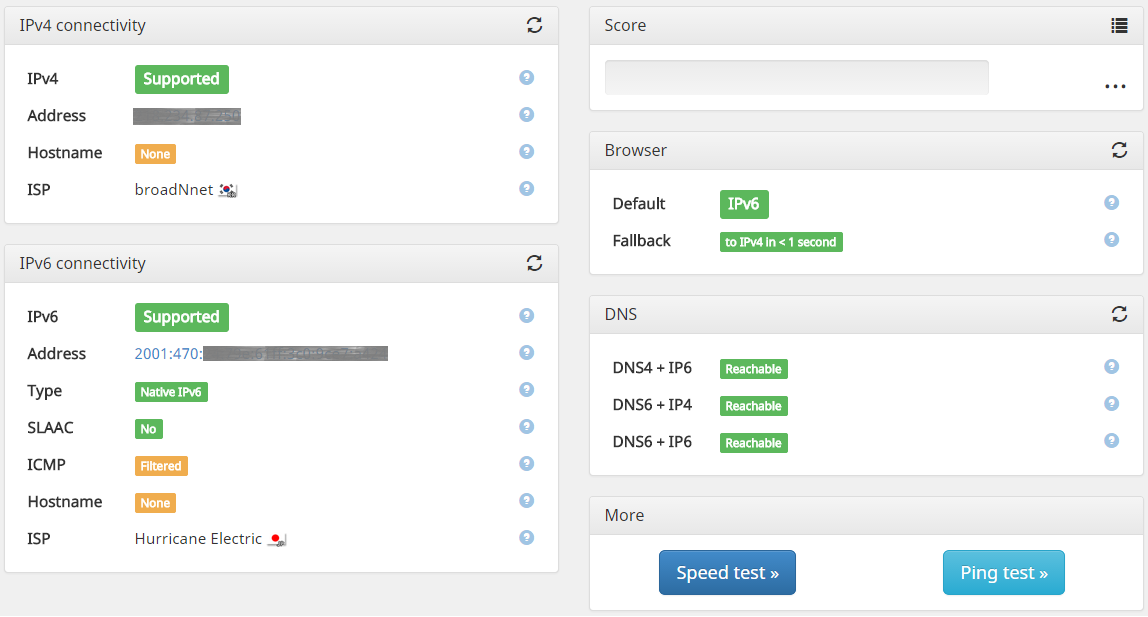
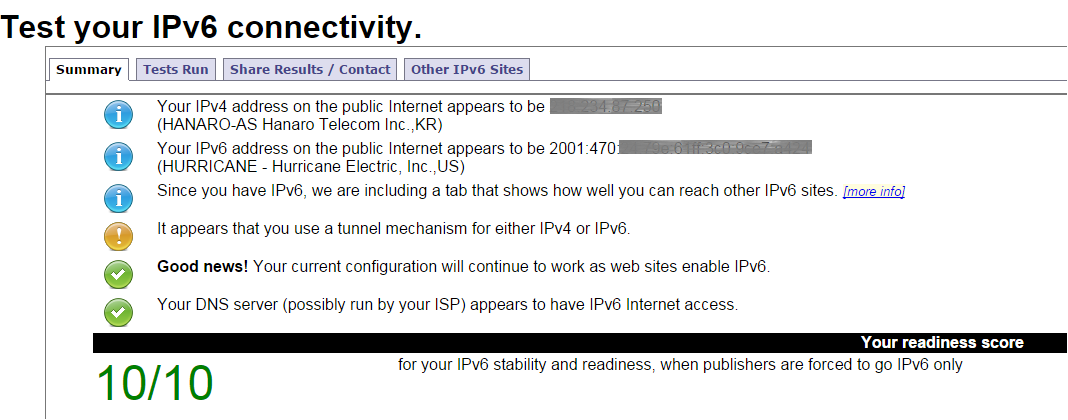
Tips!! IPv6 Verification
You can verify your IPv6 configuration whether it works correctly

-

Liverpool007
-
Cancel
-
Vote Up
0
Vote Down
-
-
Sign in to reply
-
More
-
Cancel
Comment-

Liverpool007
-
Cancel
-
Vote Up
0
Vote Down
-
-
Sign in to reply
-
More
-
Cancel
Children