

Introduction
The Asset Tracker v2 is a highly configurable asset tracker application available in nRF Connect SDK, that supports, among many things, multiple cloud services and configuring the behavior at run-time via cloud services. This allows you to configure the behavior of the application via nRF Cloud. Some of the settings that can be configured are whether the device is in Active Mode, or what the wait time is. You can find the list of items that can be configured here.
The Asset Tracker v2 application uses the Settings subsystem to store run-time settings in flash so that they are preserved across power cycles. This blog post will walk you through how to configure the Asset Tracker v2 application to connect to nRF Cloud and configure the behavior at run-time using nRF Cloud's REST API and the API platform Postman.
To complete the steps in this post, you will need:
- A free account created with nRF Cloud
- A Nordic Thingy:91 that has been added to your nRF Cloud dashboard
You can follow these instructions to create the nRF Cloud account, activate the SIM card that comes with the Thingy:91, and connect the Thingy:91 to nRF Cloud.
REST API
The nRF Cloud exposes a REST API for accessing these functions. REST, also called RESTful APIs are very common ways to interact with web services. REST uses HTTPS transactions, just like a web browser does to access a webpage. This makes it easy to create a web page that uses Javascript to dynamically load data from the nRF Cloud. In addition, if you have a backend system you can also use the REST API to access the data. This is what is called "Cloud to Cloud" communication, and enables multiple cloud systems to get data from the device, without each individual cloud system having to interact with the device. Limiting the "Device to Cloud" communication with one cloud adds reliability to the application while minimizing data costs for devices that use a metered network connection such as cellular.
HTTPS transactions can be done with Javascript, Python, or any number of programming languages. Curl is a very common command-line program that can also be used, and you will find curl examples through the documentation. Sometimes, having a graphical program can be an easier way to do testing and experiment with the different APIs. One such graphical program that makes it easy to make REST API transactions is Postman Client.
Authentication
The nRF Cloud REST API can be accessed by either devices or users. Devices are for IP-based devices, such as nRF9160, IP Gateways, etc. Note that devices can also access the nRF Cloud via MQTT. When using the REST API, the devices are authenticated using a JSON Web Token (JWT).
Users refer to any access other than a device. For example, it might be someone using Postman to test APIs, as this document will explain. Another example is a production web application, using cloud to cloud communications to get data from the nRF Cloud and display it to a user. Users are authenticated by using an API key, or a simple token.
Get your API Key
This documentation shows how to use the API key. Below, I will show you step by step how to use the API key with Postman.
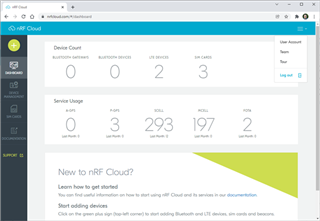
Log into nRF Cloud.
Navigate to your User Account using the settings menu on the top right:
Copy the API key by clicking on the copy button next to the key:
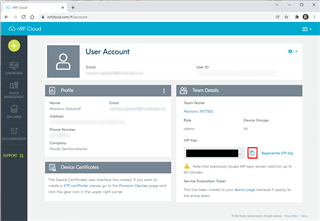
Now you have the token that you will need to authenticate your API calls. Next, let’s see how to setup Postman and add the key there.
Postman
You can download Postman from their website.
It is recommended, but not necessary, that you create an account (or login with Google). A free account will allow you to setup Workspaces, which are useful if you are testing different APIs as they group settings and variables. The rest of this tutorial uses Workspaces.
Setup
- Open Postman and create a Workspace.
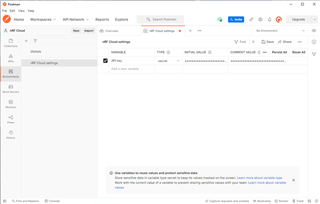
- Click on the Environments tab on the left side and create one. Give it a name like nRF Cloud settings.
- Create a new variable called API key, of type Secret
- Paste the key that you previously copied from the nRF Cloud account page into the Initial Value field
- Click Save
Your setup should look like this:
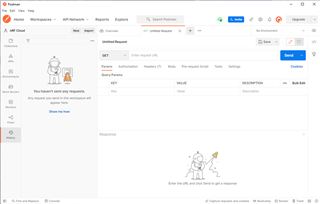
Send your first request
Open a new tab in the Workspace by clicking on the plus sign on the horizontal tab bar:
You can find the API specification for the nRF Cloud REST API here: https://api.nrfcloud.com/v1
First, let’s get a listing of all the devices that you have added to nRF Cloud, by using the List Devices API.
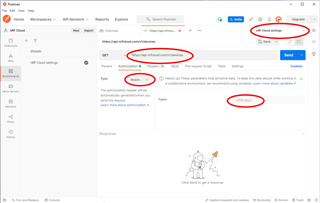
- For Environment, select nRF Cloud settings
- The method is GET, and URL is https://api.nrfcloud.com/v1/devices
- In the Authorization section, set Type to Bearer Token, and the Token to {{API key}} (this will bring in the variable that was previously set in the environment)
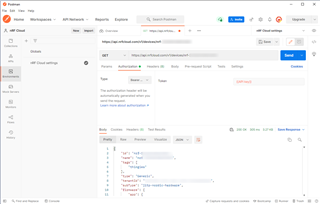
- Click on the Send button, and the response will be JSON with the list of devices you have on nRF Cloud
Here is an example response for one device:
{
    "items": [
        {
            "tenantId": "<tenant-id>",
            "id": "nrf-<imei>",
            "name": "nrf-<imei>",
            "tags": [
                "thingies"
            ],
            "type": "Generic",
            "subType": "jitp-nordic-hardware",
            "firmware": {
                "app": {
                    "version": "0.0.0-development"
                },
                "supports": [
                    "BOOT",
                    "MODEM",
                    "APP"
                ],
                "modem": "mfw_nrf9160_1.3.1"
            },
            "$meta": {
                "createdAt": "2022-01-20T16:12:39.073Z",
                "version": "7.0",
                "updatedAt": "2022-01-20T17:16:49.043Z"
            }
        }
    ],
    "total": 2
}
Asset Tracker v2
This next section shows how to work with a Thingy:91 or an nRF9160 DK that has the Asset Tracker v2 application on it. Please make sure that one of the devices that you have provisioned onto your nRF Cloud account has this firmware loaded on it. You can find more details on Asset Tracker v2 here: https://developer.nordicsemi.com/nRF_Connect_SDK/doc/latest/nrf/applications/asset_tracker_v2/README.html
Configuration and Device Shadow
The Asset Tracker v2 application has a configuration that can be set at run-time. You can find the list of what can be configured at run-time here. The configuration can be retrieved or changed via the REST API.
However, since the device can be asleep a significant portion of the time, it is better to interact with the Device Shadow. The Device Shadow or digital twin is a JSON document that lives in the cloud and contains data on the state of the device.
Retrieve Device Shadow
You can retrieve the Device Shadow by using the FetchDevice API. So let’s go back to Postman and add the deviceID of our device at the end of the URL:
The response will be JSON. For simplicity, I have removed most of the fields that are not necessary for this exercise, but you can see them when you try this out on your own device:
{
    "state": {
        "desired": {
            "pairing": {
                "state": "paired"
           	},
        },
        "reported": {
            "connection": {
                "status": "connected",
                "keepalive": 1200
            },
            "pairing": {
                "state": "paired
            },
            "device": {
                "serviceInfo": {
                    "fota_v2": [
                        "BOOT",
                        "MODEM",
                        "APP"
                    ],
                    "ui": [
                        "GPS",
                        "BUTTON",
                        "TEMP",
                        "HUMID",
                        "RSRP"
                    ]
                }
            },
            "config": {
                "activeMode": true,
                "gpsTimeout": 60,
                "activeWaitTime": 120,
                "movementResolution": 30,
                "movementTimeout": 3600,
                "movementThreshold": 10,
                "locm": 2,
                "nod": []
            }
        },
        "version": 1732
    }
}
The Device Shadow is in the “state” object in the JSON. As you can see, there are two objects inside the “state” object. One is called “desired”, and the other “reported”. The “reported” object shows the state of the device when it last published its state to the Cloud. The “desired” object shows updates that have not been pushed to the device yet (probably because it hasn’t connected to the Cloud since the update was requested).
The JSON above shows the configuration of the Asset Tracker v2 firmware in the “config” object. As you can see, the “config” object is only in the “reported” object. That means that there are no configuration changes pending. Let’s change that. Instead of publishing every 2 minutes, we’ll change it to once an hour. To change the Device Shadow, we’ll use the UpdateDeviceState API. Note that you only need to include the changes that you want, not the whole “config” object.
Note that it is possible your JSON doesn't show any "config" object in the "reported" object. This can happen if the configuration has not been changed in the past. It's not a problem, we can still use the UpdateDeviceState API to change the configuration, and in the future it will show the "reported" object.
Change Configuration
First, make sure that the device is turned off. This will allow us to see the difference between “desired” and “reported” states.
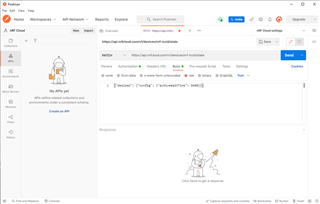
Go to the “Headers” tab, and enter a new header with the key “Content-Type”, and the value “application/json”:
Then, in the “Body” tab, enter the following JSON:
{"desired":{"config":{"activeWaitTime":3600}}}
Now, the Device Shadow will have the requested change to update once an hour. We can confirm this by re-running the FetchDevice API call, and the JSON will have the “config” object as part of the “desired” object. Note that “activeWaitTime” is 3600 in the “desired” object, but still 120 in the “reported” object. This is because the device hasn’t connected yet.
{
    "state": {
        "desired": {
            "config": {
                "activeWaitTime": 3600
            }
        },
        "reported": {
            "connection": {
                "status": "connected",
                "keepalive": 1200
            },
            "device": {
                "serviceInfo": {
                    "fota_v2": [
                        "BOOT",
                        "MODEM",
                        "APP"
                    ],
                    "ui": [
                        "GPS",
                        "BUTTON",
                        "TEMP",
                        "HUMID",
                        "RSRP"
                    ]
                }
            },
            "config": {
                "activeMode": true,
                "gpsTimeout": 60,
                "activeWaitTime": 120,
                "movementResolution": 30,
                "movementTimeout": 3600,
                "movementThreshold": 10,
                "locm": 2,
                "nod": []
            }
        }
    }
}
Turn the device on. Once it connects to the nRF Cloud, it will download the new configuration. You can verify that by getting the device information using the FetchDevice API again.

Top Comments
-

Pete Skeggs
-
Cancel
-
Vote Up
0
Vote Down
-
-
Sign in to reply
-
More
-
Cancel
-

Mariano Goluboff
in reply to Pete Skeggs
-
Cancel
-
Vote Up
0
Vote Down
-
-
Sign in to reply
-
More
-
Cancel
Comment-

Mariano Goluboff
in reply to Pete Skeggs
-
Cancel
-
Vote Up
0
Vote Down
-
-
Sign in to reply
-
More
-
Cancel
Children