
Introduction
This document will go over the process of running a Mesh Provisioning Demo using the nRF Mesh app available on Google Play or iOS App Store from Nordic Semiconductor. There is a blog post on the Nordic Devzone about this here and the firmware for the Thingy:52 is available here.
Procedure
1. Install the nRF Mesh app on your smartphone. This demo is based on the iOS version but the Android version should be a similar user interface.
2. Download the firmware from the Nordic Playground GitHub account.
- Clone the repository using git command line or download the zip file:

3. Unzip the zip file. There is a folder called “hex” which has pre-compiled hex files which we will use to program the Thingy:52s. Alternately, one can compile the code using Segger Embedded Studio (SES) but these instructions will not cover that. For instructions on compiling, see instructions on the GitHub webpage for the firmware.
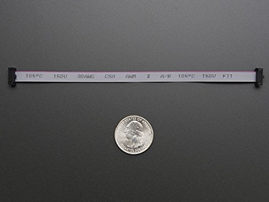
4. To program the Thingy:52 requires a 5 x 10-pin 2x5 Socket-Socket 1.27mm SWD Cable which can be found here on Amazon.com:
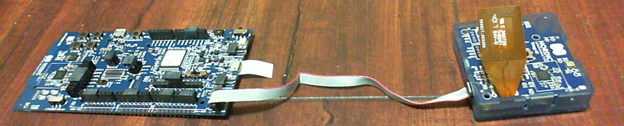
5. Connect one end of the SWD cable to the P19 header on the nRF52 DK and the other end to the exposed SWD debug headers on the Thingy:52. When the SWD cable is connected, the nRF52 DK will be programming the Thingy:52 rather than the DK’s own flash memory:
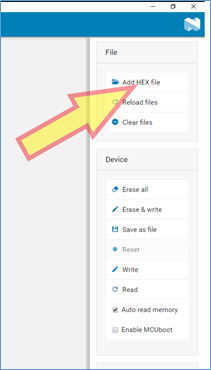
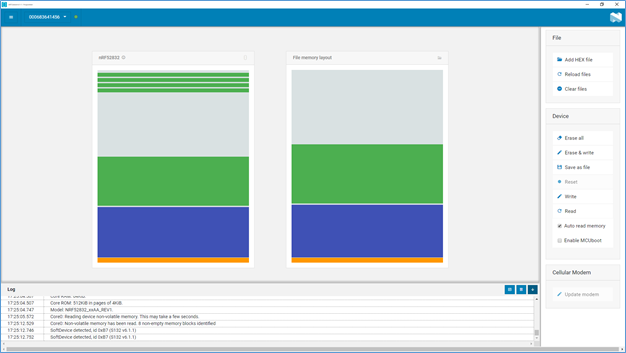
6. Launch nRF Connect Desktop program on your PC and launch the Programmer applet or use the command line (nrfjprog) to first erase the Thingy:52 and then program the SoftDevice and the application firmware:
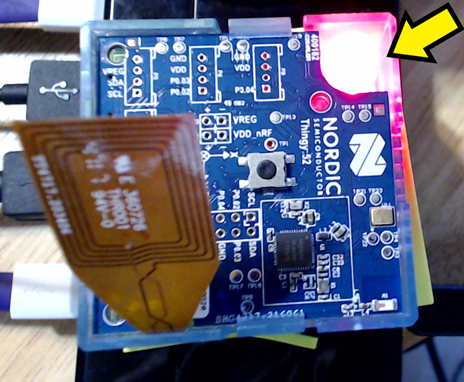
7. After programming is successfully completed, observe the Thingy:52 light up with the LED “breathing” red which means it has not been provisioned and has not joined the network:
8. Repeat step #6 and program all the Thingy:52s you’d like to be in the BLE Mesh network.
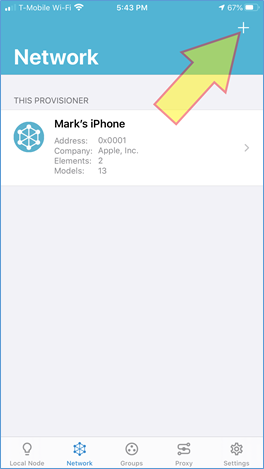
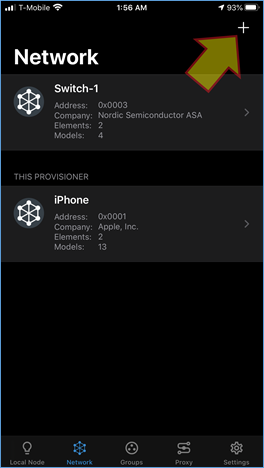
9. Launch nRF Mesh app on your smart phone and tap on the + icon on the top left corner:
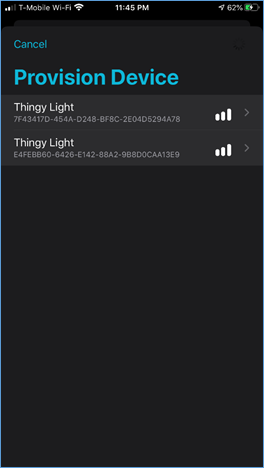
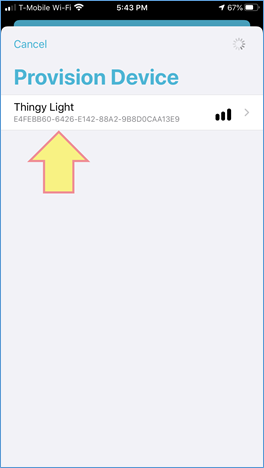
10. A list of available Thingy:52s will pop up that are available for provisioning; go ahead and select one:
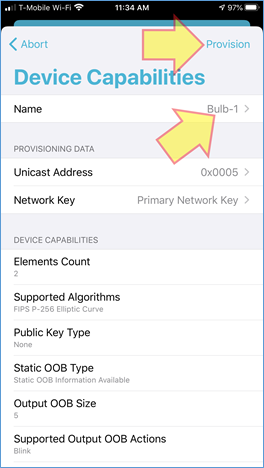
11. Tap the Name label and change to a descriptive name i.e. “Switch-1” and then click on Provision on the top left. Note the selected Thingy:52 will flash its LED to indicate selection:
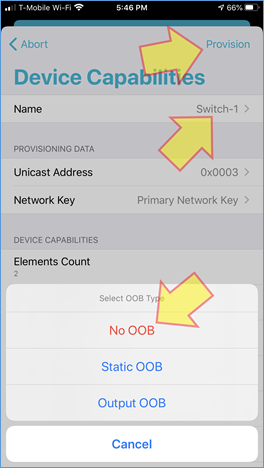
12. Tap on No OOB as shown above. This should provision the node into the network.
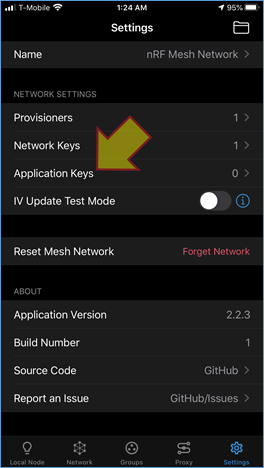
13. In this demo, we’ll assign one Thingy:52s as a “switch”, and one as a “light bulb”. A switch may control sets of light bulbs. Tap on Settings:
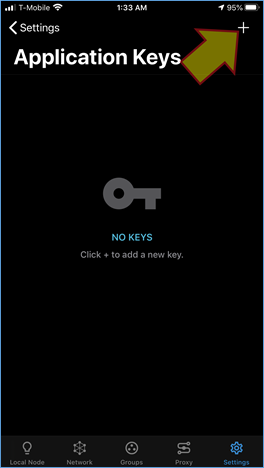
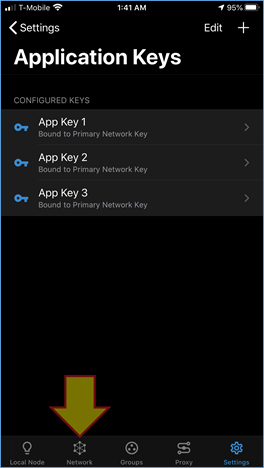
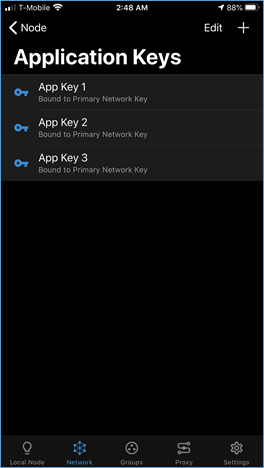
14. Now we will add Application Keys so tap on that and follow sequence below to add three application keys:
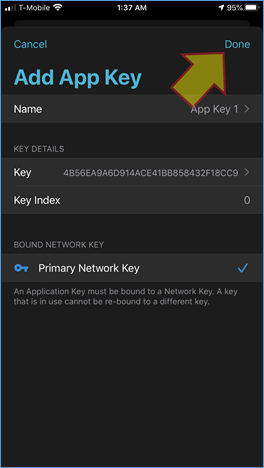
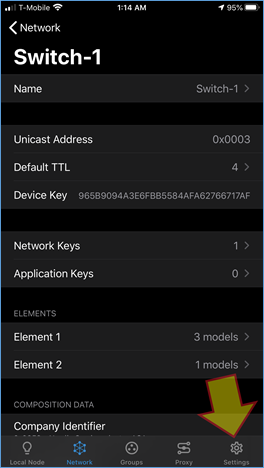
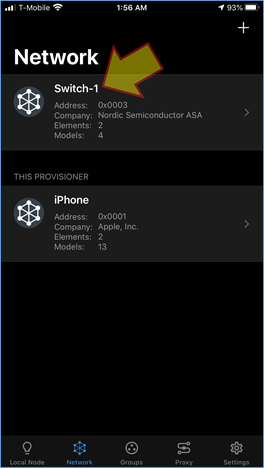
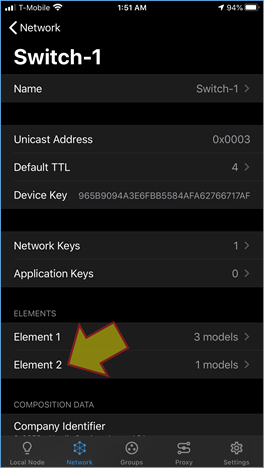
15. Repeat above three times to add three Application Keys and then tap on Network and then Switch-1:
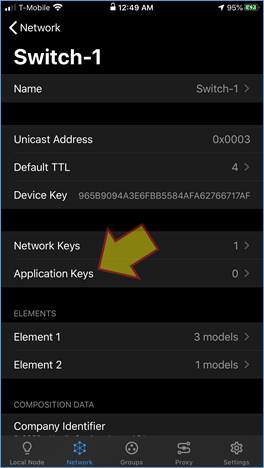
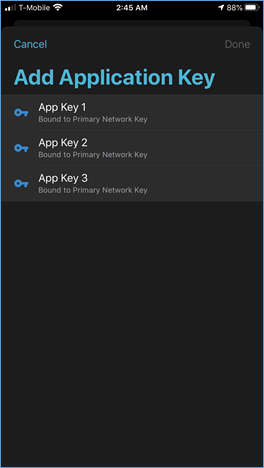
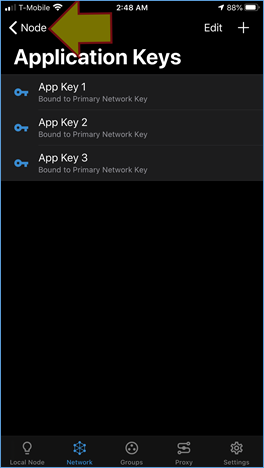
16. Tap on Application Keys and add all three Application Keys to the node:

17. Tap on Node to go back to the node configuration and then tap on Element 2:
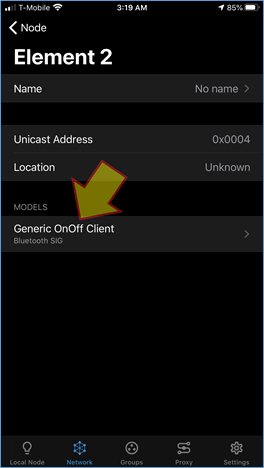
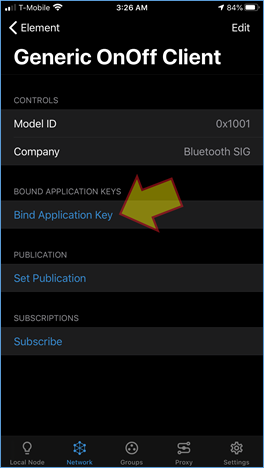
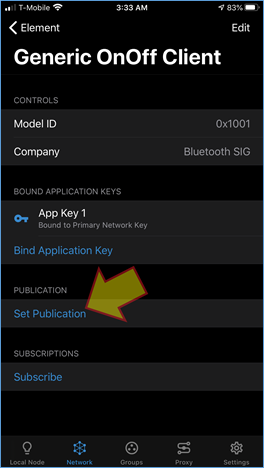
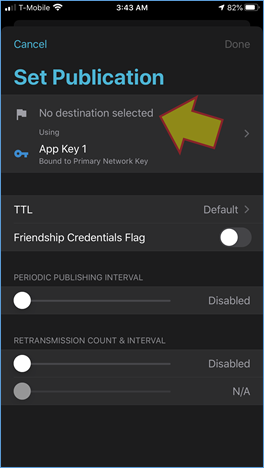
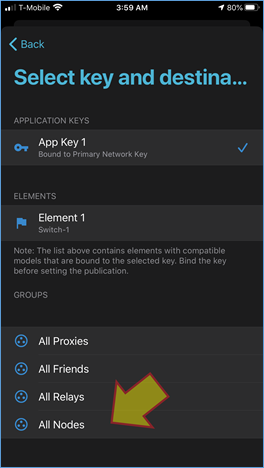
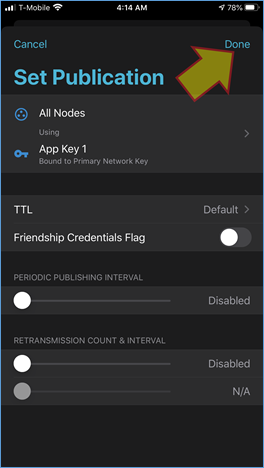
18. Tap on Set Publication to set a publication address for this node and follow sequence below:
19. Go back to the main Network screen and tap on + and then select another unprovisioned Thingy:52:
20. Tap on Name and update to “Bulb-1”, tap on Provision, and then tap on No OOB as done previously:
21. Tap on Application Keys and add Application Key 1 to the device as shown previously.
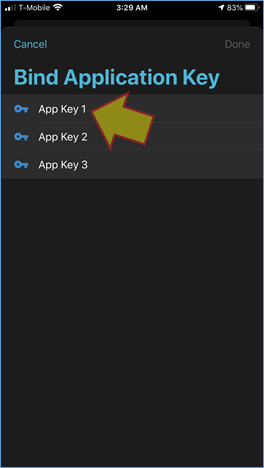
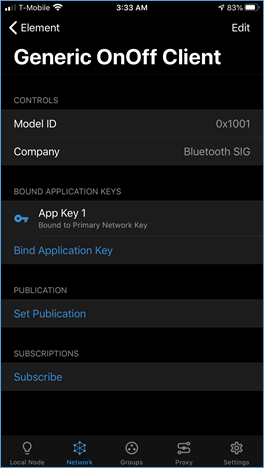
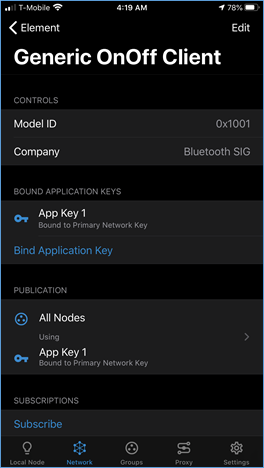
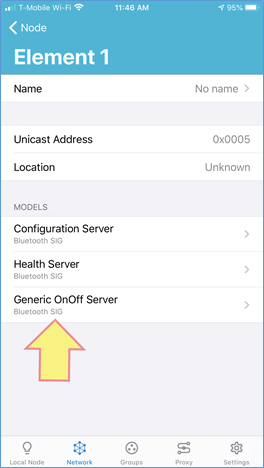
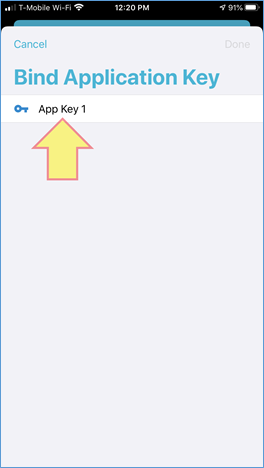
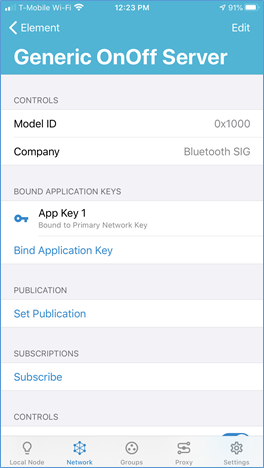
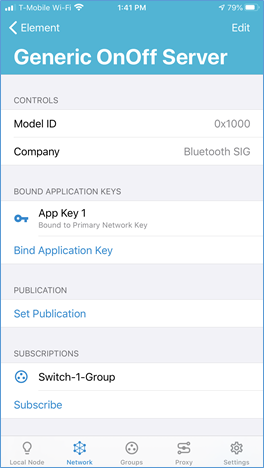
22. Navigate to Element 1 and then tap on Generic OnOff Server, tap on Bind Application Key, and then tap on App Key 1:

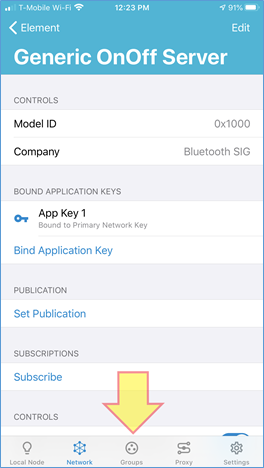
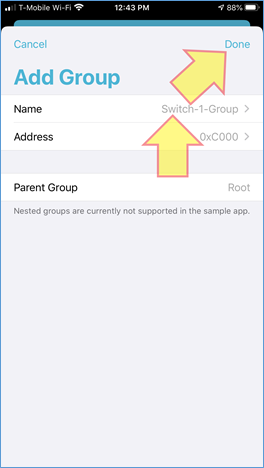
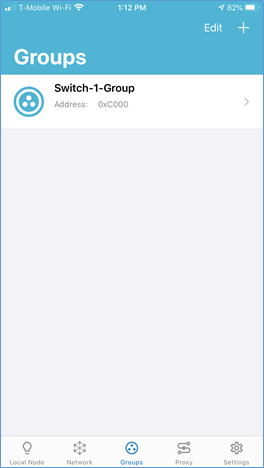
23. Tap on the Groups icon, update Group Name to “Switch-1-Group”:
24. Tap on Network and navigate back to Element 1 of “Bulb-1”, tap on Generic OnOff Server, and tap on Subscribe:

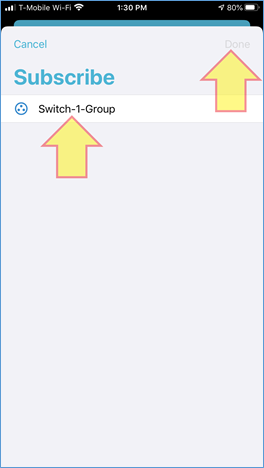
25. Tap on “Switch-1-Group” and then on Done:
27. Navigate back to “Bulb-1” information screen and slide the Configured slider:

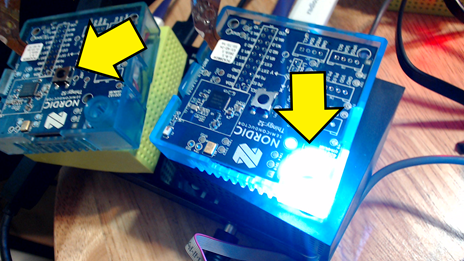
28. Press the button on the Client and observe the LED on the Server illuminate:
29. Follow above steps to set up multiple Servers and Clients. One can assign different groupings to different nodes.
30. Observe bulbs turning on when their configured subscription address is published by a switch:
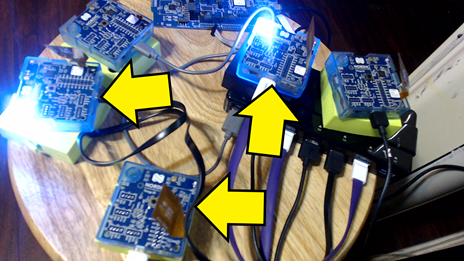
Different bulbs can thus be operated by different switches depending on their configuration. Each node is provisioned by a smartphone.
HINT: Holding down top button of a Thingy:52 and turning off and on will erase a node’s provisioning record thus effectively resetting it.
