From Thingy53 to custom board

Hi community,

I`m trying to develop a custom board with nRF5340, now comes the question how to flash it?

The application was developed with the Thingy53. On Thingy53 the bootloader mode is activated by cycling the power during press the button SW2(P1.14).

we also want to use another pin for activating the bootloader mode, therefore we also need to customize the bootloader.

so my questions are: 

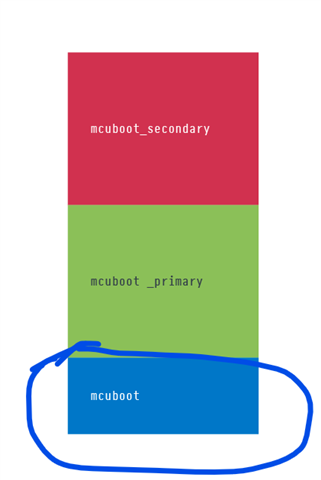
1. how to customize/develop the bootloader?

2. Is it possible to use another pin for activating the bootloader mode?

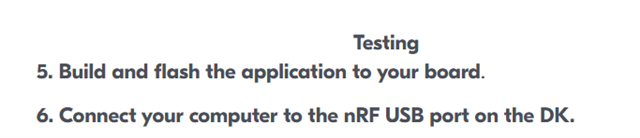
3. how to flash the custom bootloader?

Thanks in advance

Danny

Parents Reply
  • danny0007 said:

    This link describes two ways for updating firmware:
    1. Firmware update using MCUboot bootloader

    This we have done many times through USB with nRF connect for Desktop, works fine for uns, no questions. we mostly flash our dfu_application.zip file. The OTA also works fine. 

    2. Firmware update using external debug probe

    this we have never done, because we don´t have DK or Jlink in hand. We just assume that a blank nRF5340 can aslo be programmed through USB with nRF connect for Desktop. Our PCB only with USB interface is on the way to us. Now we´re not sure, if it´s possible to program the  mcuboot/zephyr/zephyr.hex just through USB. Tried on Thingy failed as above said.

    Thank you for verifying.

    danny0007 said:
    we never used this command, don´t know under which conditions it will be used. 

    https://docs.nordicsemi.com/bundle/ug_nrf_cltools/page/UG/cltools/nrf_nrfjprogexe.html 

    nrfjprog, which will be replaced with nrfutil (same usage as nrfjprog) is what is used under the hood when programming SoCs in VS Code

    danny0007 said:
    that means the  mcuboot/zephyr/zephyr.hex can only be flashed with J-LINK or DK, it also means a blank nRF5340 can only be flshed with J-LINK or DK. is this correct? If Yes, we need to deesign a new PCB. this is the answer I have been seeking for.

    Yes, if you don't have a bootloader already present on the board, or you're not able to enter bootloader mode for said bootloader in place, then the only way you can program in the bootloader is with J-Link or through a DK/programmer. 

    Here's a description from another guide w.r.t how to program through SWD:

    ----

    To program a System on Chip (SoC) with Serial Wire Debug (SWD), you will need a debug probe like the J-Link External Debug Probe. Here are the steps:

    1. Install the https://docs.nordicsemi.com/bundle/ncs-latest/page/zephyr/develop/flash_debug/host-tools.html#jlink-debug-host-tools and make sure they are in your search path.

    2. The board can be programmed using the [J-Link External Debug Probe](docs.nordicsemi.com/.../probes.html, provided the onboard debug circuit’s SWD signals are isolated from the MCU.

    3. To do so, ensure that jumpers J9 and J10 are **off** (they are on by default when the board ships from the factory). The external probe’s 20 pin connector can then be connected to J2 to program the SOC.

    For nRF5340 SoC, the required connections for nRF5340 DK v2 are as follows:

    | DK (programmer)P19 or P20 | Target boardSoC | Comments |
    | --- | --- | --- |
    | SWD CLK | SWDCLK | |
    | SWD IO | SWDIO | |
    | GND | GND | |
    | VTG | VDD | If using P20 |
    | SWD0 SEL | GND | If using P19 |
    | VDD nRF | VDD | If powering the external board from the DK |
    | RESET | RESET | Optional |

    If you have a bricked chip, you can perform "nrfjprog --eraseall" command to erase all and "nrfjprog --program new.hex --verify" to program a new image with the https://www.nordicsemi.com/Products/Development-tools/nRF-Command-Line-Tools 

     Programming Custom nRF5340 Board Using nRF5340 Development Kit  

    ---

    Kind regards,
    Andreas

Children
Related