This post is older than 2 years and might not be relevant anymore
More Info: Consider searching for newer posts

J-Link Programming external nRF52 : Failed to connect to target, no Idcode detected

Hi,

I'm currently programming a custom board using a nRF52832 (using this wiring). Everything was working great but I tried to play with SAADC and maybe did a wrong configuration and/or added too much debug log. Since a previous code upload, I'm unable to connect to my board again.

I had another board with the same behavior (same code uploaded to confirm this was the code), but somehow I found a way to unlock it, I was able to upload a basic blinky example while removing the GND DETECT and switch from VDD to VDD nRF. I don't know if it related though.

But I still have one board completely locked, how to unlock it ?

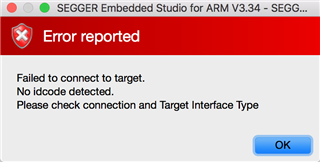
> JLinkExe -device NRF52 -if SWD -speed 1518 -autoconnect 1

SEGGER J-Link Commander V6.22a (Compiled Nov 28 2017 17:57:01)
DLL version V6.22a, compiled Nov 28 2017 17:56:49

Connecting to J-Link via USB...O.K.
Firmware: J-Link OB-SAM3U128-V2-NordicSemi compiled Jul 24 2017 17:30:12
Hardware version: V1.00
S/N: 682621274
VTref = 3.300V
Device "NRF52" selected.


Connecting to target via SWD
Cannot connect to target.
J-Link>

Thanks

Parents Reply Children
  • No I really mean 2.06V with a coin cell battery.

    Where would you put the multimeter on the custom board ? If I put the multimeter between VDD_NRF on the DK and the GND of the custom board I got ~0.7V for both boards (broken and working ones)

  • Hi,

    2V on a coincell means that it's dead (0 % capacity). If you look at this image, there's not much juice left once you reach 2V on a CR2032.

    In order to program externally via the DK, always power your external board from the DK. This is because there are level triggered logic that is used to detect which device the SEGGER should program, and it is _very_ important that your board has the same voltage as the DK uses.

    Cheers,

    Håkon

  • To program the external board I always plug the USB, but to measure current I thought your link mentioned that we should release the USB.

    But whatever, even if I plug the USB and remove the CR2032 from the DK, I got 2.1V even on a working board. But shunting SB11 or SB12 doesn't change this value.

    I don't really understand how to be sure my board as the same voltage than the one DK uses.

  • If it works on the other board, powered at 2.1V, then you are barely hitting the required voltage for a registered logic '1' (0.7*VDD).

    It's no problem to measure current when the USB is connected, it is just that you will get more noise on your measurement if you're measuring in the micro-amp area.

    You must have the same VDD level on the custom board as the DK, as there is no level shifters or similar in between your board and the DK. Connect "VDD_NRF" from the DK to the '+' of your battery terminal (remove battery first) and the same applies for the GND connection.

    If you follow the schematic in this thread, you effectively power your custom board from the DK to ensure that VDD_CustomBoard == VDD_NRF.

    Best regards,

    Håkon

  • Hi ,

    First I removed the battery soldered on my Custom Board (aka CB). Here are some measurements I've made with my amp meter on the broken CB :

    • DK VDD_NRF  -->  CB '+' = 0.280V (unsteady, keeps dropping few mV every second)
    • DK GND  -->  CB '+' = 1.1V (unsteady, keeps dropping few mV every second)
    • DK VDD_NRF  -->  CB GND = 0.797V (steady)
    • CB '+'  -->  CB GND = 1.1V (unsteady, keeps dropping few mV every second)

    And here are the same measurement on my working CB which I can program normally using JLINK :

    • DK VDD_NRF  -->  CB '+' = 0.280V (unsteady, keeps dropping few mV every second)
    • DK GND  -->  CB '+' = 0.5V (unsteady, keeps dropping few mV every second)
    • DK VDD_NRF  -->  CB GND = 0.806V (steady)
    • CB '+'  -->  CB GND = 0.5V (unsteady, keeps dropping few mV every second)

    I don' really understand.

    Is it because on the working board 0.806V - 0.280V ~= 0.5V   while on the broken board 0.797V - 0.280V /= 1.1V ?

Related