This post is older than 2 years and might not be relevant anymore
More Info: Consider searching for newer posts

Implementing a buttonless DFU for nRF51x22

We are using an nRF51x22 in one of our designs.

I am in the process of writing a bootloader that conforms to a packet format we use for loading code across our product line (this allows our suite of software tools to work across our product line, to load code into many different processors).

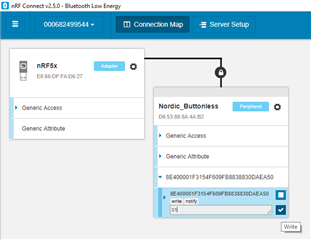
Anyway, we need a buttonless DFU to accomplish this. 

I noticed that there is an example buttonless DFU that only supports the nRF52 products (contained in SDK version 15.0.0), but that buttonless DFU requires the loading of a special dedicated soft device to handle the buttonless toggling between the bootloader and the application.  A specialized soft device seems like an extremely complicated way to accomplish what should be a rather simple thing – the decision whether to stay in the bootloader, or jump to the application. Besides, we need a BLE stack loaded as our soft device.

I am drawn to this structure, and its use:

typedef struct
{
    uint32_t            crc;                /**< CRC for the stored DFU settings, not including the CRC itself. If 0xFFFFFFF, the CRC has never been calculated. */
    uint32_t            settings_version;   /**< Version of the currect dfu settings struct layout.*/
    uint32_t            app_version;        /**< Version of the last stored application. */
    uint32_t            bootloader_version; /**< Version of the last stored bootloader. */

    uint32_t            bank_layout;        /**< Bank layout: single bank or dual bank. This value can change. */
    uint32_t            bank_current;       /**< The bank that is currently used. */

    nrf_dfu_bank_t      bank_0;             /**< Bank 0. */
    nrf_dfu_bank_t      bank_1;             /**< Bank 1. */

    uint32_t            write_offset;       /**< Write offset for the current operation. */
    uint32_t            sd_size;            /**< SoftDevice size (if combined BL and SD). */

    dfu_progress_t      progress;           /**< Current DFU progress. */

    uint32_t            enter_buttonless_dfu;
    uint8_t             init_command[INIT_COMMAND_MAX_SIZE];  /**< Buffer for storing the init command. */
} nrf_dfu_settings_t;

Shouldn’t the decision to stay in the bootloader or run the application be a simple matter of triggering off the “enter_buttonless_dfu” element of the above structure?

 In order to set this value in the application, and then have the DFU evaluate it upon reset, this structure has to be stored non-volatially. Is it place in non-volatile memory at some point? If so, I’m not finding where (although I could be overlooking it).

 TIA


Parents
  • Hello,

    Have you checked out the buttonless_dfu example in SDK12.3.0? I haven't tested it for nRF51 now, but it looks like both the bootloader and the buttonless example has project files for nRF51.


    Best regards,

    Edvin

  • Is there a buttonless DFU example in 12.3.0?

    The entire reason I asked this question in the first place is there didn't appear to be one.

    Could you point me to the buttonless DFU project in 12.3.0?

    I've gone all through that SDK and cannot find a buttonless DFU example in it (which is the newest that supports the nRF51).

    If I'm missing it, please point me to the project folder within that SDK (12.3.0) that it is in.

    Thanks.

  • OK.

    I found the "experimental_ble_app_buttonless_dfu" under "ble_peripheral" in SDK 12.3.

    It is only a framework (doesn't really do anything) around which I could build an application, but that's helpful.

    I still don't understand the notes that specify that the buttonless DFU's need to run with a special soft device loaded.

    Why is a particular soft device necessary to run a butonless DFU.  I thought part of the DFU's job was to load soft devices in the first place (as well as applications).

    I'd like a little insight into this.

    Thanks,

  • Hello,

    You don't need a special softdevice, only the normal softdevice to use with the bootloader.


    It is true that the buttonless dfu examples have changed a bit in the later SDKs, but it is still possible to use SDK12.3.0 to perform a buttonless DFU operation with nRF51.

    In order to do so, you can use the following steps:

    1. Compile the secure_bootloader from SDK12.3.0(SDK from now on)\examples\dfu\bootloader_secure\pca10028\<your favorite compiler>\...
      You need to change the keys in order to compile it. A description on how to do that is described here.

    2. flash the softdevice from the SDK, s130v2.0.1 to the nRF51DK

    3. flash the compiled bootloader that you just compiled to the nRF51DK.
    4. connect to it with nRF Connect (either for desktop or mobile) It should advertise as "DfuTarg".
      Note: I see that we don't get the DFU sign a few steps after this, so if you have an extra DK or Dongle, use nRF Connect for Desktop).
    5. build the buttonless_dfu project from SDK\examples\ble_peripheral\experimental_ble_app_buttonless_dfu and rename the .hex file to buttonless.hex and put it in a folder you have easy access to, together with the private.key that you generated with the bootloader.
    6. build a DFU packet with the output .hex file. use the command from the same folder as your private.key and buttonless.hex:
      nrfutil pkg generate --application buttonless.hex --application-version 2 --hw-version 51 --sd-req 0x87 --key-file private.key buttonless_dfu_img.zip

    7. in nRF Connect, press the DFU icon and select the buttonless_dfu_img.zip to transfer it. When the transfer is done, it should disconnect. If you do a new scan, you should see the device advertising as "Nordic_Buttonless".

    8. Generate another packet (we need to do this in order to increment the application version with 1. The bootloader will only accept applications with a higher application number than it already has):
      nrfutil pkg generate --application buttonless.hex --application-version 3 --hw-version 51 --sd-req 0x87 --key-file private.key buttonless_dfu_img_2.zip

    9. Now, connect to the Nordic_Buttonless, and write 0x01 to the service with a lot of numbers and letters:


    10. The device will disconnect again. If you do another scan, you will see that it advertises again with DfuTarg. If you connect to this, you should be able to perform the DFU again with the new (!) DFU image that we created in 8.
    11. You can keep doing this as much as you like. Just create a DFU img with a higher application version than the last time.


    This was a brief explanation, and it is probably not complete, but hopefully enough for you to do some tests, and play around with it. You should notice a couple of things:

    • The device has different addresses when in DFU mode and when in buttonless mode. DFU mode is always 1 higher than buttonless mode. This is so that phones that doesn't do service discovery will notice that the device has new services when in DFU mode.

    • It is possible to use nrfutil to create bootloader settings page. This is described here. If you do this, you can flash the softdevice, bootloader, application and bootloader_settings (which was created with the correct application), and then the device will run the application without having to flash the application through DFU the first time. The reason that this is needed is that the bootloader always check the bootloader settings on startup, to see whether it has a valid application. If it has, it will run the application. If not, it will go into bootloader mode (as a fallback in case the DFU operation didn't go through).

    You can also read a bit about the buttonless example here.

    Let me know if you get stuck on one of the steps while testing the bootloader.


    Best regards,

    Edvin

Reply
  • Hello,

    You don't need a special softdevice, only the normal softdevice to use with the bootloader.


    It is true that the buttonless dfu examples have changed a bit in the later SDKs, but it is still possible to use SDK12.3.0 to perform a buttonless DFU operation with nRF51.

    In order to do so, you can use the following steps:

    1. Compile the secure_bootloader from SDK12.3.0(SDK from now on)\examples\dfu\bootloader_secure\pca10028\<your favorite compiler>\...
      You need to change the keys in order to compile it. A description on how to do that is described here.

    2. flash the softdevice from the SDK, s130v2.0.1 to the nRF51DK

    3. flash the compiled bootloader that you just compiled to the nRF51DK.
    4. connect to it with nRF Connect (either for desktop or mobile) It should advertise as "DfuTarg".
      Note: I see that we don't get the DFU sign a few steps after this, so if you have an extra DK or Dongle, use nRF Connect for Desktop).
    5. build the buttonless_dfu project from SDK\examples\ble_peripheral\experimental_ble_app_buttonless_dfu and rename the .hex file to buttonless.hex and put it in a folder you have easy access to, together with the private.key that you generated with the bootloader.
    6. build a DFU packet with the output .hex file. use the command from the same folder as your private.key and buttonless.hex:
      nrfutil pkg generate --application buttonless.hex --application-version 2 --hw-version 51 --sd-req 0x87 --key-file private.key buttonless_dfu_img.zip

    7. in nRF Connect, press the DFU icon and select the buttonless_dfu_img.zip to transfer it. When the transfer is done, it should disconnect. If you do a new scan, you should see the device advertising as "Nordic_Buttonless".

    8. Generate another packet (we need to do this in order to increment the application version with 1. The bootloader will only accept applications with a higher application number than it already has):
      nrfutil pkg generate --application buttonless.hex --application-version 3 --hw-version 51 --sd-req 0x87 --key-file private.key buttonless_dfu_img_2.zip

    9. Now, connect to the Nordic_Buttonless, and write 0x01 to the service with a lot of numbers and letters:


    10. The device will disconnect again. If you do another scan, you will see that it advertises again with DfuTarg. If you connect to this, you should be able to perform the DFU again with the new (!) DFU image that we created in 8.
    11. You can keep doing this as much as you like. Just create a DFU img with a higher application version than the last time.


    This was a brief explanation, and it is probably not complete, but hopefully enough for you to do some tests, and play around with it. You should notice a couple of things:

    • The device has different addresses when in DFU mode and when in buttonless mode. DFU mode is always 1 higher than buttonless mode. This is so that phones that doesn't do service discovery will notice that the device has new services when in DFU mode.

    • It is possible to use nrfutil to create bootloader settings page. This is described here. If you do this, you can flash the softdevice, bootloader, application and bootloader_settings (which was created with the correct application), and then the device will run the application without having to flash the application through DFU the first time. The reason that this is needed is that the bootloader always check the bootloader settings on startup, to see whether it has a valid application. If it has, it will run the application. If not, it will go into bootloader mode (as a fallback in case the DFU operation didn't go through).

    You can also read a bit about the buttonless example here.

    Let me know if you get stuck on one of the steps while testing the bootloader.


    Best regards,

    Edvin

Children
Related