This post is older than 2 years and might not be relevant anymore
More Info: Consider searching for newer posts

asset_tracker does not work with firmware v1.0.0

Environment

- DK 0.8.2 in which SB44 is cut, and P1 and P2 are connected
- firmware v1.0.0
- program : asset_tracker
- SIM: iBasis

Before updating firmware, asset_tracker worked fine. 

However, after updating, LED3 is always blinking and LED4 is off.
What I do is to write the program to DK, push reset button, and wait for more than 5 min.
at_client program and LTE Link Monitor works out with v1.0.0.
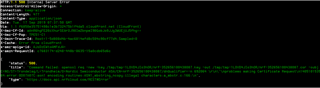
this is log

SPM: NS image at 0xc000
SPM: NS MSP at 0x2002aa00
SPM: NS reset vector at 0x142f1
SPM: prepare to jump to Non-Secure image.
***** Booting Zephyr OS v1.14.99-ncs2-rc3 *****
Asset tracker started
Connecting to LTE network. This may take several minutes.
Connected to LTE network

Any idea to solve this?

Parents
  • Hi.

    Edit: This procedure has been deprecated by an update to the nRF Cloud API. For a new procedure, see devzone.nordicsemi.com/.../nrf-cloud-certificate-update

    -------------------------------------------------------------------------------------------------------------------------------------------------------------------

    If your device has been registered at nRF Cloud earlier, you can recover your certificates by following this procedure:

    1. Install httpie.
    2. Get your API key from nRF Cloud (you can find it at your account page).
    3. Get the device ID by running 
      http https://api.nrfcloud.com/v1/devices Authorization:"Bearer <your API key>"
      .
    4. Get the devices certificates by running 
      http POST https://api.nrfcloud.com/v1/devices/<device ID>/certificates Authorization:"Bearer <API key>"
      .
    5. Get Amazon's root CA certificate: https://www.amazontrust.com/repository/AmazonRootCA1.pem
    6. Write the certificates to the modem
      1. By writing certificates to the modem using AT command:
        1. Root CA cert: AT%CMNG=0,16842753,0,"< Amazon root CA >"
        2. Client cert:     AT%CMNG=0,16842753,1,"< Client cert >"
        3. Private key:    AT%CMNG=0,16842753,2,"< Private key >"
      2. Or by adding the certificates and your client ID to certificates.h (in the asset tracker sample) and adding CONFIG_NRF_CLOUD_PROVISION_CERTIFICATES=y to your prj.conf

    Best regards,

    Didrik

  • Note that version 1.8.0 of the nRF Connect for Cloud API was released last week changed this specific endpoint. It is no longer possible to generate certificates without proof of ownership.

    POST ​/devices​/{deviceId}​/certificates

    Creates a certificate for a device. This is a JITP (just-in-time-provisioning) certificate. For it to work properly the device must not yet be provisioned (created) on our platform. If you are creating a certificate for a device that you have already connected to our platform, please delete the device using the DELETE /devices/{deviceId} endpoint before using this certificate. For a Nordic Semiconductor product such as an nRF9160-DK or a Thingy-91, the `deviceId` is `nrf-IMEI`, e.g., `nrf-111222333444555`. The IMEI can be found on your product's label. If you want to create a certificate for a non-Nordic device, any `deviceId` is sufficient that does not start with `nrf-` (we recommend using a GUID).
    The respective call with httpie looks like this:
    echo -n <ownership code> | http https://api.nrfcloud.com/v1/devices/nrf-<device ID>/certificates \ 
     Authorization:"Bearer <your API key>"

    You will find your deviceId and the PIN on a sticker on DKs and Thingys that support this method.
     
    Example deviceId: 351234567890123
    Example ownership code (PIN): 123456
    httpie request with example data:
    echo -n 123456 | http https://api.nrfcloud.com/v1/devices/nrf-351234567890123/certificates \
      Authorization:"Bearer <your API key>"
Reply
  • Note that version 1.8.0 of the nRF Connect for Cloud API was released last week changed this specific endpoint. It is no longer possible to generate certificates without proof of ownership.

    POST ​/devices​/{deviceId}​/certificates

    Creates a certificate for a device. This is a JITP (just-in-time-provisioning) certificate. For it to work properly the device must not yet be provisioned (created) on our platform. If you are creating a certificate for a device that you have already connected to our platform, please delete the device using the DELETE /devices/{deviceId} endpoint before using this certificate. For a Nordic Semiconductor product such as an nRF9160-DK or a Thingy-91, the `deviceId` is `nrf-IMEI`, e.g., `nrf-111222333444555`. The IMEI can be found on your product's label. If you want to create a certificate for a non-Nordic device, any `deviceId` is sufficient that does not start with `nrf-` (we recommend using a GUID).
    The respective call with httpie looks like this:
    echo -n <ownership code> | http https://api.nrfcloud.com/v1/devices/nrf-<device ID>/certificates \ 
     Authorization:"Bearer <your API key>"

    You will find your deviceId and the PIN on a sticker on DKs and Thingys that support this method.
     
    Example deviceId: 351234567890123
    Example ownership code (PIN): 123456
    httpie request with example data:
    echo -n 123456 | http https://api.nrfcloud.com/v1/devices/nrf-351234567890123/certificates \
      Authorization:"Bearer <your API key>"
Children
Related