This post is older than 2 years and might not be relevant anymore
More Info: Consider searching for newer posts

Time out error while production test using DTM

Hello,

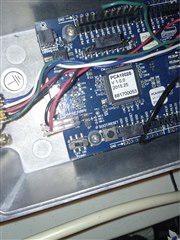
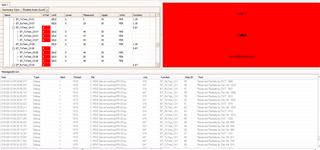
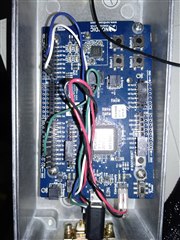
I am testing 9 channels for PER (1,2,3,21,22,23,37,38,39). During testing the last 3 channels I always get a single time out error in response to LE_TEST_END. I also get much higher PER for higher channels (not sure if these 2 problems are related). Anybody with a similar experience? I am using nRF51 dev kit.

Thanks

Jerry

Parents Reply Children
  • Thank you Håkon for your suggestion.

    Can you point me to documentation describing the process of loading firmware? I joined the project late and the original engineer has left our company.

  • The documentation on how to get started is located here:

    https://infocenter.nordicsemi.com/topic/com.nordic.infocenter.sdk5.v12.3.0/nrf51_getting_started.html?cp=5_5_7_1

    It does not look like you're using the default RXD/TXD pins (P0.09 and P0.11; in which you could have used the precompiled .hex file), so it looks like you have to change the pins in main.c::uart_init().

    Here's how the function looks now:

    static void uart_init(void)
    {
        // Configure UART0 pins.
        nrf_gpio_cfg_output(TX_PIN_NUMBER);
        nrf_gpio_cfg_input(RX_PIN_NUMBER, NRF_GPIO_PIN_NOPULL);
    
        NRF_UART0->PSELTXD       = TX_PIN_NUMBER;
        NRF_UART0->PSELRXD       = RX_PIN_NUMBER;
        NRF_UART0->BAUDRATE      = DTM_BITRATE;
    
        // Clean out possible events from earlier operations
        NRF_UART0->EVENTS_RXDRDY = 0;
        NRF_UART0->EVENTS_TXDRDY = 0;
        NRF_UART0->EVENTS_ERROR  = 0;
    
        // Activate UART.
        NRF_UART0->ENABLE        = UART_ENABLE_ENABLE_Enabled;
        NRF_UART0->INTENSET      = 0;
        NRF_UART0->TASKS_STARTTX = 1;
        NRF_UART0->TASKS_STARTRX = 1;
    }

    These defines comes from the board definitions, so its easier just to hard-code it in main, like this:

    #define MY_TXD_PIN XX
    #define MY_RXD_PIN YY
    
    static void uart_init(void)
    {
        // Configure UART0 pins.
        nrf_gpio_cfg_output(MY_TXD_PIN);
        nrf_gpio_cfg_input(MY_RXD_PIN, NRF_GPIO_PIN_NOPULL);
    
        NRF_UART0->PSELTXD       = MY_TXD_PIN;
        NRF_UART0->PSELRXD       = MY_RXD_PIN;
        NRF_UART0->BAUDRATE      = DTM_BITRATE;
    
        // Clean out possible events from earlier operations
        NRF_UART0->EVENTS_RXDRDY = 0;
        NRF_UART0->EVENTS_TXDRDY = 0;
        NRF_UART0->EVENTS_ERROR  = 0;
    
        // Activate UART.
        NRF_UART0->ENABLE        = UART_ENABLE_ENABLE_Enabled;
        NRF_UART0->INTENSET      = 0;
        NRF_UART0->TASKS_STARTTX = 1;
        NRF_UART0->TASKS_STARTRX = 1;
    }


    If you run into issues, just let me know what TXD/RXD pins you're using, and I can compile one for you.


    Kind regards,

    Håkon

  • Hi Håkon, thanks for your response. I think I am using the default RXD/TXD pins.

    Could you confirm from the picture?

  • Hi Håkon, how do you load the precompiled hex file onto the board? I see a section that mentions loading it to the board USB drive. What happens next? Does it load after power toggle?

  • It does indeed look like you're using the default pins.

    You drag the file "\nRF5_SDK_12.3.0_d7731ad\examples\dtm\direct_test_mode\hex\direct_test_mode_pca10028.hex" to the mass storage device labeled "J-LINK" and that's it. It should boot up within seconds. You can power cycle if you'd like, but wait atleast 4-5 seconds after drag-and-dropping the .hex file.


    Kind regards,

    Håkon

Related