This post is older than 2 years and might not be relevant anymore
More Info: Consider searching for newer posts

Zigbee Cli Agent Router example hangs after bdb start command

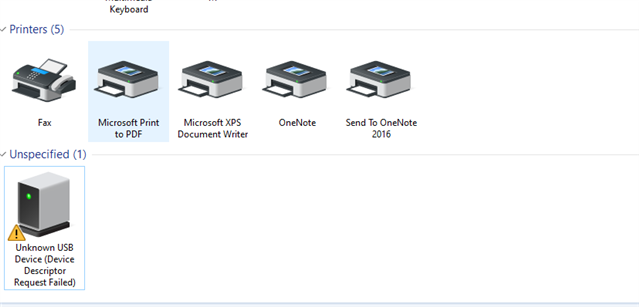
I am using nrf52840 dk for zigbee project with two xbee modules. One xbee is configured as coordinator and other as end device and nrf board is supposed to act as router. After setting channel and pan id from cli when I enter bdb start , command prompt just hangs .

Parents Reply Children
  • No , the device is not listed in wireshark even after refreshing interfaces.

  • no location is shown for extcap , but I have placed files in "C:\Program Files\Wireshark\extcap" directory

  • Try placing them in the folder listed under "Personal Extcap path". Also check the README.md file in the sniffer folder. There is a guide suggesting to run some python scripts to check that everything is set up correctly after you added the scripts to the correct folder.

    # nRF Sniffer for 802.15.4
    
    This repository contains firmware and Wireshark extcap script that can be used with nRF52840 chip as an 802.15.4 sniffer.
    
    __Note:__ this project is experimental.
    
    The software provided has been tested with the nRF52840-DK board and the following operating systems:
    * Ubuntu 18.04 (Wireshark 2.4.5 from the official package, Wireshark 2.6.4)
    * Windows 10 (Wireshark 2.6.3)
    * macOS Mojave (Wireshark 2.6.4)
    
    ## Dependencies
    * Wireshark (Ubuntu package `wireshark`)
    * pySerial (Ubuntu package `python-serial` or `python3-serial`)
    
    ## Quick start guide
    
    To start using the sniffer, you must flash the firmware, install the script, and configure the sniffer in Wireshark.
    
    ### Flash firmware
    
    #### nRF52840-DK (PCA10056)
    1. Connect the nRF52840-DK to the PC with an USB cable by connecting it to the J2 USB port.
    2. Flash the firmware with the following command:
    ```
    nrfjprog -f nrf52 --program nrf802154_sniffer/nrf802154_sniffer.hex --chiperase -r
    ```
    3. J2 USB port can now be optionally disconnected.
    4. Connect the nRF52840-DK to J3 nRF USB port.
    
    __Note:__ Sniffer firmware can no longer transport captured packets over J2 USB port. Capture can be carried out using only the J3 nRF USB port.
    
    #### nRF52840-Dongle (PCA10059)
    
    1. Download and install [nRF Connect for Desktop](https://www.nordicsemi.com/Software-and-Tools/Development-Tools/nRF-Connect-for-desktop).
    2. Click `Add/remove apps` and install `Programmer` application.
    3. Plug the dongle to USB port and click reset button to enter DFU mode. Red diode should start blinking.
    4. Select `Nordic Semiconductor DFU Bootloader` device from the list.
    5. Click `Add HEX file` and select `nrf802154_sniffer_dongle.hex` from `nrf802154_sniffer` directory.
    6. Verify that the selected application begins at the `0x00001000` address to avoid overwriting the MBR section.
    7. Click `Write` to flash the device.
    8. Unplug the dongle from the USB port and plug it again. Do not click the reset button.
    
    ### Install extcap script
    
    To find the correct installation path of the extcap utility on any system please see:
    ```
    "Help" -> "About Wireshark" -> "Folders" -> "Extcap path"
    ```
    Copy the provided `nrf802154_sniffer.py` script to the extcap directory.
    
    __Note to Windows users:__ `nrf802154_sniffer.bat` has to be copied to the same directory as well.
    Ensure that Python directory is included in your `PATH` system environment variable.
    
    ### Configuring the system
    
    #### Ubuntu Linux
    1. During the Wireshark installation on Ubuntu the user will be prompted to choose one of the following options:
        * Create the `wireshark` user group and allow all members of that group to capture packets.
        * Only allow the root user to capture packets.
    
        __Note:__ Using the Wireshark as the root user is strongly discouraged.
    
        To change the settings after the installation, run the following command:
        ```bash
        sudo dpkg-reconfigure wireshark-common
        ```
    
        If the Wireshark was configured to restrict the capture to members of the `wireshark` group, add the correct user to the group:
        ```bash
        sudo usermod -a -G wireshark [user]
        ```
    2. Add the correct user to the `dialout` group:
        ```bash
        sudo usermod -a -G dialout [user]
        ```
    3. Log-out and log-in again to apply the new user group settings.
    4. Install the Python interpreter. The recommended version is `3.7`.
    5. Install the `pySerial` module. To install it, run one of the following commands:
        - Using Ubuntu's native package manager:
            ```bash
            sudo apt install python-serial
            ```
            Or alternatively:
            ```bash
            sudo apt install python3-serial
            ```
        - Using Python's pip package manager:
            ```bash
            sudo pip install pyserial
            ```
    #### Windows 10
    1. Install the python interpreter. The recommended version is `3.7`. Make sure to check the `Add Python to environment variables` option during installation.
    2. Install the `pySerial` module using the Python's pip package manager:
        ```bash
        sudo pip install pyserial
        ```
    
    ### Start sniffing
    1. Run Wireshark.
    2. Click the gear icon next to the 'nRF Sniffer for 802.15.4'.
    3. Select the 802.15.4 channel.
    4. Select the format for out-of-band meta-data.
    5. Click 'Start'.
    
    ## Wireshark configuration for Thread
    
    ### Decryption key
    
    To decode packets exchanged on the Thread network, you must configure the Wireshark to use the correct decryption keys.
    1. Go to `Edit -> Preferences... -> Protocols -> IEEE 802.15.4 -> Decryption Keys`.
    2. Configure the following values:
        - Decryption key: `00112233445566778899aabbccddeeff` (default value used by the Nordic Thread and Zigbee SDK examples)
        - Decryption key index:`0`
        - Key hash: `Thread hash`
    
    ### CoAP port configuration
    
    Thread uses the CoAP protocol on port 61631 for network data exchange. To correctly decode packets sent over that port, you can use one of the following options:
    * Apply the setting globally by editing CoAP protocol settings in `Preferences` and changing the `CoAP UDP port` value to `61631`.
    * Apply the setting on per-capture basis by adding an entry to `Analyze -> Decode as...` with the following values:
        - `Field`: `UDP port`
        - `Value`:`61631`
        - `Current`: `CoAP`
    
    ### 6loWPAN contexts
    
    Go to 6loWPAN settings in `Preferences` window and add correct values. Contexts may vary depending on the Thread Network Data. Below values are used by Thread examples in nRF5 SDK.
    * Context 0: `fdde:ad00:beef:0::/64`
    * Context 1: `fd11:22::/64`
    
    ### Disable unwanted protocols (optional)
    
    If Wireshark uses incorrect dissectors to decode a message you have an option to disable unwanted protocols. Go to `Analyze -> Enabled protocols` and uncheck unwanted protocols. Suggestions below.
    * LwMesh
    * ZigBee
    * ZigBee Green Power
    
    ## Configuring Wireshark for Zigbee
    
    To capture the data for Zigbee examples in SDK, you must manually configure Wireshark:
    1. Press Ctrl + Shift + P to enter the Wireshark preferences.
    2. Go to `Protocols -> Zigbee`.
    3. Click the `Edit` button next to Pre-configured Keys. The Pre-configured Keys window appears.
    4. Add two entries by clicking on the "+" button:
        - Key: `5A:69:67:42:65:65:41:6C:6C:69:61:6E:63:65:30:39`, Byte Order: Normal, Label: ZigbeeAlliance09
        - Key: `ab:cd:ef:01:23:45:67:89:00:00:00:00:00:00:00:00`, Byte Order: Normal, Label: Nordic Examples
    
    ## Out-Of-Band meta-data
    The sniffer can provide additional information. For every packet, you can display channel, RSSI and LQI. The format used for this is configurable in the Interface Options dialog (the gear icon next to the 'nRF Sniffer for 802.15.4'). Depending on the Wireshark version this can be configured in two ways:
    
    1. For Wireshark 3.0 and later: Select "IEEE 802.15.4 TAP".
    2. For Wireshark 2.4 and 2.6: Install a custom Lua dissector and select "Custom Lua dissector".
    
    ### Install Lua dissector
    Copy the provided script to the appropriate directory (it can be found in `About Wireshark -> Folders -> Personal Lua Plugins`).
    If the directory is not displayed, ensure that the Wireshark was built with Lua support. This can be checked in the `About Wireshark` window.
    
    ## Indicator LEDs
    
    The firmware uses the following LEDs to indicate operation:
    * PCA10056:
        - LED1 - toggled continuously
        - LED4 - toggled when new frame is received
    * PCA10059:
        - green LD1 - toggled continuously
        - blue LD2 - toggled when new frame is received
    
    ## Troubleshooting
    
    See the sections below for the description of several known issues with the respective workarounds.
    
    ### Sniffer capture hangs when another Wireshark process is started
    If you have other extcap scripts installed, ensure that they do not send any data to serial ports.
    For instance, the Nordic BLE sniffer extcap discovers connected BLE sniffers during Wireshark startup by actively sending data to all serial ports.
    Because Linux applications primarily use advisory locking, there is nothing stopping other applications from opening and writing data to a serial port, causing unexpected behaviour.
    Currently, the only way to avoid this issue is to disable the offending script by removing the `executable` permission:
    ```bash
    sudo chmod -x <extcap_file>
    ```
    
    ### Sniffer capture hangs with `ModemManager` service enabled on Linux
    On some occasions, the `ModemManager` may send AT commands to the sniffer. To avoid this, use one of the following options:
    * Disable `ModemManager` service:
    ```bash
    sudo systemctl stop ModemManager.service
    sudo systemctl disable ModemManager.service
    ```
    * If `ModemManager` runs on `DEFAULT` or `PARANOID` policy, create `udev` rule:
    
      __Note__: The below steps will not work if `STRICT` policy of the `ModemManager` is used.
    
        1. Create new file `/etc/udev/rules.d/99-mm-blacklist.rules` and include in it the following configuration:
            ```
            ACTION!="add", SUBSYSTEM!="usb_device", GOTO="mm_blacklist_rules_end"
    
            ATTR{idProduct}=="154a", ATTR{idVendor}=="1915", ENV{ID_MM_DEVICE_IGNORE}="1"
    
            LABEL="mm_blacklist_rules_end"
            ```
        2. Apply the new `udev` rules:
            ```bash
            udevadm trigger
            ```
        3. Verify that the settings have been successfully applied:
            ```bash
            udevadm info -q property -n /dev/ttyACMx
            ```
            The following values confirm the settings are correctly applied:
            ```
            ID_MM_CANDIDATE=0
            ID_MM_DEVICE_IGNORE=1
            ```
        4. Restart the `ModemManager`:
            ```bash
            sudo systemctl restart ModemManager
            ```
    
    ### Sniffer interface does not appear in the Wireshark
    
    This issue can affect both Ubuntu Linux and Windows.
    
    #### On Ubuntu Linux
    If you have multiple Python interpreters installed, ensure that `pySerial` module was installed for the correct Python interpreter used by the extcap script.
    If that does not help, you may not have sufficient permissions to access the serial device. Please refer to `Configuring the system` section.
    
    #### On Windows
    Ensure that the Python installation directory is included in the `PATH` environment variable and that the correct interpreter with `pySerial` installed is used.
    
    If during Python installation the `Add Python to environment variables` option was unchecked, you can add the entry manually by doing the following steps:
    1. Open the `Control Panel` and search for `Advanced system settings`.
    2. Click `Environment variables...`.
    3. In `System variables` window, double click the `PATH` variable.
    4. Append the Python installation directory at the end.
    
    To verify that everything is correct, run:
    ```
    $ python
    Python 2.7.15 (v2.7.15:ca079a3ea3, Apr 30 2018, 16:30:26) [MSC v.1500 64 bit (AMD64)] on win32
    Type "help", "copyright", "credits" or "license" for more information.
    >>> import serial
    ```
    If there are no errors, the configuration was done correctly.
    

  • I think the main problem is with driver , once it is resolved hopefully everything will start to work correctly.

  • Well, I know for a fact that you need to put the files in the correct extcap folder (from your description you did not). So you either way have to do this, and use the python scripts from the readme files to check that everything is set up correctly.

    Best regards,

    Edvin

Related