This discussion has been locked.
You can no longer post new replies to this discussion. If you have a question you can start a new discussion

New nRF Project Creation using nRF Connect SDK

I am new to Nordic. I installed nRF Desptop Connector. I have opened succesfully the sample nRF projects. Now, I want create my own new nRF Connect Project. I tried two ways:

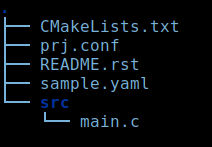
1. First created a new folder named "First" in "C:\nrc\v1.7.1". I tried to create a new project using nRF Connect Options in this folder. But there is option to open either existing nRF project only. see first image ... 

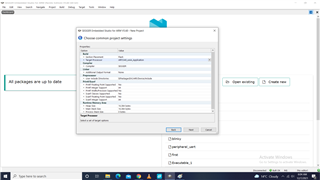
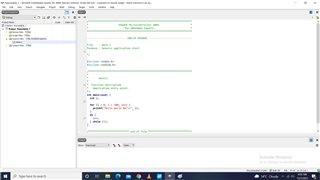
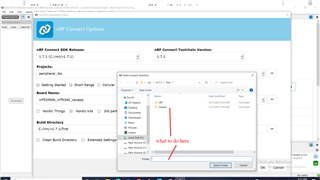
2. I creted a new project in SES without nRF Connect SDK in the above folder. The default "Hello World" code builds successfully.see images 2 and 3. But, I want to know how to open/ convert this new project as nRF Project, see image 4.


Gulzar SIngh

Parents
  • Hi Gulzar

    If you are new to developing with Nordic, I advise you to use the nRF Connect Extension for VS Code.
    This has a nice collection of videos to get you started, as well as a more in-depth webinar if you want to learn more on it.

    In addition, to learn more on the basics of nRF Connect SDK, I recommend this tutorial.

    To answer your question:

    A project in nRF Connect SDK is a folder with at minimum the following parts:

    CMakeLists.txt
    prj.conf
    a src folder with .c file(s) inside

    Here is an example of a minimal application

    The CMakeLists.txt will point to your C files, for example like this:
    "target_sources(app PRIVATE src/main.c)"

    When you choose "project", Segger Embedded Studio will only look for a folder containing the mentioned files.
    To create a new project, you need to find an example, then copy it manually.
    Then you can chose this new folder as if it were an existing project.

    Regards,
    Sigurd Hellesvik

Reply
  • Hi Gulzar

    If you are new to developing with Nordic, I advise you to use the nRF Connect Extension for VS Code.
    This has a nice collection of videos to get you started, as well as a more in-depth webinar if you want to learn more on it.

    In addition, to learn more on the basics of nRF Connect SDK, I recommend this tutorial.

    To answer your question:

    A project in nRF Connect SDK is a folder with at minimum the following parts:

    CMakeLists.txt
    prj.conf
    a src folder with .c file(s) inside

    Here is an example of a minimal application

    The CMakeLists.txt will point to your C files, for example like this:
    "target_sources(app PRIVATE src/main.c)"

    When you choose "project", Segger Embedded Studio will only look for a folder containing the mentioned files.
    To create a new project, you need to find an example, then copy it manually.
    Then you can chose this new folder as if it were an existing project.

    Regards,
    Sigurd Hellesvik

Children
  • Dear Hellesvik.. thanks for your vakued suopport and guidance. In continuation before closing this ticket, may you guide lilte more:  I want to test a simple program on the nRF5340_DK kit in which an normal LCD16X2 is to be interfaced.

    1. How to define the Port Pins e.g.: in some generic compilers the port pins and port can be defined as below 

    #define RS P0.4

    #define EN P0.5

    #define lcd_port P0

    //******

    But, how to define 1 bit, 4 bit, 8 bit interface in SES with/ without Zephyre. May you show a small function  to:

    1. Define the Individual Port Pins

    2. Define 8 bit Port

    3. Sent data to 8 bit Port

    4. Set Pin and Clear Pin

    2. To write a program to interface Button, Leds and LCD, which Zephyr files are required to include at Minimum in the project. 

  • Hi

    Some points here:

    The nRF Connect SDK is buildt on Zepjhyr, so you will be using Zephyr either way.

    The nRF5340 is a 32 bit microcontroller, so registers will be 32 bits, not 8 bit.

    To toggle LEDs, I would recommend using the GPIO API in Zephyr, see the Blinky sample.

    Regards,
    Sigurd Hellesvik

Related