This discussion has been locked.
You can no longer post new replies to this discussion. If you have a question you can start a new discussion

nRF connect vscode samples for 52840-dongle PCA10059

Goodday all 

Im experimenting with Vscode and Nrfconnect (zypher library). I want to see how easy it is to port my Segger nrf SDK code to vsCode.  Having trouble getting it to work (with my custom board based on modified dongle board files) I thought let me first just try the blinky example. which also did not work.

Is the blinky example suppose to work out the box? In my application build I select nrf52840dongle_nrf52840. I program the dongle via my 52840DK.

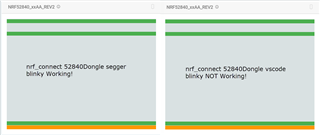
Currently if I flash the blinky example im just getting the pulsating red led. I can see its flashing the dongle as it resets after the programming is complete.

Thank you

Parents
  • Hi,

    What is your VS Code version and your nRF Connect for SDK version?

    Regards,

    Priyanka

  • Morning Priyana

    nRF connect v 3.10.0 and vscode 1.65.2

  • Hi,

    It does look strange. Are you facing the issue only with VS Code or with SEGGER and west too?

    -Priyanka

  • Only with Vs code.I have not tried Segger through nRF connect will try this afternoon. I normally use Segger SDK and that works 100%

  • Please do keep in mind that when using the nRF52840 Dongle you have to build different images if you use the Bootloader or if you use a programmer to get the program onto the device. This is caused by the MBR which will be present in the device when using Bootloader and not when not using bootloader resides in the first 4KB of the flash. This means target needs to either reside after this or at address 0x00000000.

    Depending on how you set up the project in DTS this will work for one of the platforms but not both. Have you changed the build for the different versions or do you add the MBR to the hex file when using the JLINK/DK to program the dongle?

  • Not sure what you mean with DTS. but I have taken a fresh dongle with bootloader. Connected it to my DK and flashed it through nRF connect with vscode and Segger. Segger works but they look the same, so not sure why vscode does not work

  • So you mentioned the use of a nRF52840-DK earlier on.

    there are 2 ways to program the nRF52840 Dongle

      Use the built in DFU over USB, requires code set up for existence of MBR, code starting from 0x1000

      Use a nRF52840 DK (or other debugger) programming through SWD, requires code set up for no MBR and starting at 0x0000

    placement of code is set in .dts files when using the nRF Connect SDK, this is the device tree files.

    so how do you program the nRF52840 Dongle?

    Check what configuration you have for the flash placement, that should tell you if the code built should run with the programming method used.

Reply
  • So you mentioned the use of a nRF52840-DK earlier on.

    there are 2 ways to program the nRF52840 Dongle

      Use the built in DFU over USB, requires code set up for existence of MBR, code starting from 0x1000

      Use a nRF52840 DK (or other debugger) programming through SWD, requires code set up for no MBR and starting at 0x0000

    placement of code is set in .dts files when using the nRF Connect SDK, this is the device tree files.

    so how do you program the nRF52840 Dongle?

    Check what configuration you have for the flash placement, that should tell you if the code built should run with the programming method used.

Children
  • I use the SWD.

    in the build\zephyr.dts

    flash_controller: flash-controller@4001e000 {
                compatible = "nordic,nrf52-flash-controller";
                reg = < 0x4001e000 0x1000 >;
                #address-cells = < 0x1 >;
                #size-cells = < 0x1 >;
                label = "NRF_FLASH_DRV_NAME";
                flash0: flash@0 {
                    compatible = "soc-nv-flash";
                    label = "NRF_FLASH";
                    erase-block-size = < 0x1000 >;
                    write-block-size = < 0x4 >;
                    reg = < 0x0 0x100000 >;
                    partitions {
                        compatible = "fixed-partitions";
                        #address-cells = < 0x1 >;
                        #size-cells = < 0x1 >;
                        boot_partition: partition@1000 {
                            label = "mcuboot";
                            reg = < 0x1000 0xf000 >;
                        };
                        slot0_partition: partition@10000 {
                            label = "image-0";
                            reg = < 0x10000 0x5e000 >;
                        };
                        slot1_partition: partition@6e000 {
                            label = "image-1";
                            reg = < 0x6e000 0x5e000 >;
                        };
                        storage_partition: partition@cc000 {
                            label = "storage";
                            reg = < 0xcc000 0x4000 >;
                        };
                        scratch_partition: partition@d0000 {
                            label = "image-scratch";
                            reg = < 0xd0000 0x10000 >;
                        };
                    };
                };
            };
  • This is the .dts settings for building projects that should be programmed through the USB DFU, if you want to use the DK to program then the flash section of the .dts should look more like they do for the nRF52840-DK if I am not mistaken:

        partitions {
            compatible = "fixed-partitions";
            #address-cells = <1>;
            #size-cells = <1>;

            boot_partition: partition@0 {
                label = "mcuboot";
                reg = <0x000000000 0x0000C000>;
            };
            slot0_partition: partition@c000 {
                label = "image-0";
                reg = <0x0000C000 0x00067000>;
            };
            slot1_partition: partition@73000 {
                label = "image-1";
                reg = <0x00073000 0x00067000>;
            };
            scratch_partition: partition@da000 {
                label = "image-scratch";
                reg = <0x000da000 0x0001e000>;
            };

    If you want to keep the dts settings you have today then you should also merge the resulting .hex file with the S140 MBR (not part of the nRF Connect SDK),

    Suggest you make a call on how you want to work, if you want  to use the USB DFU then stick with it, if you want to use the DK then set up the project accordingly (remove the MBR and the bootloader).

  • I see,  I have loaded the S140 softdevice via nrf_connect programmer. I reprogrammed Blinky via DK SWD. Using the button "flash" and "erase &flash"  it  is now working. But you have manually reset the dongle to start the app. Even though nRF connect does an  enable pin reset and then  apply pin reset at the end of the flash  the board does not reset. (which is a pity)

    Out of interest. I also tried with the softdevice alternative methods

    1. from  VS menu view -> Command Pallete ->nRF connect : erase and flash to board. This does NOT work, I presume it erases the soft device. As you need to go back and reprogram S140 via nRF connect.

    I also tried the terminal method nrfjprog --program D:\my_vscode_apps\blinky\build\zephyr\zephyr.hex --log --verify -r . This also does not work. Again I presume it removes the softdevice.

    Thanks for all the help :Paka really apreciate it. I will  try some other examples with boards as well as port some of my Segger SDK code and see how it goes.Relaxed

Related