This discussion has been locked.
You can no longer post new replies to this discussion. If you have a question you can start a new discussion

Controling servo using timer, finding proper values for angles.

Hello!

I am trying to write a program for controlling a servo motor. I got recommended a code for making a PWM signal by someone else from devzone, so I am using a modified version of that. I am getting it to work, but only partly. I am having some problems figuring out the duty cylcles and how to position the servo properly.

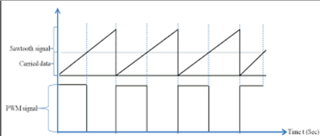
I know the servo has a operating frequency of between 50Hz, and that it has a pulse width range from 1000 to 2000 microseconds. To set the timer reload value I calculated that 320000 with clock frequency of 16MHz gives a PWM frequency of 50Hz. But when I set the position, I found from trial and error that between 10000 and 40000 gives me about 180 degrees of operation. This isn't quiet what I was expecting, how can I find the proper values so that I know how to accurately control the servo?

Thanks!

#include <zephyr.h>
#include <sys/printk.h>
#include <math.h>

#define PWM_1   3   //Custom pin for servo control

// Peripheral channel assignments
#define PWM0_GPIOTE_CH      0
#define PWM0_PPI_CH_A       0
#define PWM0_PPI_CH_B       1
#define PWM0_TIMER_CC_NUM   0

#define PWM1_GPIOTE_CH      1
#define PWM1_PPI_CH_A       2
//#define PWM1_PPI_CH_B       3
#define PWM1_TIMER_CC_NUM   1

#define PWMN_GPIOTE_CH      {PWM0_GPIOTE_CH, PWM1_GPIOTE_CH, 2, 3}
#define PWMN_PPI_CH_A       {PWM0_PPI_CH_A, PWM1_PPI_CH_A, 3, 4}
#define PWMN_PPI_CH_B       {PWM0_PPI_CH_B, PWM0_PPI_CH_B, 5, 5}
#define PWMN_TIMER_CC_NUM   {PWM0_TIMER_CC_NUM, PWM1_TIMER_CC_NUM, 2, 3}

static uint32_t pwmN_gpiote_ch[]    = PWMN_GPIOTE_CH;
static uint32_t pwmN_ppi_ch_a[]     = PWMN_PPI_CH_A;
static uint32_t pwmN_ppi_ch_b[]     = PWMN_PPI_CH_B;
static uint32_t pwmN_timer_cc_num[] = PWMN_TIMER_CC_NUM;

// TIMER3 reload value. The PWM frequency equals '16000000 / TIMER_RELOAD'
#define TIMER_RELOAD        320000
// The timer CC register used to reset the timer. Be aware that not all timers in the nRF52 have 6 CC registers.
#define TIMER_RELOAD_CC_NUM 5

// This function initializes timer 3 with the following configuration:
// 24-bit, base frequency 16 MHz, auto clear on COMPARE5 match (CC5 = TIMER_RELOAD)
void timer_init()
{
    NRF_TIMER3->BITMODE                 = TIMER_BITMODE_BITMODE_24Bit << TIMER_BITMODE_BITMODE_Pos;
    NRF_TIMER3->PRESCALER               = 0;
    NRF_TIMER3->SHORTS                  = TIMER_SHORTS_COMPARE0_CLEAR_Msk << TIMER_RELOAD_CC_NUM;
    NRF_TIMER3->MODE                    = TIMER_MODE_MODE_Timer << TIMER_MODE_MODE_Pos;
    NRF_TIMER3->CC[TIMER_RELOAD_CC_NUM] = TIMER_RELOAD;    
}

// Starts TIMER3
void timer_start()
{
    NRF_TIMER3->TASKS_START = 1;
}

// This function sets up TIMER3, the PPI and the GPIOTE modules to configure a single PWM channel.
// Timer CC num, PPI channel nums and GPIOTE channel num is defined at the top of this file
void pwm0_init(uint32_t pinselect)
{  
    NRF_GPIOTE->CONFIG[PWM0_GPIOTE_CH] = GPIOTE_CONFIG_MODE_Task << GPIOTE_CONFIG_MODE_Pos | 
                                         GPIOTE_CONFIG_POLARITY_Toggle << GPIOTE_CONFIG_POLARITY_Pos | 
                                         pinselect << GPIOTE_CONFIG_PSEL_Pos | 
                                         GPIOTE_CONFIG_OUTINIT_High << GPIOTE_CONFIG_OUTINIT_Pos;

    NRF_PPI->CH[PWM0_PPI_CH_A].EEP = (uint32_t)&NRF_TIMER3->EVENTS_COMPARE[PWM0_TIMER_CC_NUM];
    NRF_PPI->CH[PWM0_PPI_CH_A].TEP = (uint32_t)&NRF_GPIOTE->TASKS_CLR[PWM0_GPIOTE_CH];
    NRF_PPI->CH[PWM0_PPI_CH_B].EEP = (uint32_t)&NRF_TIMER3->EVENTS_COMPARE[TIMER_RELOAD_CC_NUM];
    NRF_PPI->CH[PWM0_PPI_CH_B].TEP = (uint32_t)&NRF_GPIOTE->TASKS_SET[PWM0_GPIOTE_CH];
    
    NRF_PPI->CHENSET               = (1 << PWM0_PPI_CH_A) | (1 << PWM0_PPI_CH_B);
}

// Function for changing the duty cycle on PWM channel 0
void pwm0_set_duty_cycle(uint32_t value)
{
    if(value == 0) {
        value = 1;
    }
    else if(value >= TIMER_RELOAD) {
        value = TIMER_RELOAD - 1;
    }
    NRF_TIMER3->CC[PWM0_TIMER_CC_NUM] = value;
}

int main(void)
{
    printk("Hello World! %s\n", CONFIG_BOARD);
    uint32_t counter = 0;
    
    // Initialize the timer
    timer_init();
    
    // Initialize PWM channel 0
    pwm0_init(PWM_1);
    
    // Start the timer
    timer_start();

    for (;;) {

        k_sleep(K_MSEC(4));
        
        // Update the duty cycle of PWM channel 0 and increment the counter
        pwm0_set_duty_cycle(30000);
   }
}

Parents
  • Hello,

    Just taking some notes while I read through:

    TIMER_RELOAD = 320000 means that you will have a frequency of 50Hz = 20ms.

    I found from trial and error that between 10000 and 40000 gives me about 180 degrees of operation.

    I assume that 10000 and 40000 is the number of ticks (what you put into NRF_TIMER3->CC[n]

    The duty cycles 1000µs (1ms) and 2000µs (2ms) transfers to 0.001s*16 000 000ticks/s = 16000 ticks and 32000 ticks 

    Your trial and error gave 10000 and 40000, which is more than the extremes from the datasheet, but I have seen a lot of deviation on some servo motors (especially cheap ones). In addition, they may not be the same for each motor, so you may need to "calibrate" each one.

    By calibrate I mean trial and error, and take notes on what duty cycle that is needed to set the outer angles on that specific motor.

    Best regards,

    Edvin

Reply
  • Hello,

    Just taking some notes while I read through:

    TIMER_RELOAD = 320000 means that you will have a frequency of 50Hz = 20ms.

    I found from trial and error that between 10000 and 40000 gives me about 180 degrees of operation.

    I assume that 10000 and 40000 is the number of ticks (what you put into NRF_TIMER3->CC[n]

    The duty cycles 1000µs (1ms) and 2000µs (2ms) transfers to 0.001s*16 000 000ticks/s = 16000 ticks and 32000 ticks 

    Your trial and error gave 10000 and 40000, which is more than the extremes from the datasheet, but I have seen a lot of deviation on some servo motors (especially cheap ones). In addition, they may not be the same for each motor, so you may need to "calibrate" each one.

    By calibrate I mean trial and error, and take notes on what duty cycle that is needed to set the outer angles on that specific motor.

    Best regards,

    Edvin

Children
  • Hello!

    Yes! That is what I was expecting, that the values would be between 16000 and 32000 ticks. But it only gave me a small operating range with the servo.

    However, after investigating, I now found that using duty cycles of 0.5ms and 2.5ms gave me the perfect positions. It translates to between 8000 tics and 40000 tics for 0 to 180 degrees, with neutral position at 1.5ms (24000 tics). I don't know why exactly those values works so well, concidering in the datasheet it is given 1ms to 2ms. But using a simple convertion to degrees I now get exaclty the position I want from the servo:

    uint32_t convert_to_raw(uint32_t value)
    {
        uint32_t angle = 0;
        angle = (value * 32000)/180 + 8000;
    
        return angle;
    }

    Thank you for the clarification, this was exaclty what I needed!

    I have one follow up question. If I want to change the frequency, say to 60hz. How will that affect how the duty cycle transfers from ms to tics?

    I have this general formula:

     *      W = duty_cycle/period_counter
     * For example, with neutral position in 1.5ms, we have:
     *      W = 0.0015/6.25*10^-8 = 24000

    Where W is tics, duty_cycle is the required duty cycle and period_counter is found by taking the inverse of the servo frequency, then dividing that by the clock speed divided by the servo frequency. So that is (60^-1)/(16*10^6/60) = 1/16000000.

    So from the math, unless I am doing something wrong, I see that it seems that no matter what frequency the servo has, the frequency cancels out and we always get the same period_counter as 1/16000000. This in turn gives the same conversion from ms to tics for any frequency. Is this correct?

    Thank you for replying!

  • If I understand your question correctly, then it is correct that the duty cycle (given in ms) is not dependent on the period. 

    I only found a poor image, but let me try to explain:

    The PWM in this case is the TIMER counting from 0 up to TIMER_RELOAD (32000 from your first post). 

    When the timer reaches the value in NRF_TIMER3->CC[PWM0_TIMER_CC_NUM], the PWM pin will turn on, and when the timer reaches the TIMER_RELOAD register, the PWM pin will flip back, and the timer will reset.

    NRF_TIMER3->CC[PWM0_TIMER_CC_NUM] = value;

    (this register value is set in your pwm0_set_duty_cycle())

    So if you change the value of the CC[PWM0_TIMER_CC_NUM] register, it will change how far the counter needs to count before the signal is turned on. the value in NRF_TIMER3->CC[TIMER_RELOAD] decides how far the timer will count before it resets to 0. So you can change one of them without affecting the other*** 

    *** As long as the value in the TIMER_RELOAD register is larger than the PWM0_TIMER_CC_NUM register, or else the PWM pin will never flip.

    *** The duty cycle in ms doesn't change, but the duty cycle as a percentage of the PWM period changes when you change the period. However, if you are using the servo motor that I suspect you are using, the duty cycle is read out in ms, and not percentage of the period.

    That being said, I am not sure how this servo motor will behave when you change the PWM period (TIMER_RELOAD). If the datasheet expects 50Hz, I am not sure how it reacts on a frequency of 60Hz. I suspect that it doesn't improve the behavior of the servo.

    Best regards,

    Edvin

  • Okay!

    Thank you for this in-depth explanation.

    The servo I am working with is expecting 50Hz, so I am not planning to change it. However, I am going to expand with other motors later, and they are specified to work between 50-330Hz. So I was just curious in case it would be necessary to use a different frequency :)

    Again, thank you!

Related