nRF9160-DK as JTAG programmer to nRF7002-DK or Thingy:53

Hi

I am preparing a project for the MAKE IT MATTER contest.

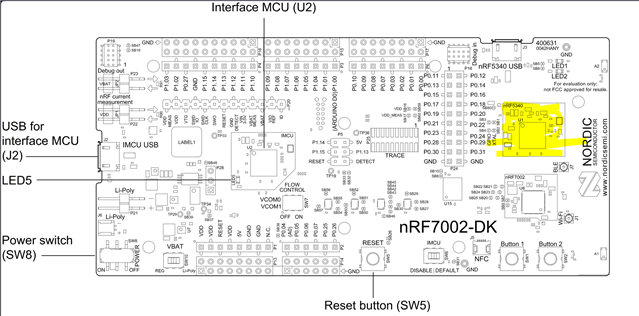
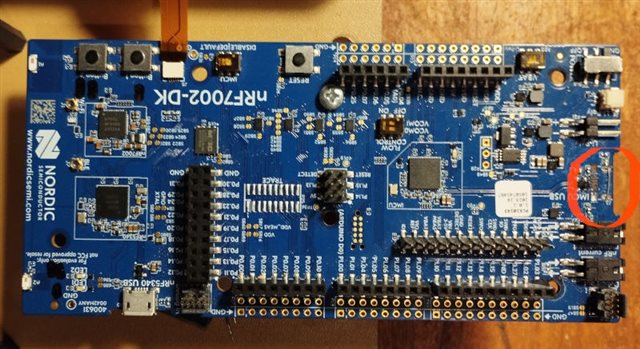
During experiments I broke the USB connector on the nRF7002-DK.

Fortunately we already have downloaded the Light Bulb firmware on nRF 7002-DK and tested before the USB was broken. We have now a working Light Bulb module but no apparent way to reprogram it.

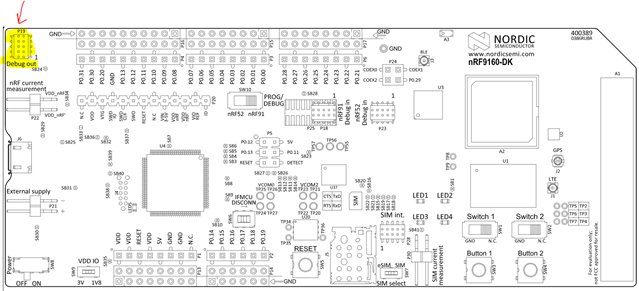
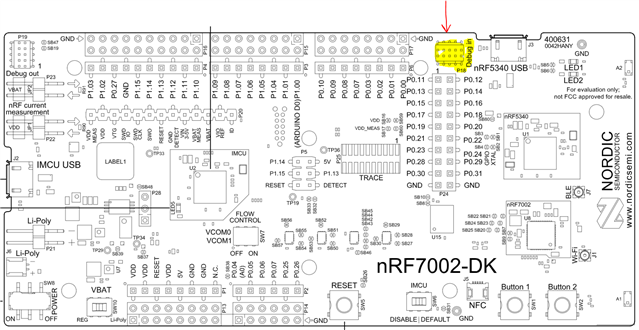
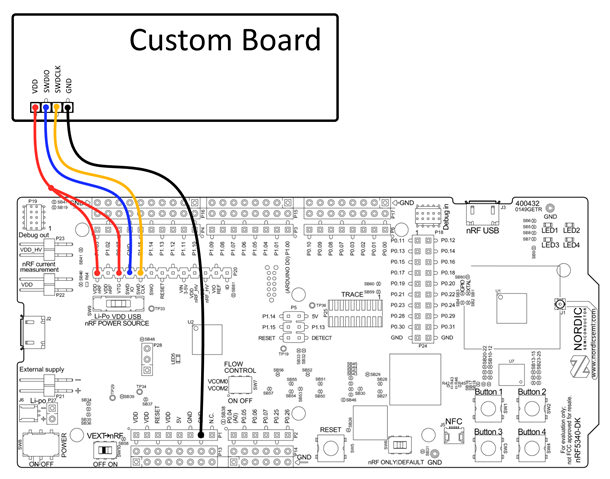
Looking for alternatives, a solution could be connecting the DK via JTAG connector + flat cable + JTAG programmer. Reading Nordic documentation we see that another DK can be used as a JTAG programmer.

So here some questions:

1 - How exactly nRF9160-DK (as JTAG programmer - debugger) can be connected with the nRF7002-DK using the JTAG flat cable?

2 - What is needed is to be able to discover the target device (nRF7002-DK) inside VS code or nRF Connect programmer.

3 - If that can be done can I do the same with Thingy:53 and how exactly?

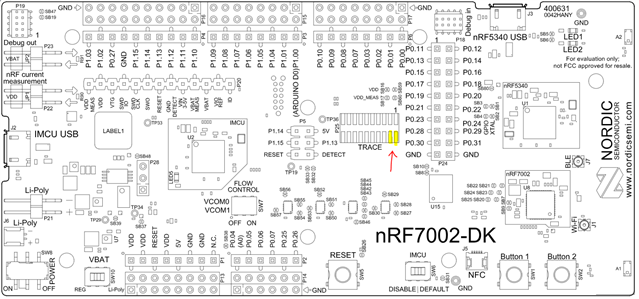
4 - Can the other micro USB connector (nRF5340 USB) be used to program the nRF5340 chip?

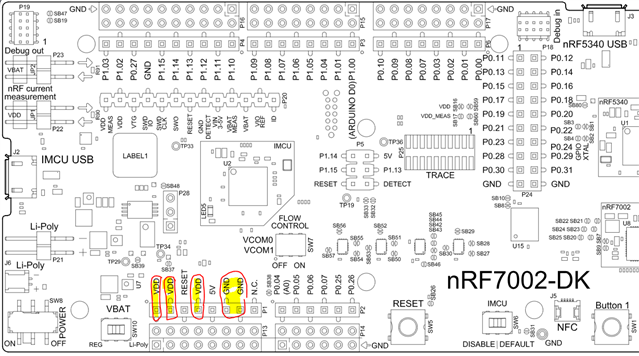
5 - And finally is any way to externally solder / connect a USB connector? The tracks on the original Micro USB are damaged.

Note : I have been through a similar post 2 years ago  nRF9160 DK as a Debugger for a second nRF9160 DK:

devzone.nordicsemi.com/.../nrf9160-dk-as-a-debugger-for-a-second-nrf9160-dk

But my target board is different

nRF5340-DK was ordered as well some time ago but it will not be here on time

I appreciate any help since the nRF7002-DK can not programmed in time for the contest.

So getting the nRF7002 to life is crucial.

Regards

Vasilis

Parents
  • eading Nordic documentation we see that another DK can be used as a JTAG programmer.

    Correct! For the nRF7002DK to be programmed you need a programmer that is able to program the onboard SoC.  Since the nRF7002DK uses a nRF5340 you will need a DK that has a onboard programmer that will support it. 

    To be on the safe side you should either be using a nRF9160DK or a nRF5340DK, these two will be able to program everything we have including nRF5340 and nRF9160's. 


    So since it seams that you have a nRF9160 available you should be fine. 

    There are a few ways to program the "external board"(your broken nRF7002DK) so the simplest option according to most is to use a flat ribbon cable. These are easy to use and there is no extra fumbling with cables. 

    First and simplest option(if you have a flat ribbon cable)

    Connect the cable to P19 (Debug out) on the DK that you use as your programmer(nRF9160DK or nRF5340DK) then connect the other end of the flat ribbon cable to  P18 (Debug in) on the nRF7002DK. 

    So from here:


    To here:


    Second option is to use some cables and connect from P20 on the programmer DK to the external boards P25 trace pads. 
    From here:
    The image above is from a nRF5340DK but its the same on the nRF9160 DK. And the custom board will be your broken 7002DK


    To here:


    Its a bit more tricky and you will have to solder on to the pads. GND and VDD also needs to be connected but that can be done to any of the corresponding P1 female headers


    There are other options as well here for method two, but feel free to ask and I will guide you. 


    Regards,
    Jonathan

Reply
  • eading Nordic documentation we see that another DK can be used as a JTAG programmer.

    Correct! For the nRF7002DK to be programmed you need a programmer that is able to program the onboard SoC.  Since the nRF7002DK uses a nRF5340 you will need a DK that has a onboard programmer that will support it. 

    To be on the safe side you should either be using a nRF9160DK or a nRF5340DK, these two will be able to program everything we have including nRF5340 and nRF9160's. 


    So since it seams that you have a nRF9160 available you should be fine. 

    There are a few ways to program the "external board"(your broken nRF7002DK) so the simplest option according to most is to use a flat ribbon cable. These are easy to use and there is no extra fumbling with cables. 

    First and simplest option(if you have a flat ribbon cable)

    Connect the cable to P19 (Debug out) on the DK that you use as your programmer(nRF9160DK or nRF5340DK) then connect the other end of the flat ribbon cable to  P18 (Debug in) on the nRF7002DK. 

    So from here:


    To here:


    Second option is to use some cables and connect from P20 on the programmer DK to the external boards P25 trace pads. 
    From here:
    The image above is from a nRF5340DK but its the same on the nRF9160 DK. And the custom board will be your broken 7002DK


    To here:


    Its a bit more tricky and you will have to solder on to the pads. GND and VDD also needs to be connected but that can be done to any of the corresponding P1 female headers


    There are other options as well here for method two, but feel free to ask and I will guide you. 


    Regards,
    Jonathan

Children
No Data
Related