Custom NRF52840 board design review

Hello,

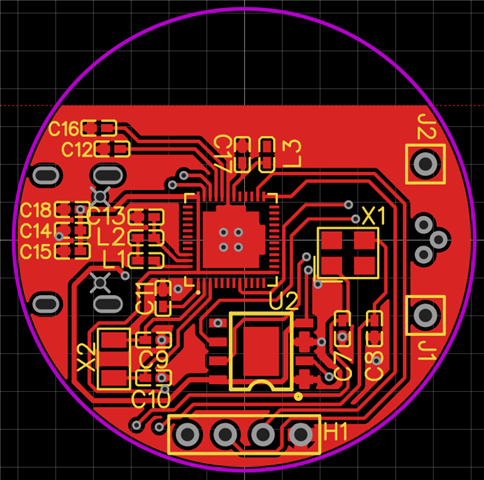
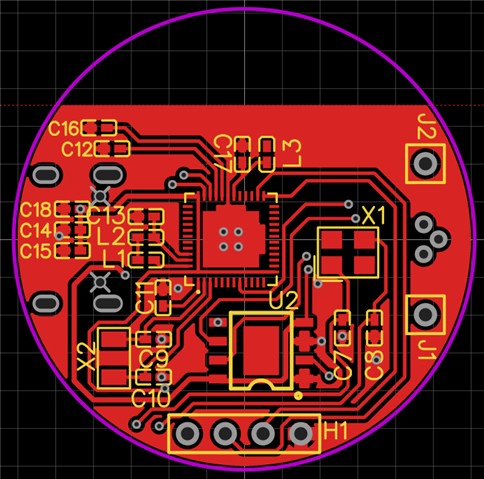
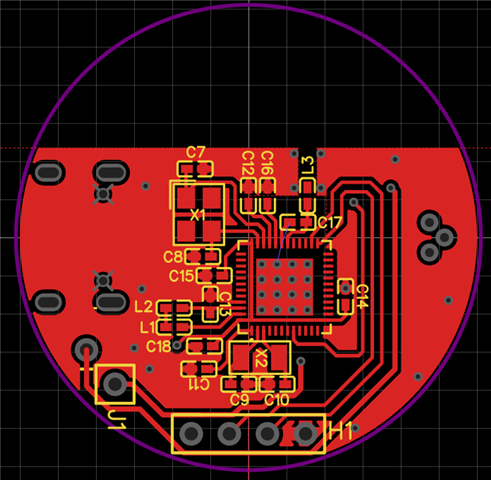
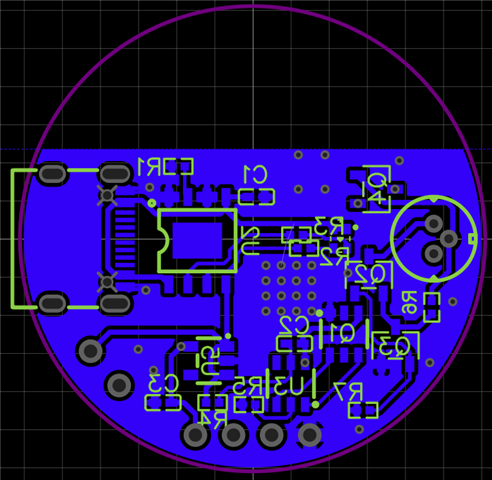
I have designed my own custom NRF52840 board for my own apllication. I tried to gather as much information about the NRF as possible and put it in an schematic. I am building the PCB in EASYEDA but first i want to make sure the schematics are right. The purpose of the PCB is to control an laser diode by an smartphone app using the BLE network of the SoC. The schematic consist of 2 sheets and i will try to explain everything as good as possible. 

Sheet 1: (Power supply)

4237.Sheet 2.pdf 

USB-C Connector: The board is going to be charged and programmed by an USB-C cable.

Battery Charging: The PCB is powered by an 3.7V LiPo battery which is charged via the TP4056 IC.

Battery Protection: The LiPo is protected by the DW01 and FS8205.

Vin -> 3.3V: The battery voltage is converted to 3.3V (VDD) for the NRF52840 by the NCP114.

Laser Diode: The laser diode is powered by an constant current circuit.

Battery: Solder pads for the battery.

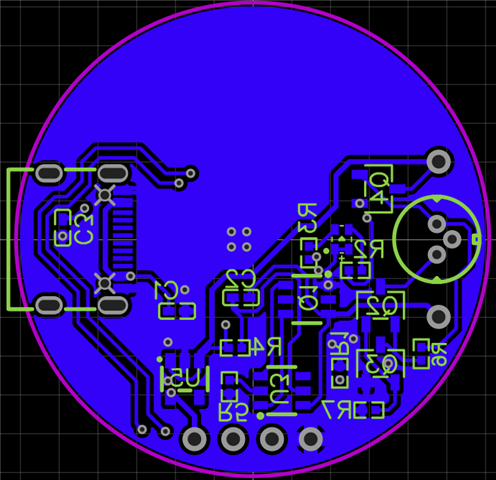
Sheet 2 (Controller): 

2654.Sheet 1.pdf

USB -> UART: The CP2104 is used to program the NRF52840 by an USB cable.

Crystals: The crystals for the NRF52840

NRF52840: The SoC itself. 

I have a couple questions about this project:

- Are my power nets designed the right way ?

- Is the NRF52840 going to work like this ?

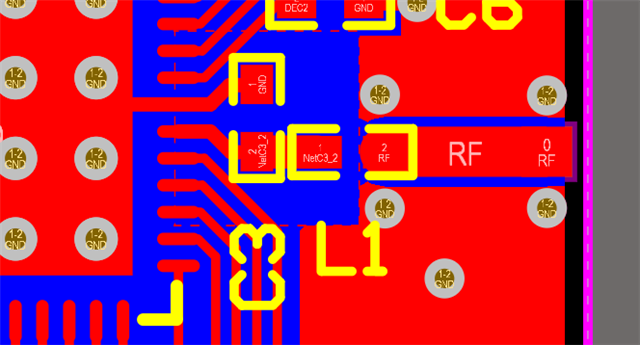
- I connected the ANT pin untill the antenna itself. I need to look further into this which antenna is good for this project but maybe somebody can already help me with this ?

- Maybe my biggest question of this whole project. This PCB is eventually going to be mass produced after the prototypes are tested and fully working. What is the best way to program a board like this when its going to be mass produced. I saw somebody do it this way and i liked it because it uses the USB port. But i also saw that they use the SWDIO and SWDCLK pins but i dont know a lot about this. Can somebody help me with this ?

- Final question. Are there any other upgrades i can make for this schematic ?

  • Hi Bendik, again thank you for your usefull answer. I decided to replace the NRF52840 for the NRF52832. It still fits my needs and it might be easier for me. Maybe in the future i can always update to the NRF52840. I updated my schematic (Sheet 1 V2) and have added it in my comment. I also removed the CP2104 and added a header to SWDIO and SWDCLK. I am planning to program my board throug a NRF development board. I still haven't add an antenna but maybe you can review my schematic again ? Sheet 1 V2.pdf

  • Hi Bendik, in the mean time i designed the first version of the PCB itself. I tried to do as much research as possible and process it in the design. If you can review the PCB as well that would be great!
      

  • Comment: The upper section of the PCB is for the antenna

  • Hi Léon,

    Sorry for the delay.

    The updated schematic looks good. One  thing to note is that when you have selected  the antenna type you are using you will need to add a antenna matching network  between L3 and the antenna. Chip antennas have a recommended matching circuit in the antenna datasheet. The number on matching components needed for a PCB antenna is dependent on the type, monopole antennas with few bends can be tuned with only a shunt component and by varying the length of the antenna. For this type of antenna it is a good idea to make the antenna longer than the theoretical optimal length on the first prototype, its easiest to reduce the length of the antenna when tuning. Antennas with more bends(like the meander antenna  used on the nRF52840) should have a pi network, shunt-series-shunt, available when tuning.

    LJBouman said:
    Hi Bendik, in the mean time i designed the first version of the PCB itself. I tried to do as much research as possible and process it in the design. If you can review the PCB as well that would be great!
      

    •  More vias should be added to the center GND pad, we recommend using at least a  3x3 via grid. The SoC needs a good  connection to the bottom layer ground  to have a stable output from the radio.
    • C17 should only be grounded to the VSS pin 31 and the center GND pad. In conjunction with the trace impedance this creates a notch filter that helps with attenuating the 2nd harmonic frequency. Here is a snippet from the reference layout showing the correct grounding:
    • The antenna needs a keep out area on the bottom layer as well, the  same size as the one on the top layer.
    • Both of the crystals must be placed closer to the SoC, its important to minimize the length of the traces between the crystal and the  SoC.
    • The decoupling capacitors on the VDD net must be  placed close the VDD pins. The 4.7uF capacitor must be placed close to pin 48, while the two 100nF close to pin 13  and 36.
    • The decoupling capacitors on the DEC lines must also be placed closer to the SoC.

    You can download the design and production files for the reference design here: https://www.nordicsemi.com/Products/nRF52832/Download#infotabs

    I recommend you use it as a guide on where the components should be placed.


    Best  regards,

    Bendik

  • Hi Bendik, thanks voor the review. I updated my PCB design with al the things you mentioned. You think it will be good now ? I left space for the antenna like on the example you sent.


Related